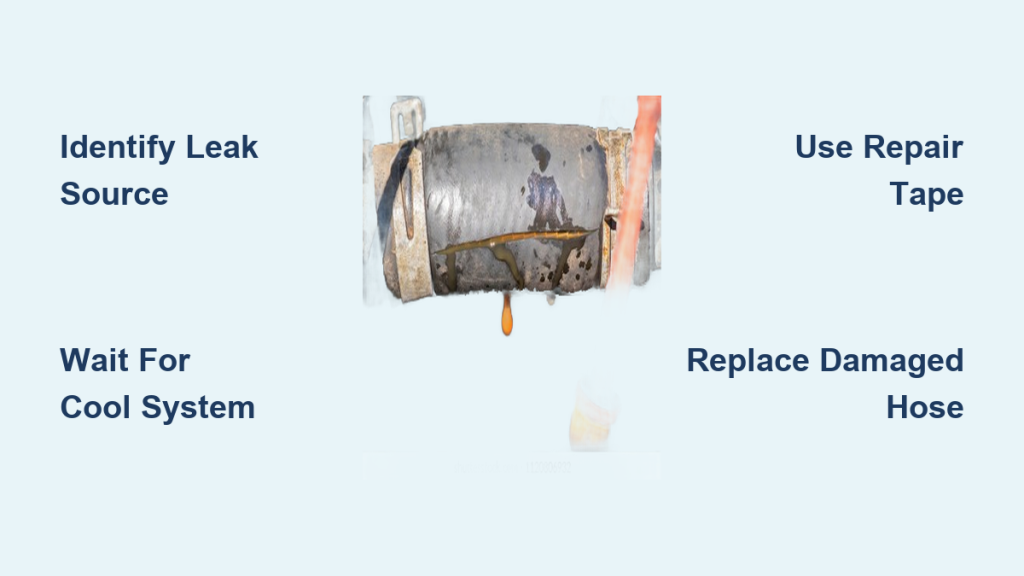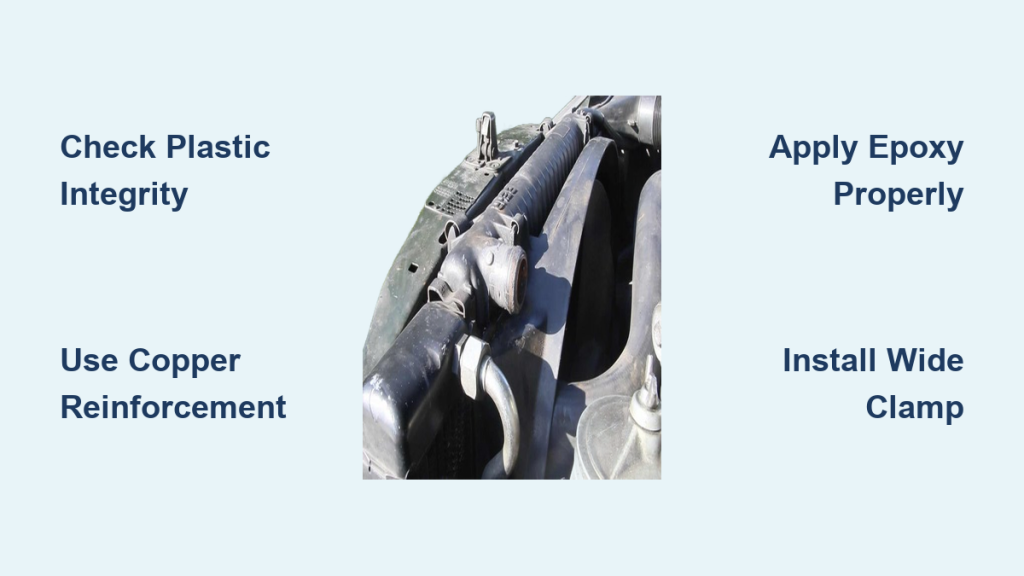
You pull over, pop the hood, and see steam pouring from a cracked radiator hose. Look closer and the real culprit stares back: a plastic upper neck that crumbled like old drywall. This is the classic Mercedes-Benz failure mode from the 1970s through the early 1990s, where original Behr radiators used plastic that simply rots with age. A proper radiator neck repair is not a patch. It is engine insurance that costs less than a tow truck.
For owners of W123, W124, W107, and early W126 models, this issue is widespread and predictable. Even low-mileage vehicles suffer because the plastic formulation itself degrades over time. A documented 2011 case study of a 300TD showed the hose clamp had fallen off because the neck literally rotted away, and only a wide clamp installed years earlier saved the engine. This guide covers compatibility, repair versus reinforcement, step-by-step procedures, and long-term durability so you can act before disaster strikes.
Confirm Your Mercedes Chassis Compatibility
Models That Need Radiator Neck Repair Attention
The radiator neck repair solution applies specifically to Mercedes-Benz vehicles from 1978 through 1995 with plastic upper radiator tanks. Compatible chassis include:
- W123 Series: 240D, 300D, 300CD, 300TD, 280E, 280CE
- W124 Series: 300E, 300CE, 300D, 300TD
- W107 Series: 380SL, 300SD, 420SL (verify submodel)
- W126 Series (early): 380SEL, 300SD
- W201 Series: 190E, 190D
If your vehicle falls within this range, assume the radiator is at risk, especially if it still carries the original or a used Behr unit.
V8 Models That Require Different Solutions
Standard radiator neck repair kits do not fit large V8 models. These vehicles use larger diameter necks, and the copper reinforcement tube in general kits will not seat properly. Excluded models include:
- 500SEL
- 500SL
- 560SEL
- 560SL
Forcing a standard kit onto these models causes leaks and failure. V8 owners must source model-specific radiators or custom repair solutions.
Evaluate the Severity of Neck Damage
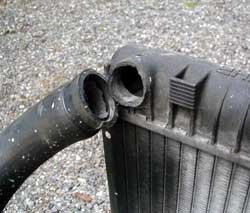
When Preventive Reinforcement Makes Sense
If your radiator is still intact, now is the time to act. Preventive reinforcement is the cheapest and most effective insurance against sudden failure. Signs your neck needs radiator neck repair reinforcement include:
- Plastic appears brittle or chalky
- Hose clamp feels loose or sinks into the neck
- Vehicle is over 25 years old with original cooling parts
- Radiator has a plastic upper tank from the 1978 to 1995 era
Even with no visible leak, the plastic is degrading internally. Reinforcement adds a copper support core before failure occurs.
When a Clean Break Can Be Repaired
A broken neck can still be saved if the break is clean. Repair is possible only when:
- The neck snapped in the center or toward the rear
- The main tank body is solid with no cracks
- The plastic did not shatter into fragments
- At least a quarter inch of solid plastic remains on the tank side
If the break sits flush with the tank or the plastic is crumbling, repair is not viable.
When Full Replacement Is the Only Option
Do not attempt a radiator neck repair if any of these conditions apply:
- The neck shattered into multiple pieces
- The break sits too close to the tank wall for bonding
- The tank itself shows cracks or softness
- The vehicle is a 500 or 560 series V8
In these cases, replacement is the only safe path forward.
Select the Right Repair Kit for Your Situation

Preventive Reinforcement Kit for Intact Necks
Choose this kit if the neck is intact but aging.
SKU: DSL-COMRNK
Price: around $24.95
Best for: W123, W124, W107, W201, and early W126 models
The kit includes:
- Pre-cut copper reinforcement pipe
- High-temperature, coolant-resistant epoxy
- Sandpaper for surface preparation
- Wide heavy-duty hose clamp
- Downloadable PDF instructions
This kit strengthens the neck from the inside, turning weak plastic into a durable, long-lasting joint.
Broken Neck Repair Kit for Snapped Necks
Choose this kit if the upper neck has already broken off cleanly.
SKU: COM-BROKENECKKIT
Price: around $31.95
Use only for clean breaks with a solid tank base
The kit includes:
- Extended copper repair tube
- Structural epoxy with higher bond strength
- Sanding pads
- Stainless steel pin screws for alignment
- Wide hose clamp
- Protective gloves
- Streaming video instructions requiring login
The pin screws mechanically lock the broken piece in place before epoxying, which is critical for shear strength.
Prepare Surfaces for a Lasting Bond

Clean and Roughen All Bonding Areas
Epoxy failure almost always traces back to poor surface preparation. Old plastic oxidizes and forms a slick layer that epoxy cannot grip. Follow these steps:
- Drain coolant from the radiator
- Remove the upper hose and clamp
- Aggressively abrade with the provided sandpaper:
– Inside of the plastic neck (for reinforcement)
– Broken edge on the tank and neck piece (for repair)
– Outside of the copper tube - Wipe clean with isopropyl alcohol to remove all oil and residue
The finished surface should look matte and rough, never shiny.
Allow Full Cure Before Pressurizing the System
Never rush the cure. Starting the engine too soon is the leading cause of repair failure. Let epoxy cure at least 24 hours at room temperature. Do not install the hose or refill coolant until fully cured, and avoid heat or pressure during the curing window. The bond is only as strong as the time you give it to set.
Reinforce an Intact Radiator Neck
Insert the Copper Support Tube
This step adds a permanent internal skeleton to the aging plastic. Test-fit the copper tube first; it should slide into the neck snugly. Apply epoxy to the outside of the copper tube and the inside of the plastic neck. Insert the tube fully, making sure it does not block coolant flow. Wipe excess epoxy from the top edge and let it cure for 24 hours or more. The copper prevents the neck from collapsing under clamp pressure.
Install the Wide Hose Clamp
Replace the original narrow clamp with the wide clamp included in the kit. Position it over the hose and neck, covering the full joint. Tighten securely but avoid overtightening. The wide surface area prevents the clamp from cutting into aging plastic.
Repair a Broken Radiator Neck

Align and Pin the Broken Piece
Mechanical fastening comes before epoxy. Fit the broken neck piece back onto the tank stub. Drill two small pilot holes through both pieces if they are not pre-drilled. Insert the stainless steel pin screws to hold alignment, and confirm the neck sits straight and flush. Pins resist shear forces while the epoxy cures, which is critical for durability.
Epoxy and Seal the Joint
Mix the epoxy thoroughly. Apply a thick, continuous bead over the seam and around the pins, ensuring full coverage that encapsulates the entire repair zone. Let it cure for 24 to 48 hours without disturbance. Do not rush. A fully cured bond is permanent.
Reconnect and Test the System
Install the wide hose clamp over the repaired neck. Reattach the upper radiator hose and refill the coolant system. Start the engine and check for leaks, monitoring the temperature closely for the first 10 minutes. If no leaks appear, the repair is successful.
Maintain Long-Term Reliability After Repair
Replace Narrow Clamps Immediately
Never reuse the original narrow hose clamp. It concentrates pressure on a small area, increasing the risk of cutting into old plastic or breaking the epoxy bond. Always use the wide clamp from the kit, which spreads force evenly and is essential for long-term success.
Inspect the Repair at Every Service Interval
Even after a successful radiator neck repair, the rest of the plastic tank remains aged. Check every oil change for new cracks, discoloration, or coolant seepage around the repair. Confirm the clamp stays tight and does not shift. Early detection prevents repeat failures.
Monitor Coolant Chemistry
Acidic or degraded coolant accelerates plastic breakdown throughout the system. Use the correct Mercedes-spec coolant in blue or pink formulations. Flush the system every 2 to 3 years and test pH if overheating occurs. Proper coolant chemistry extends the life of all plastic components.
Understand Repair Durability Limits

Reinforced Necks Last Indefinitely
A properly reinforced neck with a copper insert and wide clamp will not fail from internal pressure. It outlasts the rest of the radiator and provides permanent structural support. This is a true lifetime fix for the neck itself.
Repaired Necks Are One-Time Fixes
A successful radiator neck repair on a clean break is permanent only when done correctly. Limitations include:
- If the epoxy fails, the neck likely cannot be repaired again
- Remaining plastic may fail elsewhere on the tank
- No second chances with fragmented breaks
It is a reliable fix, but it is not repeatable.
Source the Correct Repair Kit
Order from Trusted Suppliers
The primary vendor is Mercedessource. The reinforcement kit (DSL-COMRNK) runs around $24.95, and the broken neck kit (COM-BROKENECKKIT) runs around $31.95. Both include physical parts and digital instructions.
Access Digital Instructions Properly
The reinforcement kit includes a downloadable PDF manual with three download attempts. Save the PDF locally as a backup. The repair kit includes streaming video instructions that require login credentials and cannot be downloaded. Watch the video before starting the repair.
Watch Recommended Training Guides
Recommended companion resources include “Radiator Inspection and Reinforcement” by Kent Bergsma, “Old Neglected Cooling Systems: How to Prevent Trouble,” and “Possible to Fix a Broken Off Radiator Neck?” These videos show real-world failures and proper technique.
Frequently Asked Questions About Radiator Neck Repair
Which Mercedes Models Need Radiator Neck Repair?
Models from 1978 to 1995 with plastic upper radiator tanks are at risk, including the W123, W124, W107, early W126, and W201 series. Large V8 models like the 500SEL, 500SL, 560SEL, and 560SL require different solutions because their neck diameters do not match standard kits.
How Much Does Radiator Neck Repair Cost?
A preventive reinforcement kit costs around $24.95, and a broken neck repair kit costs around $31.95. Both prices are far lower than the cost of a tow, a new radiator, or an engine rebuild from overheating damage.
Can a Broken Radiator Neck Be Repaired?
Yes, if the break is clean and located in the center or rear of the neck, with at least a quarter inch of solid plastic remaining on the tank side. If the neck shattered into fragments or the break sits flush with the tank, replacement is the only safe option.
How Long Does the Epoxy Take to Cure?
Allow at least 24 hours at room temperature for reinforcement kits and 24 to 48 hours for broken neck repairs. Do not start the engine, install the hose, or refill coolant until the cure window has fully passed.
Will the Repair Last Forever?
Reinforced necks with copper inserts and wide clamps are considered permanent. Repaired necks on clean breaks are also permanent when done correctly, but they cannot be redone if the epoxy fails. The rest of the plastic tank remains aged and may eventually fail elsewhere.
Do I Need a New Hose Clamp?
Yes. The original narrow clamp concentrates pressure and cuts into aging plastic or epoxy. Always use the wide clamp included in the kit, which distributes force evenly across the joint.
Key Takeaways for a Reliable Radiator Neck Repair
A radiator neck repair is one of the most affordable insurance policies available for classic Mercedes-Benz owners. The plastic upper necks on 1978 to 1995 models degrade predictably, and ignoring the risk invites catastrophic engine damage from sudden coolant loss. Confirm your chassis compatibility, assess whether you need reinforcement or a broken neck repair, and choose the correct kit from a trusted supplier.
Surface preparation and cure time make or break the repair. Sand aggressively, clean thoroughly, and give the epoxy at least 24 hours before pressurizing the system. Replace the narrow clamp with the wide one included in the kit, and inspect the repair at every oil change going forward.
Your next step is simple. Check your radiator neck today. If the plastic looks chalky, the clamp feels loose, or your vehicle is more than 25 years old, order the appropriate kit and reinforce the neck before it fails on the road.