Picture this: you’re stuck in traffic on a hot day, and your temperature gauge starts climbing. You pull over, pop the hood, and realize the fan isn’t spinning. That silent radiator is the first clue that your radiator fan switch is not working, and your engine is one traffic jam away from disaster.
This guide walks you through every step to diagnose, test, and repair a failed fan switch system. You’ll learn how to spot early warning signs, test each component with simple tools, and decide whether to fix it yourself or call a mechanic. Most repairs cost less than $100 in parts, and the entire job can take under an hour.
Spot the Warning Signs of a Failed Fan Switch
Temperature Spikes at Idle Only
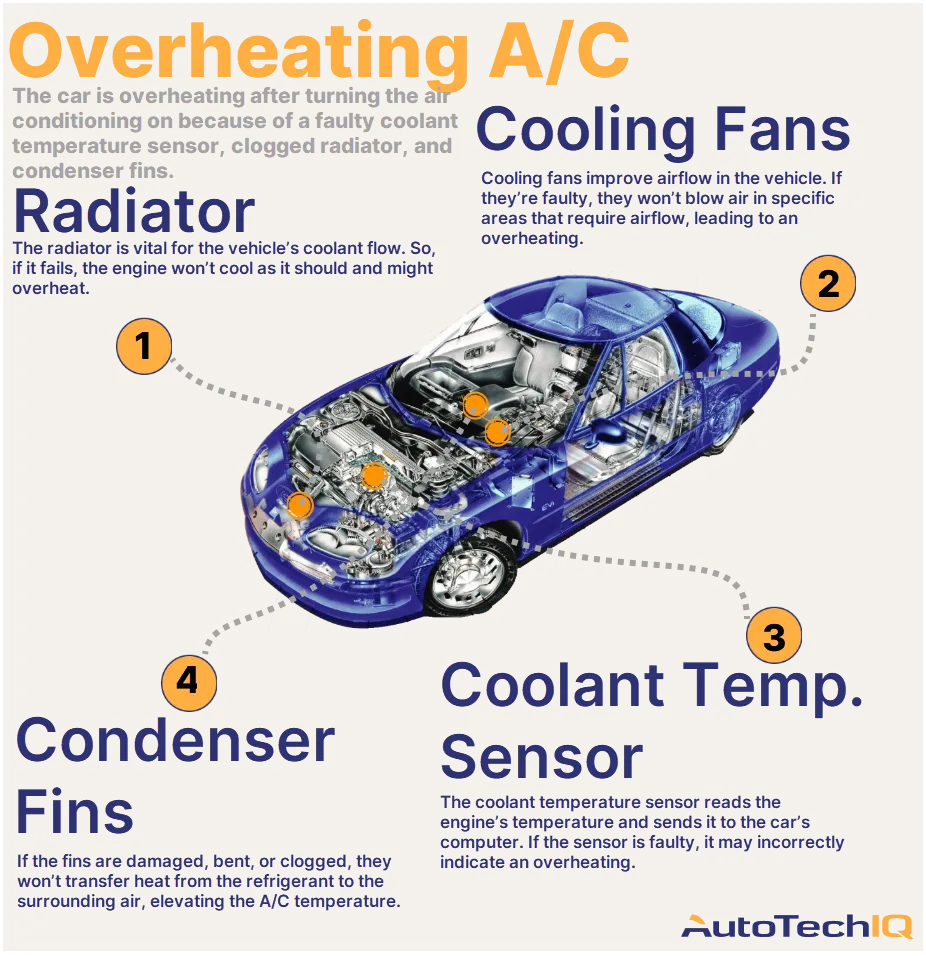
Your engine runs perfectly cool on the highway but overheats at red lights. This pattern is the textbook symptom of a radiator fan switch not working. At speed, ram air cools the radiator naturally. At idle, the electric fan must create that airflow. When the switch fails, the fan never activates, and heat builds up within minutes of stopping.
You’ll watch the gauge rise, then drop the moment you start moving again. This on-again, off-again overheating is a clear signal that the fan control circuit is the culprit, not the thermostat or water pump.
Dashboard Warning Lights You Should Never Ignore
Modern vehicles often use warning icons instead of full gauges. Here’s what each one means:
- Yellow temperature icon: Low coolant level, which can worsen fan-related overheating
- Red temperature icon: Active engine overheating requiring immediate shutdown
- Digital messages: “Cooling System Warning” or “Engine Hot” appearing on the dash
Driving through any of these warnings, even for a few miles, can warp cylinder heads or blow head gaskets. Pull over and shut off the engine the moment any red light appears.
Steam or Coolant Leaks Under the Hood
Visible steam means coolant is boiling, which happens when temperatures exceed 230°F (110°C). You might also see coolant pooling under the car. Both signs indicate the fan failure has already caused system damage, including ruptured hoses, cracked radiators, or blown gaskets.
If you see steam, pull over safely, turn off the engine, and wait at least 30 minutes before checking anything. Never open a hot radiator cap, as pressurized steam causes severe burns.
Listen for Fan Silence or Strange Noises
Fan Stays Silent When Engine Is Hot
Once your engine reaches operating temperature (usually 5 to 10 minutes of driving), the radiator fan should cycle on. If it stays completely silent, something in the control circuit has failed. The problem could be the temperature sensor, relay, fuse, motor, or wiring.
Run this quick test: park in a safe spot, let the engine idle until warm, then open the hood and listen near the radiator. No humming or spinning means the fan isn’t receiving power or the motor is dead.
Grinding, Wobbling, or Loud Buzzing
If the fan turns on but produces strange sounds, the motor or blades are failing. Worn bearings create grinding noises, bent blades cause wobbling, and debris caught in the shroud produces loud buzzing. These issues reduce airflow and strain the motor until it burns out completely.
Replace the assembly before total failure. A noisy fan today becomes a dead fan tomorrow, and that’s when overheating strikes.
Diagnose the A/C Connection
A/C Blows Warm Air at Idle
The radiator fan cools both the engine and the A/C condenser. When the fan isn’t running, your A/C loses cooling power, especially when stopped. If the A/C works fine while driving but blows warm air at idle, suspect the fan circuit rather than the A/C system itself.
This is one of the strongest clues that the radiator fan switch is not working, because the A/C compressor and fan share a thermal relationship.
Use the A/C as a Diagnostic Tool

Here’s a useful trick: turn on the A/C. In most vehicles, this forces the radiator fan to activate even if the engine is cold.
- Fan turns on with A/C? The motor, fuse, and relay are likely good. The problem is probably the coolant temperature sensor or ECU logic.
- Fan still off? The issue is electrical (fuse, relay, wiring) or mechanical (motor dead).
This 30-second test narrows down the fault without any tools.
Check the Cooling Fan Fuse First
Locate and Inspect the Fuse
The fuse is the cheapest and easiest place to start. It protects the fan circuit from electrical overloads. When blown, the fan receives no power.
Follow these steps:
- Find the fuse box, usually under the hood.
- Check the diagram on the lid for “Radiator Fan,” “Cooling Fan,” or “FAN.”
- Pull the fuse using the built-in tool or needle-nose pliers.
- Inspect the metal strip inside. A broken or melted strip means the fuse is blown.
Replace it with an identical amperage fuse, typically 20 to 40A. If the new fuse blows immediately, you have a short circuit somewhere in the wiring. Stop replacing fuses and find the underlying fault.
Carry spare fuses in your glove box. A $5 part can prevent a $200 tow.
Test the Fan Relay
Swap to Confirm Relay Failure
The relay acts as the electrical switch that powers the fan. It uses a low-current signal from the ECU to close a high-current circuit to the motor. When the relay fails, the fan won’t turn on, runs constantly, or cuts in and out unpredictably.
Test it by swapping:
- Locate the fan relay in the fuse box, labeled “FAN” or “RADIATOR.”
- Find an identical relay from another system, like the horn or A/C clutch.
- Swap them and see if the fan activates.
If the fan now works, the original relay was defective. Replace it with a new OEM-spec unit. Never use a relay with different voltage or current ratings, as mismatched specs can damage the entire circuit.
Verify the Coolant Temperature Sensor
Why the Sensor Acts as the Fan Switch
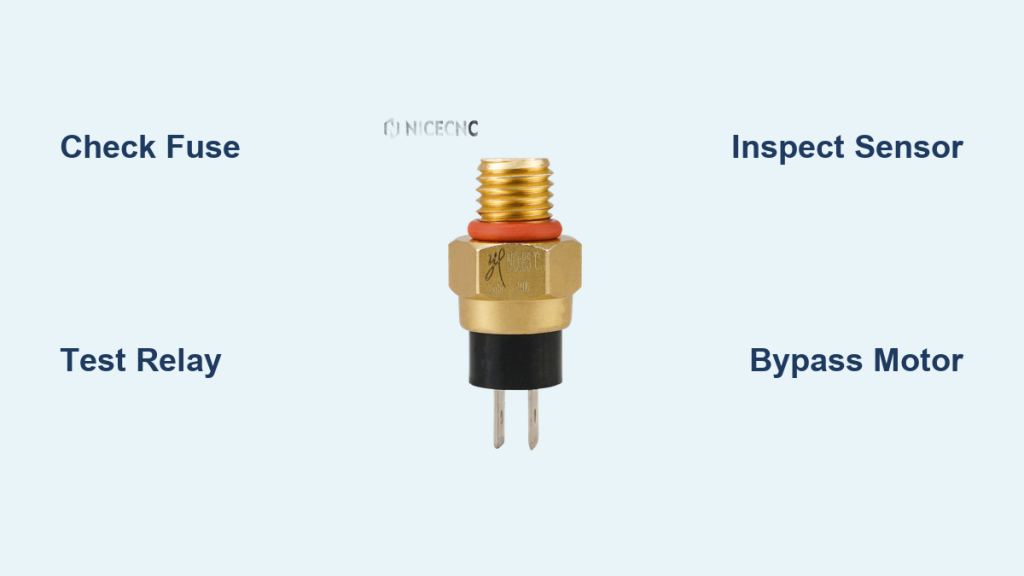
The coolant temperature sensor (CTS) is the real “radiator fan switch.” It monitors coolant temperature and signals the ECU when the engine is hot enough to trigger the fan. If it fails or sends incorrect data, the fan never receives the activation signal.
Common symptoms of a bad sensor include the fan not turning on when hot, the fan running when the engine is cold, and a Check Engine Light with codes like P0115 through P0118.
Test the Sensor with an OBD2 Scanner
Use an OBD2 scanner to read live coolant temperature data. Compare the reading to the actual engine heat using an infrared thermometer if possible. If the sensor reads 80°F when the engine is clearly hot, it’s faulty and needs replacement.
Replacement involves draining coolant slightly below the sensor level, unscrewing the old sensor (usually on the engine block or thermostat housing), installing the new one with thread sealant, and refilling the system. The part costs $20 to $60, and DIY saves labor charges.
Inspect Wiring and Connectors
Look for Corrosion and Damaged Wires
Even with perfectly good components, broken wiring kills the circuit. The fan harness runs near the hot radiator, making it prone to heat damage, moisture intrusion, and corrosion.
Check these critical points:
- Connector at the fan motor: Unplug and inspect for green or white corrosion
- Pushed-out pins: Metal terminals that have backed out of the plastic housing
- Frayed or melted wires: Especially near sharp edges or exhaust components
Repair damaged wires by cutting out the bad section, splicing in new wire, soldering the connection, and sealing it with heat-shrink tubing. Never use electrical tape alone in the engine bay, as heat and moisture cause recurring failures.
Test the Fan Motor Directly
Bypass the System with a Jumper Test
If fuses, relays, and sensors all check out, test the motor itself. This direct battery test isolates the motor from the vehicle’s control circuit.
Follow these steps:
- Disconnect the fan motor harness.
- Prepare two jumper wires.
- Connect positive (+) battery terminal to fan motor positive.
- Connect negative (-) battery terminal to fan motor negative.
- Observe the result.
The fan should spin immediately at full speed. If it spins smoothly, the motor is good and the issue lies upstream. If it doesn’t spin, only crawls, or grinds loudly, the motor is dead and the assembly needs replacement.
Replace the Fan Assembly

When to Swap the Whole Unit
You can sometimes replace just the motor, but installing a complete fan assembly (motor, blades, and shroud) is often smarter. Sealed units last longer, ensure balanced blades, and reduce labor time.
Replacement steps:
- Disconnect the battery.
- Unplug the fan wiring harness.
- Remove mounting bolts (usually 3 to 6, typically 10mm).
- Slide out the old assembly.
- Install the new one and reconnect the wiring.
- Reconnect the battery and test.
Most jobs take 30 to 60 minutes. Parts cost $100 to $300, and shop labor adds another $100 to $250.
Consider a Manual Override Switch
DIY Fix for Emergency or Off-Road Use
Some drivers install a manual switch to control the fan directly. This involves wiring a toggle switch from the battery (through a fuse) to the fan motor, allowing you to turn the fan on whenever needed.
The benefits include preventing overheating when the sensor fails and a simple, cheap installation. The drawbacks are no automatic control, the risk of draining the battery if left on, and the need for constant driver attention.
This works best as a temporary fix or for off-road vehicles where you monitor temperatures closely.
Prevent Future Fan Failures
Clean and Inspect Regularly
Prevention beats repair every time. Add these habits to your routine:
- Clean the radiator face every 6 months to remove bugs, leaves, and debris
- Check coolant level monthly in the overflow tank
- Inspect fan blades for cracks or bends during oil changes
- Listen for early warning noises rather than waiting for total failure
Run the A/C for 10 seconds once a week, even in winter. This keeps the fan circuit active and prevents relay sticking from disuse.
Know the Real Repair Costs
What You’ll Pay by Component
| Repair | Parts Cost | Labor Cost | Total Range |
|---|---|---|---|
| Fuse | $5 to $10 | $0 (DIY) | $5 to $10 |
| Relay | $15 to $25 | $0 to $50 | $15 to $75 |
| Coolant Sensor | $20 to $60 | $50 to $100 | $70 to $160 |
| Fan Assembly | $100 to $300 | $100 to $250 | $200 to $550 |
DIY saves 50 to 70% on labor. Even a $500 repair is a bargain compared to a $3,000 engine rebuild from overheating damage.
Never Ignore Fan Failure Risks
Engine Damage Can Happen in Minutes
One overheating event can warp a cylinder head, blow a head gasket, crack the engine block, or seize the pistons. These repairs cost thousands and often total the vehicle entirely.
Safety Risks on the Road
Overheating can cause roadside breakdowns in dangerous locations, fire risks from electrical shorts or coolant on hot exhaust, and collision hazards from sudden engine failure at speed.
If the red temperature light comes on, pull over safely, turn off the engine, wait 30 minutes before checking anything, and tow the vehicle instead of driving it.
Frequently Asked Questions About Radiator Fan Switch Problems
Can I drive with a bad radiator fan switch?
You can drive briefly on the highway where ram air cools the radiator naturally, but idling in traffic will cause rapid overheating. Continued driving risks warped heads, blown gaskets, or engine seizure. Limit driving to emergency situations and get the repair done as soon as possible.
How much does it cost to fix a radiator fan switch?
Costs vary by component. A fuse costs $5 to $10, a relay runs $15 to $75, a coolant temperature sensor ranges from $70 to $160, and a full fan assembly replacement costs $200 to $550. DIY repairs save 50 to 70% on labor charges.
Where is the radiator fan switch located?
The coolant temperature sensor (which functions as the fan switch) is typically located on the engine block, thermostat housing, or upper radiator hose. The relay and fuse are found in the under-hood fuse box. Your vehicle’s service manual provides exact locations for your specific model.
How do I know if it’s the fan switch or the fan motor?
Use the A/C test. Turn on the air conditioning. If the fan activates with the A/C but not from engine heat, the motor works and the switch or sensor is faulty. If the fan doesn’t activate with the A/C either, the motor, fuse, relay, or wiring is the problem.
What happens if the radiator fan stops working?
The engine overheats at idle and low speeds because there’s no active airflow through the radiator. Prolonged overheating warps cylinder heads, blows head gaskets, and can seize the engine completely. The A/C also stops blowing cold air when parked.
How long does a radiator fan switch last?
Coolant temperature sensors typically last 50,000 to 100,000 miles. Relays and fuses can fail at any time due to electrical surges. Fan motors usually last the life of the vehicle but wear out faster in stop-and-go traffic or extreme heat environments.
Key Takeaways for Fixing Your Radiator Fan Switch
A radiator fan switch not working is never a “wait and see” problem. It’s a ticking time bomb for your engine, but the good news is that most fixes are fast, affordable, and within reach of any DIYer with basic tools.
Start with the fuse and relay, two $20 parts that solve half of all cases. Use the A/C trick to test the circuit in seconds. If needed, bench-test the motor with jumper wires. Replace the coolant sensor if readings don’t match actual engine temperature.
Fix it now, and you’ll avoid a costly tow, a ruined engine, and a much bigger repair bill. Your car’s cooling system is counting on you, so don’t let it overheat.