You park your car after a long drive and notice a small puddle of greenish liquid under the front bumper. At first glance, it looks harmless, but a radiator cap leaking coolant is rarely just a minor drip. That small cap on top of your radiator is a precision pressure regulator, and when it fails, your entire cooling system becomes vulnerable. Ignoring the warning signs can lead to boiling coolant, collapsed hoses, and an engine that overheats on the hottest day of the year.
In this guide, you will learn exactly how your radiator cap controls pressure, the symptoms that point to a failing cap, and a step-by-step process to diagnose and replace it. You will also discover common mistakes that cause recurring leaks and simple maintenance habits that extend the life of your cooling system.
How Radiator Caps Control Cooling System Pressure
Why Coolant Needs Pressure
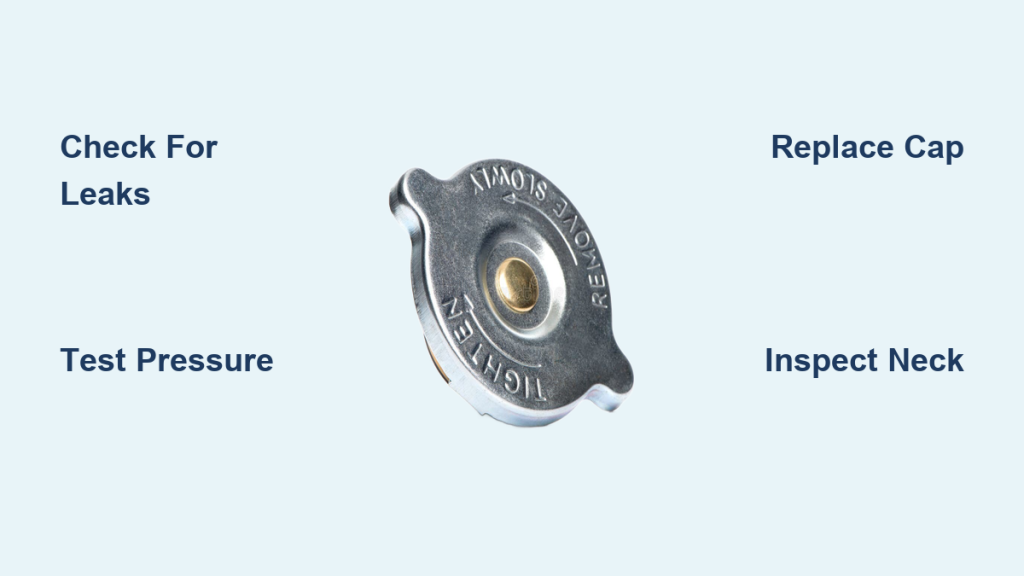
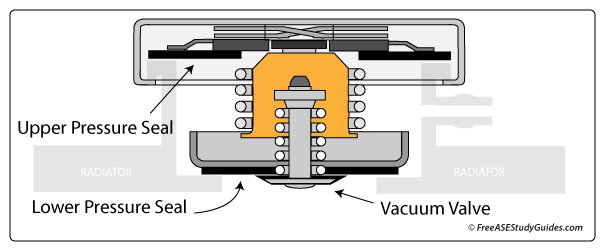
A radiator cap leaking usually means it cannot maintain the pressure your engine depends on. Most systems operate between 12 and 16 psi, and this pressurization does something critical: it raises the boiling point of coolant. Without pressure, water-based coolant boils at 212°F. Under proper pressure, that boiling point climbs above 265°F, allowing the fluid to absorb far more heat from the engine block. When pressure drops, coolant vaporizes too early, creating steam pockets that block circulation and trigger overheating.
The Spring-Loaded Valve Mechanism
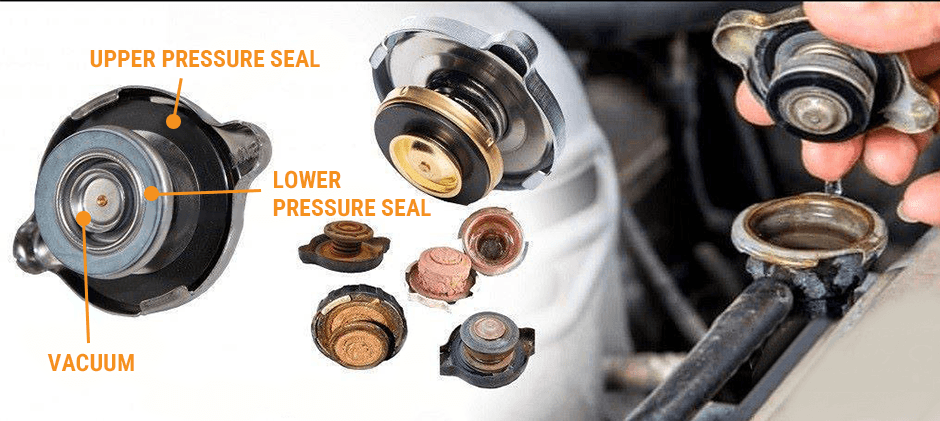
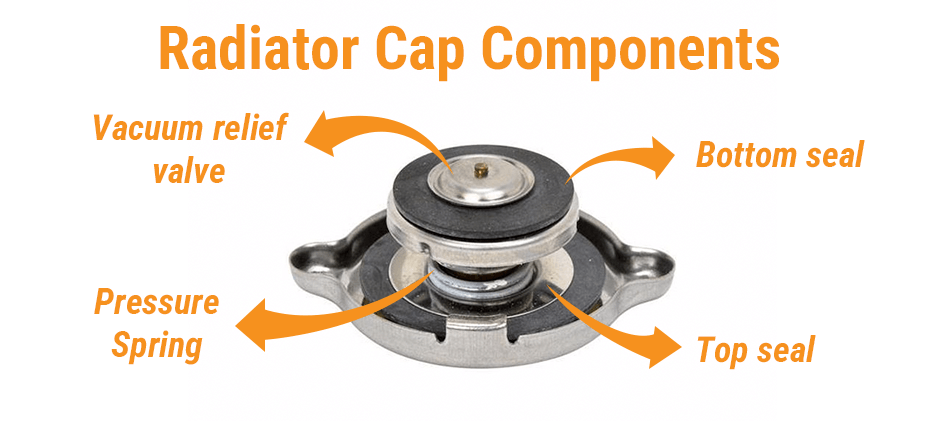
Inside every radiator cap sits a spring-loaded valve that responds to changing conditions:
– As the engine warms, coolant expands and internal pressure rises.
– The spring compresses to hold pressure within safe limits.
– When pressure exceeds the cap’s rating, the valve opens slightly.
– Excess coolant flows into the overflow reservoir instead of bursting hoses.
If the spring weakens or corrodes, the valve opens too soon or fails to open at all. Either scenario leads to leaks, pressure loss, or over-pressurization that damages components.
The Vacuum Valve Replenishes Coolant
When the engine cools, contracting coolant creates negative pressure inside the system. A secondary vacuum valve in the cap opens to pull fluid back from the overflow tank. This keeps the radiator full, prevents air pockets, and stops hoses from collapsing. A stuck vacuum valve causes exactly the opposite: collapsed hoses and poor circulation, even when no visible leak exists.
Recognize the Symptoms of a Radiator Cap Leaking
Coolant Streaks and Puddles
Visible residue is the most obvious clue. Look for:
– White or greenish streaks around the cap and radiator neck
– Small puddles under the front of the vehicle after parking
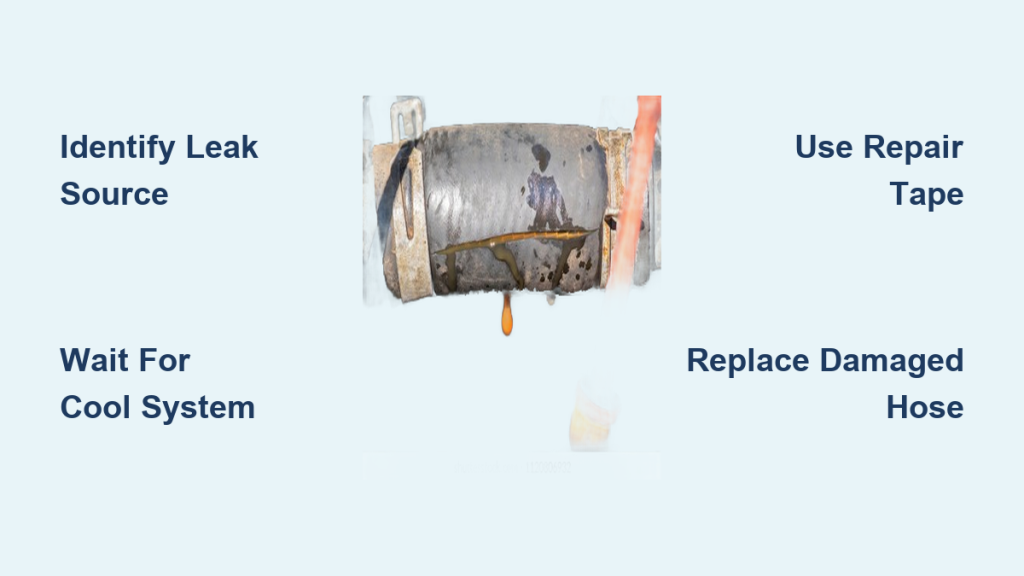
– Dried coolant staining on the upper radiator hose near the cap
These leaks typically appear when the engine is hot and pressurized. If you see staining without an active drip, the cap may be weeping intermittently, which signals imminent failure.
Engine Overheating Under Load
Cap-related overheating tends to show up during demanding conditions like climbing hills, idling in traffic, or driving in summer heat. Without sufficient pressure, coolant boils prematurely and forms steam bubbles that block flow. Your temperature gauge climbs quickly, and you might see steam escaping from under the hood. Unlike thermostat or water pump failures, this overheating often improves when you reduce engine load.
Collapsed Radiator Hoses
A collapsed upper radiator hose is one of the most definitive signs of cap failure. As the engine cools, a stuck vacuum valve prevents coolant from returning from the reservoir. The resulting vacuum crushes the soft hose walls inward. If your hose looks pinched or feels flat when cold, the cap’s vacuum valve is likely faulty.
Air Bubbles and Fluctuating Temperatures
A leaking cap allows air to enter the system. Watch for bubbles in the coolant reservoir while the engine runs, a temperature gauge that swings erratically, or weak cabin heat. Air pockets reduce heat transfer and create hot spots that risk head gasket damage over time.
Overflow Reservoir Constantly Full
If coolant keeps flooding the overflow tank even after you top it off, the cap’s relief valve may be stuck open. Coolant dumps too early, fills the reservoir beyond capacity, and eventually spills onto the ground. Many drivers mistake this for a cracked reservoir, but the root cause is usually the cap.
Diagnose a Radiator Cap Leak Step by Step
Inspect the Cap and Radiator Neck
Always begin with a cold engine. Remove the cap and examine:
– The large rubber gasket for cracks, hardening, or warping
– The internal spring for rust, corrosion, or sagging
– The radiator neck sealing surface for pitting, debris, or uneven wear
Even minor damage prevents a proper seal. If anything looks worn or corroded, replacement is the safest move.
Test Cap Flatness and Seal Contact
To check whether the seal makes full contact:
1. Apply a thin layer of ink or marker to the rubber seal.
2. Press a clean, flat metal plate against it.
3. Remove the plate and inspect the ink transfer.
Incomplete coverage means the seal is not flat, usually due to cap damage or a warped radiator neck. On vehicles older than 14 years, radiator tank warping is common and may require full radiator replacement.
Pressure-Test the Cap
The only reliable way to confirm pressure loss is with a radiator cap tester:
1. Attach the correct adapter to the cap.
2. Pump the tester to the pressure rating stamped on the cap.
3. Hold for 30 to 60 seconds and watch the gauge.
If pressure drops, the cap fails. Replace it immediately. Many auto parts stores test caps for free, so ask before purchasing a new one.
Rule Out Other Leak Sources
Do not assume the cap is guilty. Check these common mimics:
– Overflow reservoir cracks: Leak under pressure but appear as cap seepage.
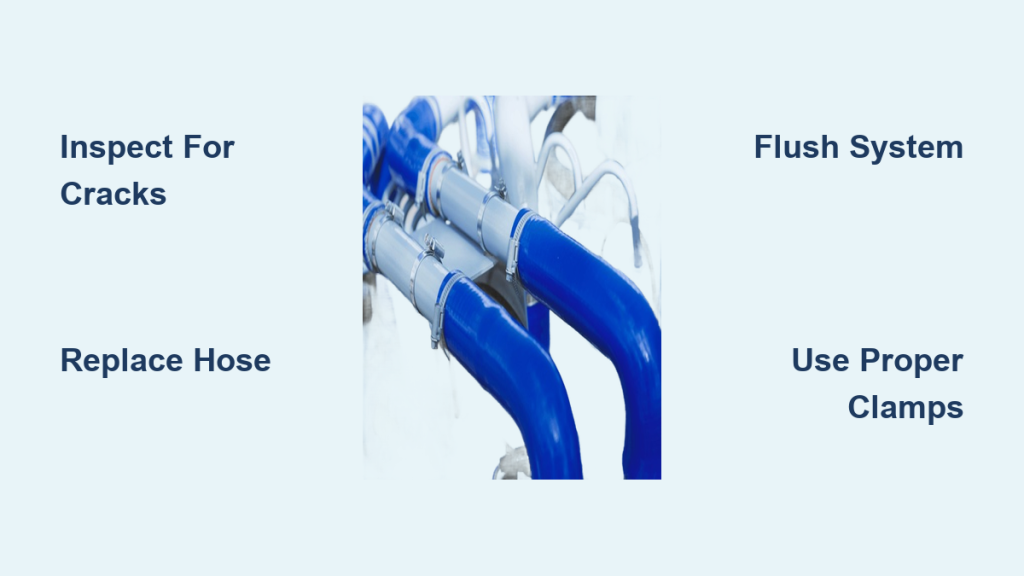
– Hose clamp failure: Coolant escapes at the hose-neck junction, staining near the cap.
– Swollen upper hoses: Soft or split hoses cannot maintain pressure, causing cap-area weeping.
– Degraded coolant: Old fluid becomes acidic and corrodes seals and gaskets.
Pro Tip: Flush and replace coolant every 30,000 to 60,000 miles to prevent internal corrosion.
Replace the Radiator Cap Correctly
Wait for a Cold Engine
Never remove a radiator cap when hot. The system can hold up to 16 psi of pressure, and hot coolant erupting from the opening causes severe burns. Wait at least 2 to 3 hours after driving, or overnight if possible. If you must test a warm system, use a thick towel and twist slowly to release pressure gradually.
Choose the Right Replacement Cap
Using the wrong pressure rating risks engine damage:
– A cap rated too low causes coolant to boil early and triggers overheating.
– A cap rated too high over-pressurizes hoses and the radiator, risking bursts.
Always match the exact PSI rating printed on the old cap or listed in your owner’s manual. OEM caps work best for older or high-mileage vehicles.
Install with Proper Technique
- Clean the radiator neck and cap seal with a damp cloth to remove all old residue.
- Apply a tiny amount of silicone lubricant to the new cap’s rubber gasket. Never use petroleum-based grease, as it degrades rubber.
- Place the cap on the neck, press down firmly, then twist clockwise until you hear a distinct click.
- That click confirms the cap is fully seated and locked.
Expert Note: Skipping the click leaves the cap unsealed, and leaks return immediately.
Verify After Installation
After installing the new cap:
– Run the engine until it reaches operating temperature.
– Let it cool completely.
– Recheck for leaks around the cap and hose connections.
– Use a pressure tester to confirm the new cap holds pressure.
If the leak persists, inspect the radiator neck for cracks or warping.
Prevent Future Radiator Cap Leaks

Clean Sealing Surfaces Regularly
Debris and old coolant buildup are silent cap killers. Every time you open the system, wipe the radiator neck and cap gasket with a clean, lint-free cloth. Even a single grain of sand can compromise the seal.
Upgrade to Band-Type Clamps
On older vehicles, spring clamps on the radiator hose can loosen over time, allowing micro-movement and pressure loss. Replacing them with band-type clamps provides even, consistent pressure and reduces the chance of cap-area leaks.
Monitor Coolant Condition
Old coolant loses its anti-corrosion properties, leading to rust, degraded rubber seals, and clogged overflow lines. Flush and replace coolant every 30,000 to 60,000 miles, or as specified by your manufacturer. Fresh fluid extends cap life and protects the entire system.
Replace Caps Every 3 to 5 Years
Even if it looks fine, a radiator cap ages. Rubber dries out, springs weaken, and seals harden. Replace the cap every 3 to 5 years as preventive maintenance, especially if you drive in extreme temperatures or heavy traffic.
When the Cap Is Not the Real Problem
Radiator Neck Damage
If new caps keep leaking, the radiator neck is likely the culprit. Pitting, warping, or hairline cracks prevent a proper seal. Inspect with a magnifying glass. If the surface is uneven, the radiator may need repair or replacement, which is common in high-mileage vehicles.
Overflow Tank Cracks
A cracked reservoir can vent coolant under pressure, making it look like the cap is leaking. Pressurize the system and watch the reservoir. If fluid escapes from a seam or side wall, replace the tank.
Internal Hose Degradation
Hoses can fail internally by splitting beneath the surface while still looking intact. If you have replaced the cap and still experience overheating or pressure loss, inspect the upper radiator hose for softness or bulging. Replace it if you have any doubt.
Frequently Asked Questions About Radiator Cap Leaking
What does a radiator cap leaking look like?
You will usually see white or greenish streaks around the cap, dried residue on the upper radiator hose, or small puddles under the front of the vehicle after parking. The leak often appears only when the engine is hot and pressurized.
Can a radiator cap cause overheating?
Yes. If the cap cannot hold the system’s designed pressure (typically 12 to 16 psi), coolant boils at a lower temperature. Steam bubbles form, circulation drops, and the engine overheats quickly under load or in hot weather.
How long does it take to replace a radiator cap?
The replacement itself takes about 5 minutes. However, you must wait 2 to 3 hours for the engine to cool completely before removing the old cap. Plan for a half-day if you are also pressure-testing the system.
Is it safe to drive with a leaking radiator cap?
Short trips at low speed may be okay, but it is risky. Pressure loss can cause sudden overheating, which damages the head gasket or engine block. Replace the cap as soon as possible to avoid costly repairs.
How do I know if my radiator cap or radiator is bad?
Start by inspecting the cap’s gasket and spring for wear. If the cap looks fine, pressure-test it with a cap tester. If a new cap still leaks, the radiator neck or tank is likely warped or cracked, especially on vehicles older than 14 years.
How often should I replace my radiator cap?
Replace the cap every 3 to 5 years as preventive maintenance. Rubber seals dry out and springs weaken over time, even if no visible leak appears. Regular replacement prevents sudden failures.
Key Takeaways for Stopping a Radiator Cap Leak
A radiator cap leaking coolant is more than a mess; it is a threat to your engine. Understanding how the cap regulates pressure, recognizing early symptoms, and replacing it correctly prevents overheating, hose collapse, and expensive repairs. Always use the right PSI-rated cap, install it on a cold engine, and verify the seal with a pressure test. For older vehicles, consider upgrading clamps and inspecting the radiator neck. Your next step is simple: grab a flashlight, inspect your cap today, and replace it if you see any signs of wear.