You’re climbing a steep grade on a hot afternoon when your temperature gauge suddenly climbs into the red zone. You pull over, let the engine cool, and discover coolant spilled near the radiator and a collapsed upper hose. The culprit is rarely the radiator itself, the water pump, or the thermostat. Most often, it’s the small, overlooked radiator cap. Despite its modest size, this component plays a critical role in your engine’s cooling system. So, how does a radiator cap work? It is far more than a simple cover. It is a precision pressure regulator that keeps coolant from boiling, prevents system collapse, and ensures consistent thermal performance.
Under the hood, the radiator cap manages two opposing forces: pressure during engine heat and vacuum during cooldown. It uses calibrated springs and dual valves to control coolant flow, maintain optimal system pressure, and recycle excess fluid. Without a properly functioning radiator cap, modern engines would overheat quickly, hoses would burst or collapse, and costly damage like warped heads or blown gaskets could follow. In this guide, you’ll learn exactly how a radiator cap regulates pressure, why it raises the boiling point of coolant, what happens when it fails, and how to test and maintain it properly.
Regulates Cooling System Pressure
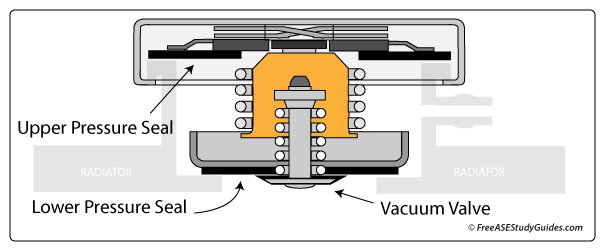
The radiator cap’s primary job is to maintain safe internal pressure in the cooling system, preventing catastrophic failure under high heat.
Controls Pressure Buildup
As the engine runs, coolant absorbs heat and expands. In a sealed system, this expansion increases pressure rapidly. The cap contains a pressure valve held closed by a calibrated spring. This spring resists internal pressure up to a specific PSI rating, commonly 13, 15, or 16 PSI. As long as pressure stays below this threshold, the system remains sealed and pressurized, allowing coolant to circulate safely without boiling.
Releases Excess Pressure
Once system pressure exceeds the cap’s rating, the force overcomes the spring tension. This lifts the pressure valve off its seat, opening a path for hot coolant and steam to escape. The fluid travels through an overflow hose into the expansion tank, also called the overflow or degassing bottle. This prevents damage to hoses, radiator seams, and core plugs caused by over-pressurization.
Prevents Coolant Boil-Over
Without pressure control, coolant would boil at normal atmospheric temperatures, around 212°F for water. By maintaining pressure, the cap delays boiling, giving the system time to dissipate heat through the radiator. If the cap fails to seal or release properly, coolant can boil prematurely, leading to steam pockets, overheating, and sudden boil-over when the cap is removed.
Elevates Coolant Boiling Point

Pressurizing the cooling system is not just about preventing leaks. It enables the engine to run hotter and more efficiently.
Pressure vs. Boiling Temperature
For every 1 PSI of pressure added, the boiling point of water increases by approximately 3°F. A 50/50 antifreeze-water mix boils at about 223°F at sea level. With a standard 16-PSI radiator cap, that boiling point jumps to over 270°F. This gives the engine a wide safety margin before coolant turns to steam.
Enables Efficient Engine Operation
Modern engines operate best between 195°F and 220°F for optimal fuel combustion and lower emissions. Without a pressurized system, coolant would boil under heavy loads like towing or climbing hills. The radiator cap allows the engine to safely run at these higher temperatures without risking vapor lock or hot spots.
Avoids Steam Formation
Steam is a poor heat conductor compared to liquid coolant. If boiling occurs due to low system pressure, steam pockets form in the engine block. These pockets insulate metal surfaces, leading to localized overheating, warped cylinder heads, and blown head gaskets. A properly functioning cap prevents this by maintaining pressure and keeping coolant in liquid form.
Manages Coolant During Cool-Down
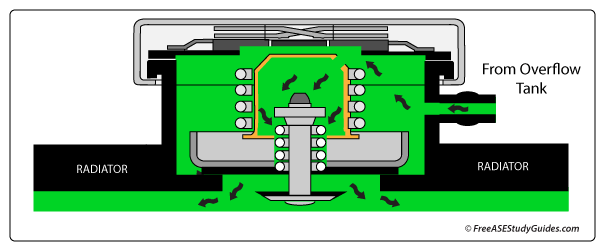
When the engine shuts off, coolant contracts. Without intervention, this creates a vacuum that can damage the cooling system.
Prevents Hose Collapse
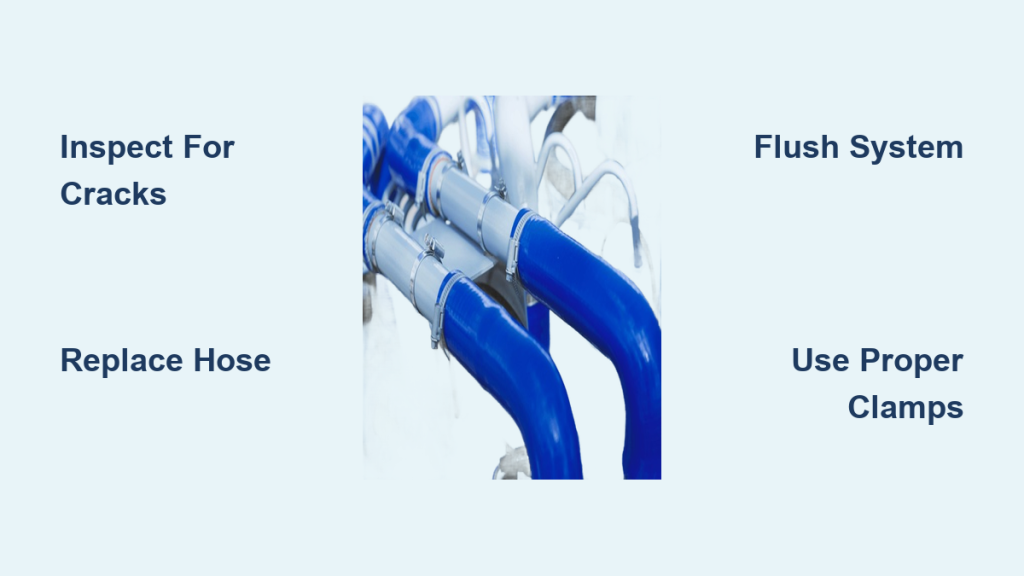
As coolant cools, it shrinks in volume, creating negative pressure inside the radiator and hoses. If no air or fluid can enter, atmospheric pressure can crush soft rubber hoses inward. A collapsed upper or lower radiator hose is a classic sign of a stuck vacuum valve in the cap.
Draws Coolant Back From Tank
The radiator cap includes a vacuum valve, a small, inward-opening valve with a light spring. As vacuum forms, this valve opens, allowing coolant to be siphoned back from the overflow tank into the radiator. This keeps the system full and eliminates air pockets that reduce cooling efficiency.
Maintains Air-Free System
By returning displaced coolant, the cap ensures the radiator stays completely filled. An air-free system circulates more efficiently and avoids hot spots where metal overheats due to lack of coolant contact. This recirculation is essential for consistent cooling performance over multiple drive cycles.
Key Components Inside the Cap
The radiator cap is a compact assembly of precision parts designed to withstand heat, pressure, and chemical exposure.
Pressure Valve and Spring
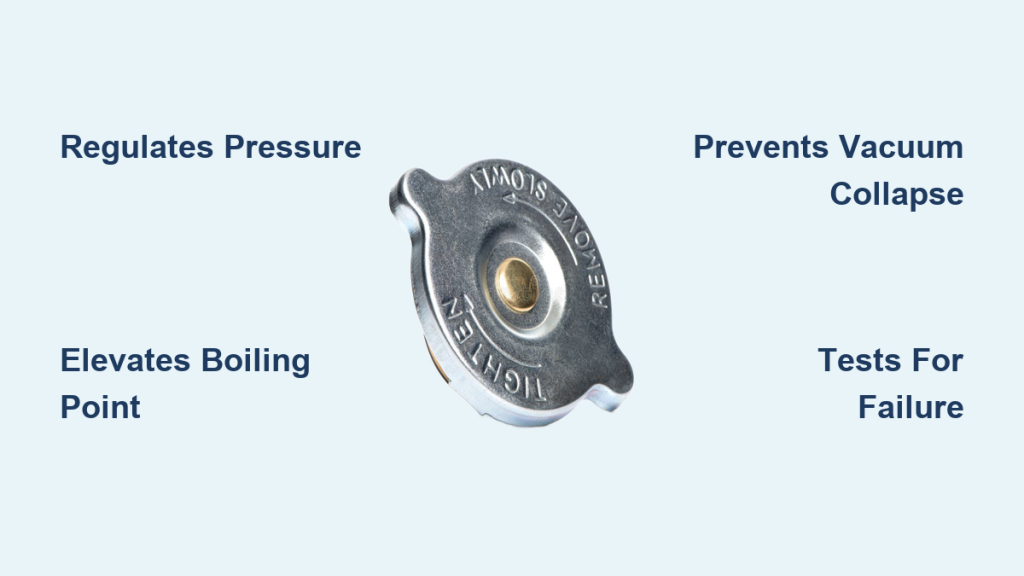
The pressure spring is calibrated to the cap’s PSI rating. It presses against the pressure valve, which is sealed with a rubber gasket. When internal pressure exceeds the spring’s resistance, the valve lifts, releasing excess fluid. The spring must remain strong and corrosion-free to function correctly.
Vacuum Valve Operation
Located in the center of the cap, the vacuum valve opens inward during cooldown. It is lightly sprung and designed to respond to slight negative pressure. If this valve sticks closed, it prevents coolant return and can collapse hoses.
Main Seal Integrity
The large main seal at the base of the cap creates a watertight barrier against the radiator filler neck. It must stay soft and pliable. A cracked, hard, or swollen seal leads to coolant leaks and pressure loss.
Metal Body and Markings
Most caps have a brass or steel body for durability and heat resistance. The top displays the PSI rating (such as “16 PSI”), which is critical for proper replacement. Never confuse a pressurized cap with a non-pressurized reservoir cap, as they are not interchangeable.
Choosing the Correct Pressure Rating
Using the wrong radiator cap can lead to overheating or system damage, even if the cap looks identical.
Match Manufacturer Specifications
Always replace the cap with one that matches the original equipment pressure rating. This information is stamped on the old cap or listed in the owner’s manual. Common ratings are 13, 15, or 16 PSI for passenger vehicles.
Risks of Wrong PSI
• Too Low (such as 13 PSI on a 16 PSI system): Coolant boils too early, causing overheating and steam formation.
• Too High (such as 19 PSI on a 15 PSI system): Excess pressure stresses hoses, water pump seals, and radiator seams, risking bursts or leaks.
High-Performance and Specialty Caps
Performance engines or heavy-duty trucks may use caps rated up to 32 PSI. These are designed for systems built to handle higher stress. Never install a high-PSI cap unless the entire cooling system is rated for it.
Diagnosing a Failing Radiator Cap
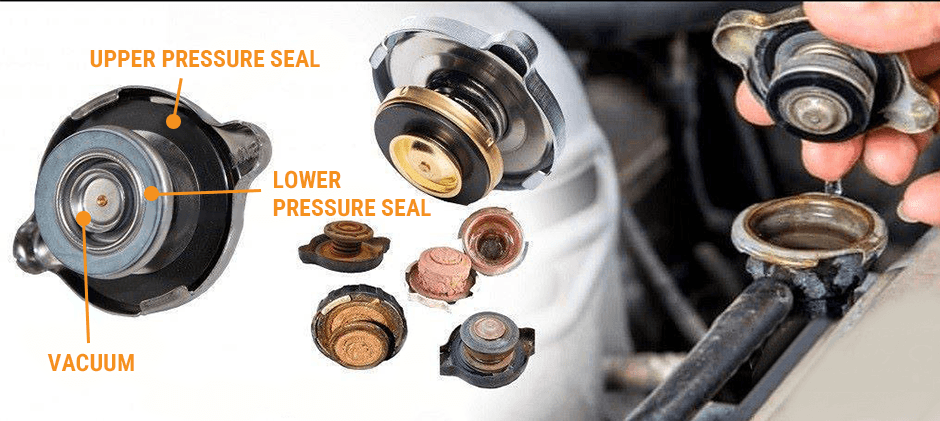
A bad radiator cap is a silent killer, often overlooked despite clear warning signs.
Common Failure Symptoms
• Engine overheats under load but runs fine at idle
• Coolant disappears with no visible leaks
• Overflow tank constantly overflows or stays empty
• Radiator hoses collapse after engine cools
• Air bubbles visible in the coolant or reservoir
• Cold cap on a hot engine, which indicates no circulation or low coolant
Visual Inspection Steps
- Check the main seal. It should be soft, pliable, and intact. Replace if cracked, swollen, or brittle.
- Inspect the vacuum seal. It must move freely and seal tightly. Gummy or stuck seals fail to open or close properly.
- Test spring tension. Press the pressure valve. It should snap back firmly. Weak resistance means spring fatigue.
- Look for corrosion. Rust or mineral deposits on metal parts can impair valve operation.
Pressure Test the Cap
Use a radiator pressure tester with a cap adapter:
- Attach the pump to the cap while it is off the radiator.
- Pressurize to the cap’s rated PSI, such as 16 PSI.
- Hold for one to two minutes. If pressure drops significantly or the valve opens below rating, replace the cap.
Safety Rules and Maintenance Tips
The radiator cap operates under dangerous conditions, so respect it to avoid serious injury.
Never Remove a Hot Cap
The cooling system can reach 15+ PSI and 250°F or higher. Removing the cap while hot releases scalding steam and boiling coolant under pressure. Always wait until the engine is completely cool, preferably overnight.
Cool-Down Waiting Period
Even after turning off the engine, wait at least two to three hours before opening the cap. If you must check sooner, place a thick towel over the cap and turn it slowly to the first click, allowing pressure to release gradually.
Replace Proactively
Radiator caps typically last three to five years but degrade with heat cycles. Replace it:
• Every time the cooling system is serviced
• If you have had overheating issues
• When installing a new radiator or thermostat
• As part of seasonal maintenance in extreme climates
Cost vs. Risk
A new cap costs $15 to $50. Compare that to a $2,000+ head gasket repair caused by overheating from a failed cap. Replacing it is one of the cheapest, highest-return maintenance tasks you can perform.
Real-World Failure Examples
Understanding cap failure helps prevent real engine damage.
Case: Overheating on Highway
A car runs fine in town but overheats on the highway. The cap’s pressure spring is weak, releasing pressure at 10 PSI instead of 15. Coolant boils at 240°F instead of 270°F. Under sustained load, steam forms, reducing cooling. Solution: Replace the cap. Problem resolved.
Case: Collapsed Upper Hose
After shutdown, the upper radiator hose is sucked flat. The vacuum valve is stuck closed. No coolant returns from the overflow tank. The system runs low, causing poor circulation. Solution: Install a new cap with a functioning vacuum valve.
Case: Constant Overflow
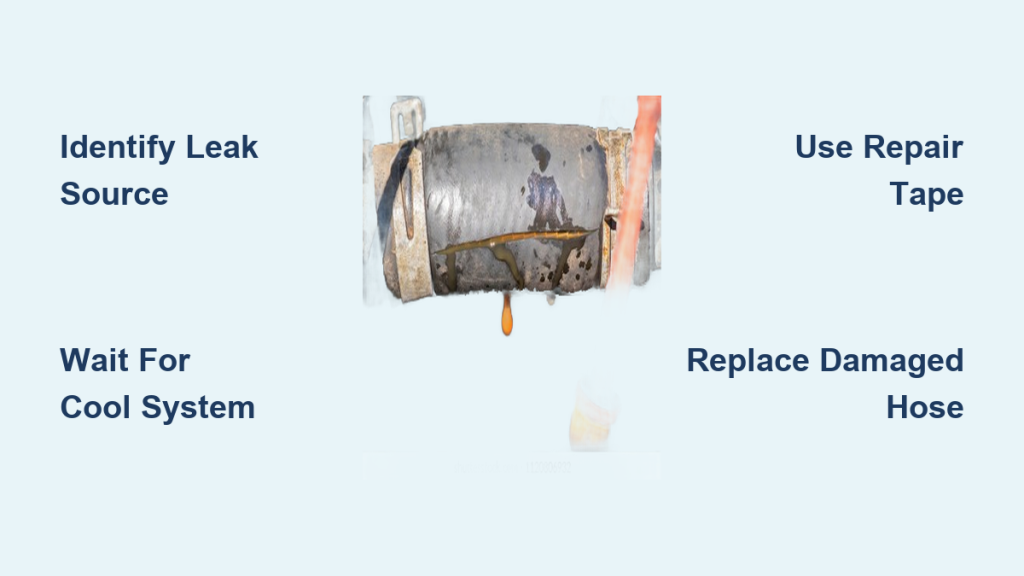
Coolant sprays into the overflow tank every drive, but the engine does not overheat. The cap’s pressure valve is stuck open or the seal is blown. The system never builds pressure, so coolant boils and escapes. Replace the cap to stop overflow.
Frequently Asked Questions About Radiator Caps
What PSI should my radiator cap be?
Most passenger vehicles use a radiator cap rated between 13 and 16 PSI. The exact rating depends on your vehicle’s cooling system design. Check your owner’s manual or the stamping on your original cap to confirm the correct specification.
How do I know if my radiator cap is bad?
Common signs include engine overheating under load, disappearing coolant with no visible leaks, collapsed radiator hoses after cooldown, and constant overflow from the reservoir tank. A pressure test is the most reliable way to confirm a failing cap.
Can I use a higher PSI radiator cap than recommended?
No. Installing a cap with a higher PSI rating than your system is designed for increases stress on hoses, radiator seams, water pump seals, and the heater core. This can cause bursts, leaks, or catastrophic system failure. Always match the original PSI rating.
How often should I replace a radiator cap?
Most radiator caps last three to five years under normal conditions. However, you should replace the cap any time you service the cooling system, install a new radiator or thermostat, or experience overheating issues. Heat cycles and chemical exposure degrade seals and springs over time.
What happens if you remove a radiator cap when hot?
Removing a hot radiator cap releases scalding steam and boiling coolant under pressure, which can cause severe burns. The system can reach 15+ PSI and 250°F or higher. Always wait until the engine is completely cool before removing the cap.
Can a radiator cap cause overheating?
Yes. A weak pressure spring, degraded seal, or stuck valve can prevent the system from maintaining proper pressure. This lowers the coolant’s boiling point and allows steam to form, leading to overheating, especially under heavy loads like towing or climbing hills.
Key Takeaways for Understanding Your Radiator Cap
The radiator cap is a small but vital guardian of engine health. It regulates pressure, prevents boiling, manages coolant flow, and avoids vacuum damage. By understanding how does a radiator cap work, including its valves, springs, seals, and pressure dynamics, you can diagnose cooling issues faster and prevent catastrophic engine damage.
Always use the correct PSI-rated cap, inspect it regularly, and never open it hot. Test the cap with a pressure tester if you suspect failure, and replace it every three to five years or during any cooling system service. With proper care, this simple component delivers outsized protection for your engine at a fraction of the cost of major repairs.