

A puddle of coolant under your car is more than a mess. It signals trouble brewing in your cooling system, and the most common culprit is a loose or improperly tightened radiator hose clamp. Learning how to tighten a radiator hose clamp correctly can prevent overheating, corrosion, and expensive engine repairs.
Most people assume the fix is cranking down the screw until it stops. That approach often causes more harm than good, crushing the hose, stripping threads, or letting the leak return weeks later. The real issue is usually hose creep, thermal cycling, or the wrong clamp type. This guide walks you through diagnosis, clamp selection, proper tightening technique, and a reliable test method to confirm a lasting seal.
Diagnose the Leak Before Grabbing a Wrench
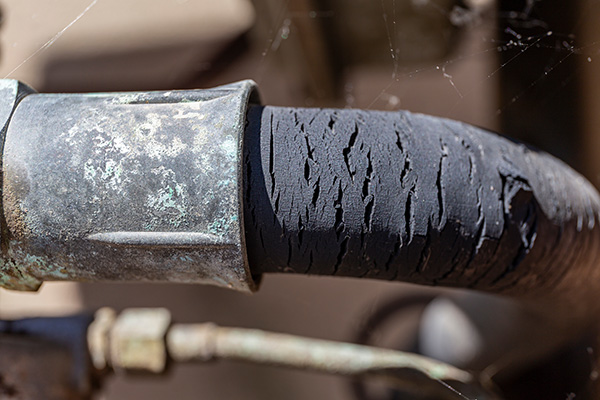
Before you tighten anything, confirm the clamp is actually the problem.
Spot Coolant Seepage at the Connections
Inspect every joint where hoses meet the radiator, water pump, or thermostat housing. Look for wet spots, dried residue in green, orange, or yellow tones, and crusty white or green corrosion around the clamp area. If fluid is pooling under the car after the engine warms up, the seal has failed, but that does not always mean the clamp loosened on its own.
Tell Hose Creep Apart From a Loose Clamp
A clamp that turns easily with a screwdriver has genuinely loosened. More often, the rubber hose itself has deformed over time, shrinking at the connection point. The clamp may still feel tight, yet it cannot compress the smaller hose enough to seal properly.
Pro Tip: Mark the clamp screw and band with a paint pen or scratch a line across both parts. If the marks stay aligned after driving, the clamp is not spinning. The hose is the part failing.
Choose the Right Clamp Type for the Job
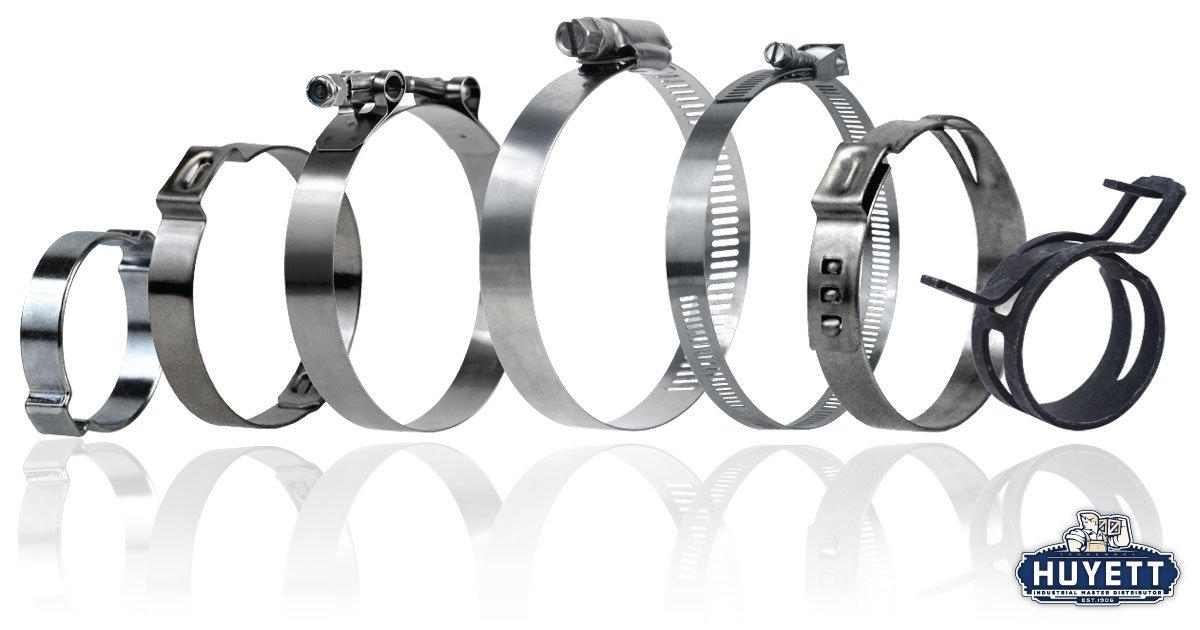
Not every clamp works the same way. Picking the wrong one causes leaks even when you tighten it perfectly.
Spring Clamps Deliver OEM-Level Reliability
Spring clamps, also called constant-tension clamps, maintain steady pressure as the hose expands and contracts with heat. Japanese automakers like Honda, Toyota, Mazda, and Subaru use them as standard equipment.
Key benefits include:
– No retightening required after installation
– Resistance to thermal cycling failure
– Reusable if not rusted or bent
The downsides involve needing a spring clamp tool for installation, requiring an exact match to the hose diameter, and limited availability at local parts stores. Measure with calipers and order online if needed.
Screw Clamps Require Extra Caution
Worm-drive clamps are common but problematic on radiator hoses. Tension drops as temperatures change, they are prone to false tightness where the screw stops before the band fully compresses, and over-tightening can crush soft hoses or strip threads.
Use screw clamps when:
– Replacing hoses where spring clamps are unavailable
– Making temporary fixes or working on low-pressure lines like heater hoses
– Upgrading to Gates spring-assisted screw clamps for a hybrid solution
Avoid cheap dollar-store clamps with poor threading and thin bands that fail quickly.
Prepare the Connection for a Lasting Seal
A tight clamp cannot fix a dirty or damaged interface.
Clean Both Surfaces Thoroughly
- Drain a small amount of coolant if needed to prevent spills.
- Remove the clamp and slide the hose back from the fitting.
- Scrub the metal fitting with a wire brush to remove rust, scale, or old gasket material.
- Wipe the inside of the hose with a clean rag and inspect for cracks or hardening.
Inspect and Trim the Hose End
If the hose end is rolled, cracked, or uneven, trim about 1/4 inch off with a sharp knife or hose cutter. Confirm enough length remains for full coverage on the fitting, typically 1/2 to 3/4 inch. No glue or sealant is needed. The clamp and proper fit create the seal.
Position the Clamp Correctly Before Tightening
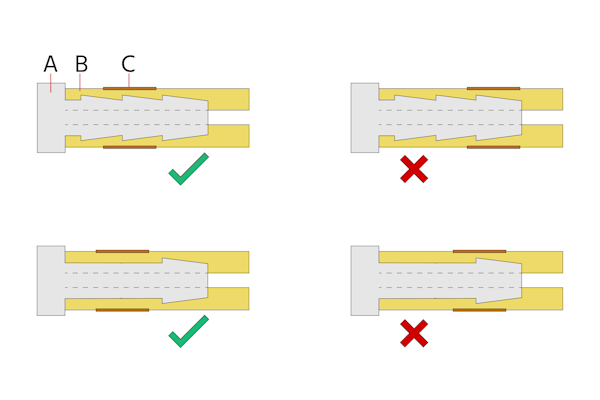
A small positioning mistake can ruin an otherwise perfect installation.
Slide the Clamp On First
Always install the clamp on the hose before pushing the hose onto the fitting. Once the hose is seated, you cannot slide the clamp into position in tight spaces.
Set the Right Distance From the Hose End
Place the clamp about 6 mm (1/4 inch) from the hose end. This ensures the band covers the reinforced section rather than the soft edge. Too close risks slipping off or crushing weak rubber. Too far means the clamp misses the fitting bead entirely.
Orient for Future Access
Position the screw head or bolt where you can reach it later with a tool. Avoid routing the screw toward sharp metal edges or hot components that could damage it.
Tighten the Clamp the Right Way
This is where most DIYers go wrong. The goal is firm pressure without crushing the hose.
For Screw Clamps: Follow the 2mm Gap Rule
- Use a nut driver or screwdriver, never an impact tool.
- Tighten until you feel strong resistance and the clamp no longer turns easily by hand.
- Stop when a 2mm gap remains between the band ends. Closing the gap completely means over-tightening.
Over-tightening risks include:
– Crushed hose that restricts coolant flow
– Stripped screw threads
– Damaged radiator neck, especially on aluminum components
Use 60 Inch-Pounds for Precision
A torque-limiting screwdriver set to 60 in-lbs (roughly 5 ft-lbs) delivers repeatable, safe results. It prevents guesswork, ensures consistent tension, and works well for high-performance or critical cooling lines.
For Spring Clamps: Use the Right Tool
- Measure the hose outer diameter with calipers since spring clamps are size-specific.
- Select the correct clamp size, such as 1.5 to 1.75 inches.
- Use a spring clamp tool to compress and install:
– Hook the tool on both ends of the clamp
– Squeeze to close the gap
– Slide over the hose and fitting
– Release slowly so the clamp self-tightens
Test the Repair Under Real Conditions
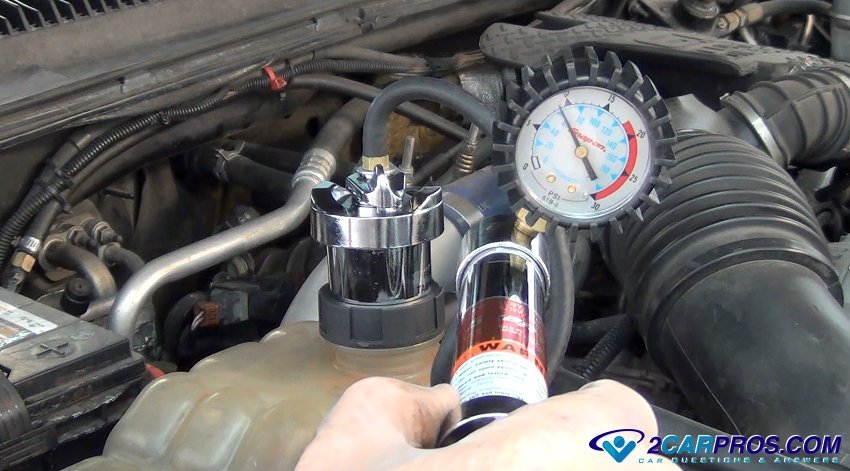
Do not assume the fix worked until you verify it.
Run the Engine to Operating Temperature
- Refill coolant and bleed air if required.
- Start the engine and let it warm up fully.
- Turn on the heater to open the entire cooling circuit.
- Watch the temperature gauge and stop if it begins to overheat.
Check for Leaks Under Pressure
Once the thermostat opens and the radiator hoses get hot, the system is pressurized. Shine a flashlight on the clamp area and look for weeping, dripping, or misting.
If it leaks, do not overtighten. Recheck hose seating and clamp position first. If the hose has crept, replace it or trim the end. If using a screw clamp, consider switching to a spring clamp for a permanent fix.
Prevent Future Cooling System Issues
A one-time fix is not enough. Build long-term reliability into your maintenance routine.
Inspect Clamps During Routine Service
Check during oil changes or seasonal maintenance. Look for corrosion on stainless clamps, green crust from coolant residue, and loose screws that need snugging.
Replace Clamps Showing Damage
Retire any clamp with rust perforation, stripped threads, or bent or cracked bands. These failure points lead to repeat leaks.
Upgrade to Spring Clamps When Possible
Even if your car came with screw clamps, switching to spring clamps improves reliability. They last longer, leak less, and require no retightening.
Expert Note: Factory spring clamps are designed to last the life of the hose. Replacing them with screw clamps is a downgrade, not a convenience.
Tools You Will Need
| Tool | Purpose |
|---|---|
| Nut driver or screwdriver | Tighten screw clamps with manual control |
| Torque-limiting screwdriver (60 in-lbs) | Prevent over-tightening |
| Spring clamp tool | Install OEM-style clamps safely |
| Calipers or tape measure | Size hoses for correct clamp fit |
| Wire brush and rag | Clean fittings and hoses |
Frequently Asked Questions About Radiator Hose Clamps
How tight should a radiator hose clamp be?
Tighten a screw clamp until you feel strong resistance and a 2mm gap remains between the band ends. For precision, use a torque-limiting screwdriver set to 60 inch-pounds. Over-tightening crushes the hose and restricts coolant flow.
Can I reuse old hose clamps?
Yes, if they show no rust, stripped threads, or physical damage. Factory spring clamps are designed for reuse. Replace any clamp with corrosion or distortion to avoid future leaks.
Why does my radiator hose keep leaking after I tighten the clamp?
The most common cause is hose creep, where the rubber deforms and shrinks at the connection point. The clamp may still feel tight but cannot bridge the gap. Trim the hose end or replace it entirely. Switching to a spring clamp also helps.
Are spring clamps better than screw clamps for radiator hoses?
Yes. Spring clamps maintain constant tension through thermal cycling and require no retightening. Screw clamps lose tension as temperatures change and are more prone to leaks. Spring clamps are harder to install but offer superior long-term reliability.
What happens if I over-tighten a radiator hose clamp?
Over-tightening crushes the hose, restricts coolant flow, strips the screw threads, and can damage the radiator neck, especially on aluminum components. Stop tightening once you feel strong resistance or when the 2mm gap closes.
Do I need a special tool for spring clamps?
Yes. A spring clamp tool lets you compress and install the clamp safely, especially in tight engine bays. Without it, installation requires significant hand strength and risks injury or improper seating.
Key Takeaways for Tightening a Radiator Hose Clamp

Tightening a radiator hose clamp is about more than torque. Understanding hose creep, thermal cycling, and clamp type matters far more than how hard you turn the screw. Use the right clamp for your vehicle, position it 6 mm from the hose end, tighten screw clamps to the 2mm gap rule or 60 inch-pounds, and always test under engine heat and pressure. When in doubt, choose a spring clamp, clean every surface thoroughly, and verify with a hot engine test. Your cooling system and your engine will thank you.



