
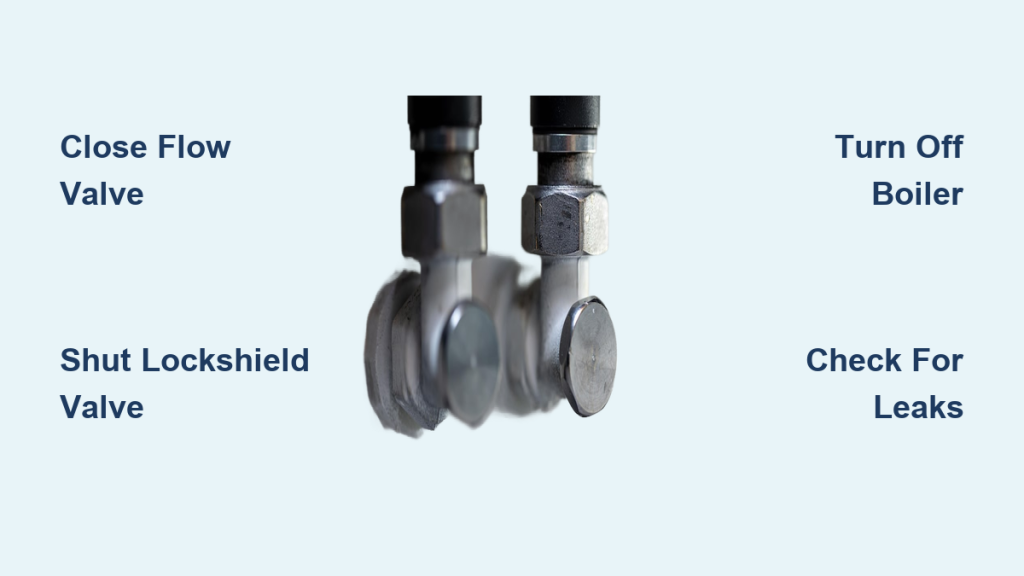
A radiator that keeps blasting heat when you want it cool is more than just annoying. It wastes energy, drives up bills, and can signal a valve problem that needs attention. Learning how to turn a radiator valve off properly gives you control over your home’s comfort and helps you handle minor repairs without calling in a professional.
This guide covers valve identification, step-by-step shutdown procedures for both thermostatic and manual valves, troubleshooting for stuck or broken units, and long-term maintenance tips. Whether you need to isolate one radiator for painting or stop a leak fast, you’ll find clear answers here.
Identify Your Radiator Valve Type Before Doing Anything
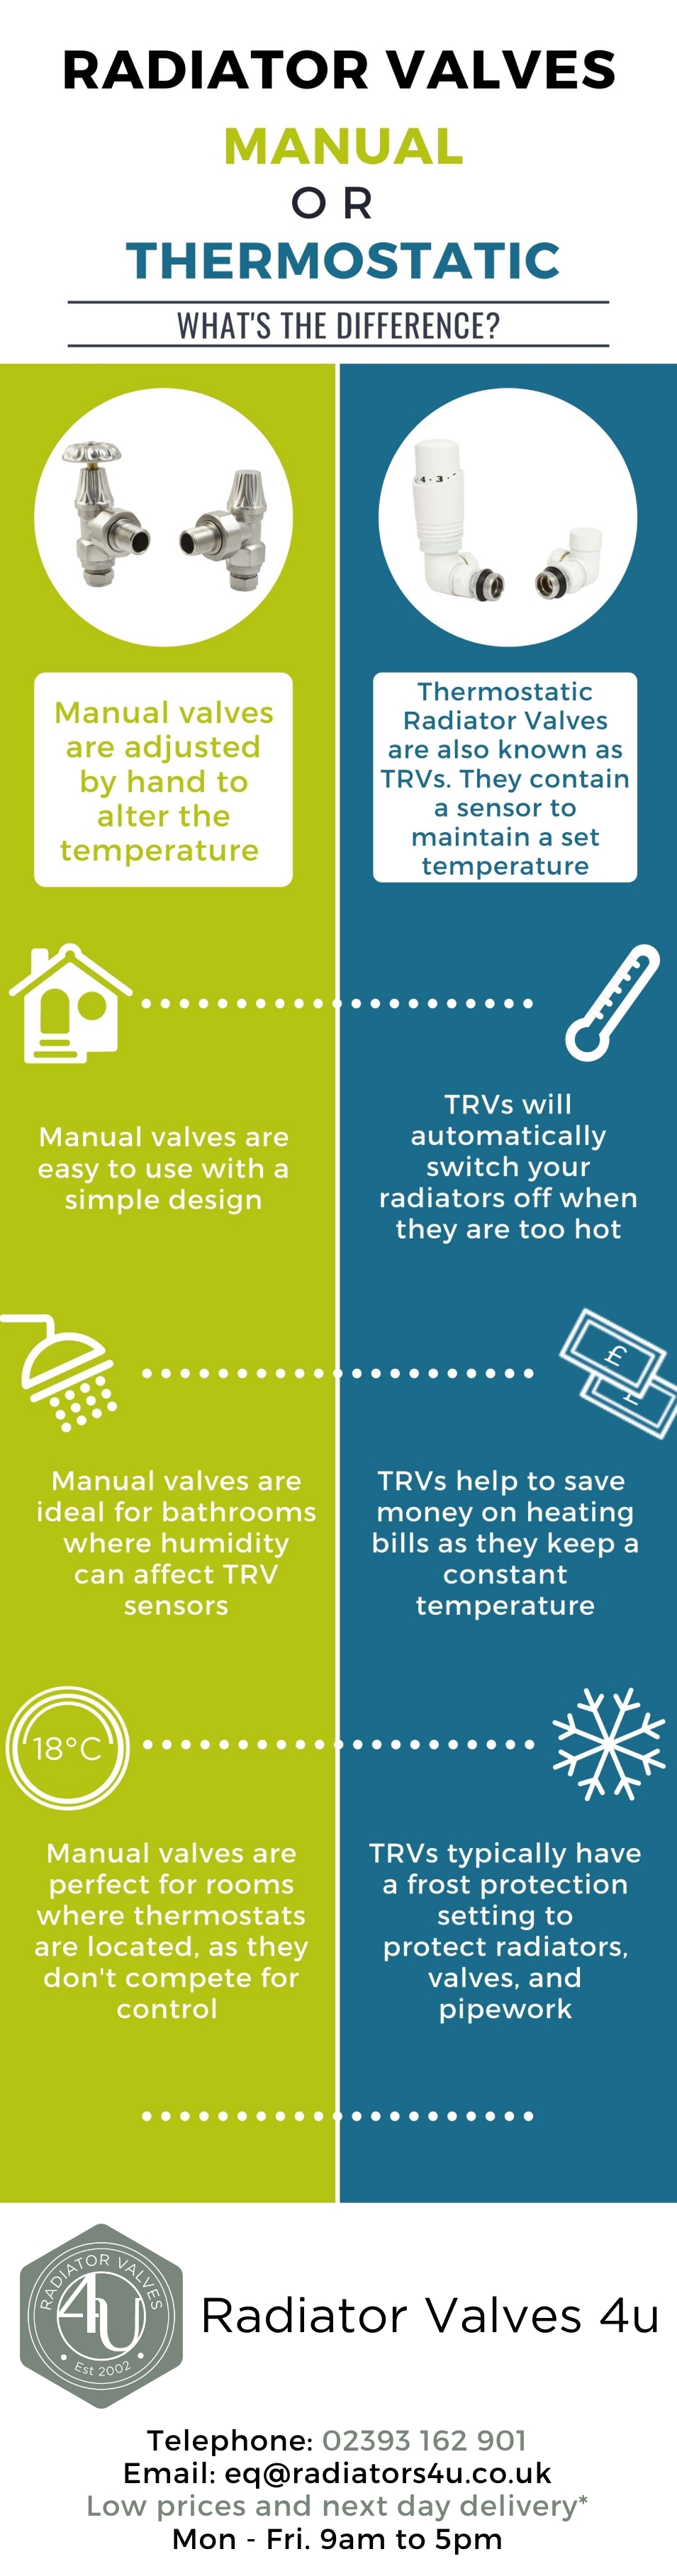
Every radiator has two valves at the bottom corners, and each plays a different role. Knowing which is which prevents mistakes and ensures full isolation when needed.
Locate the Flow and Return Valves
The flow valve controls hot water entering the radiator and usually sits on the left side. The return valve (often called the lockshield) regulates water leaving the unit and sits opposite. Both must close to fully stop circulation through the radiator.
Recognize a Thermostatic Radiator Valve (TRV)
A TRV has a numbered dial (0 to 5) or symbols like a snowflake on its head. It reads room temperature and adjusts water flow automatically. The head often unscrews by hand, revealing a small metal pin inside that opens and closes the valve.
Spot a Manual Wheel-Head Valve
Manual valves have a plain metal or plastic wheel with no numbers or symbols. They work like a simple tap and require hand-turning every time you want to adjust the heat. Unlike TRVs, they don’t self-regulate based on room temperature.
Find the Lockshield Valve
The lockshield sits on the return side and is usually hidden under a smooth plastic cap. It balances system pressure and isn’t meant for daily use. To fully isolate a radiator, you must remove the cap and close this valve with tools.
How to Turn Off a Thermostatic Radiator Valve
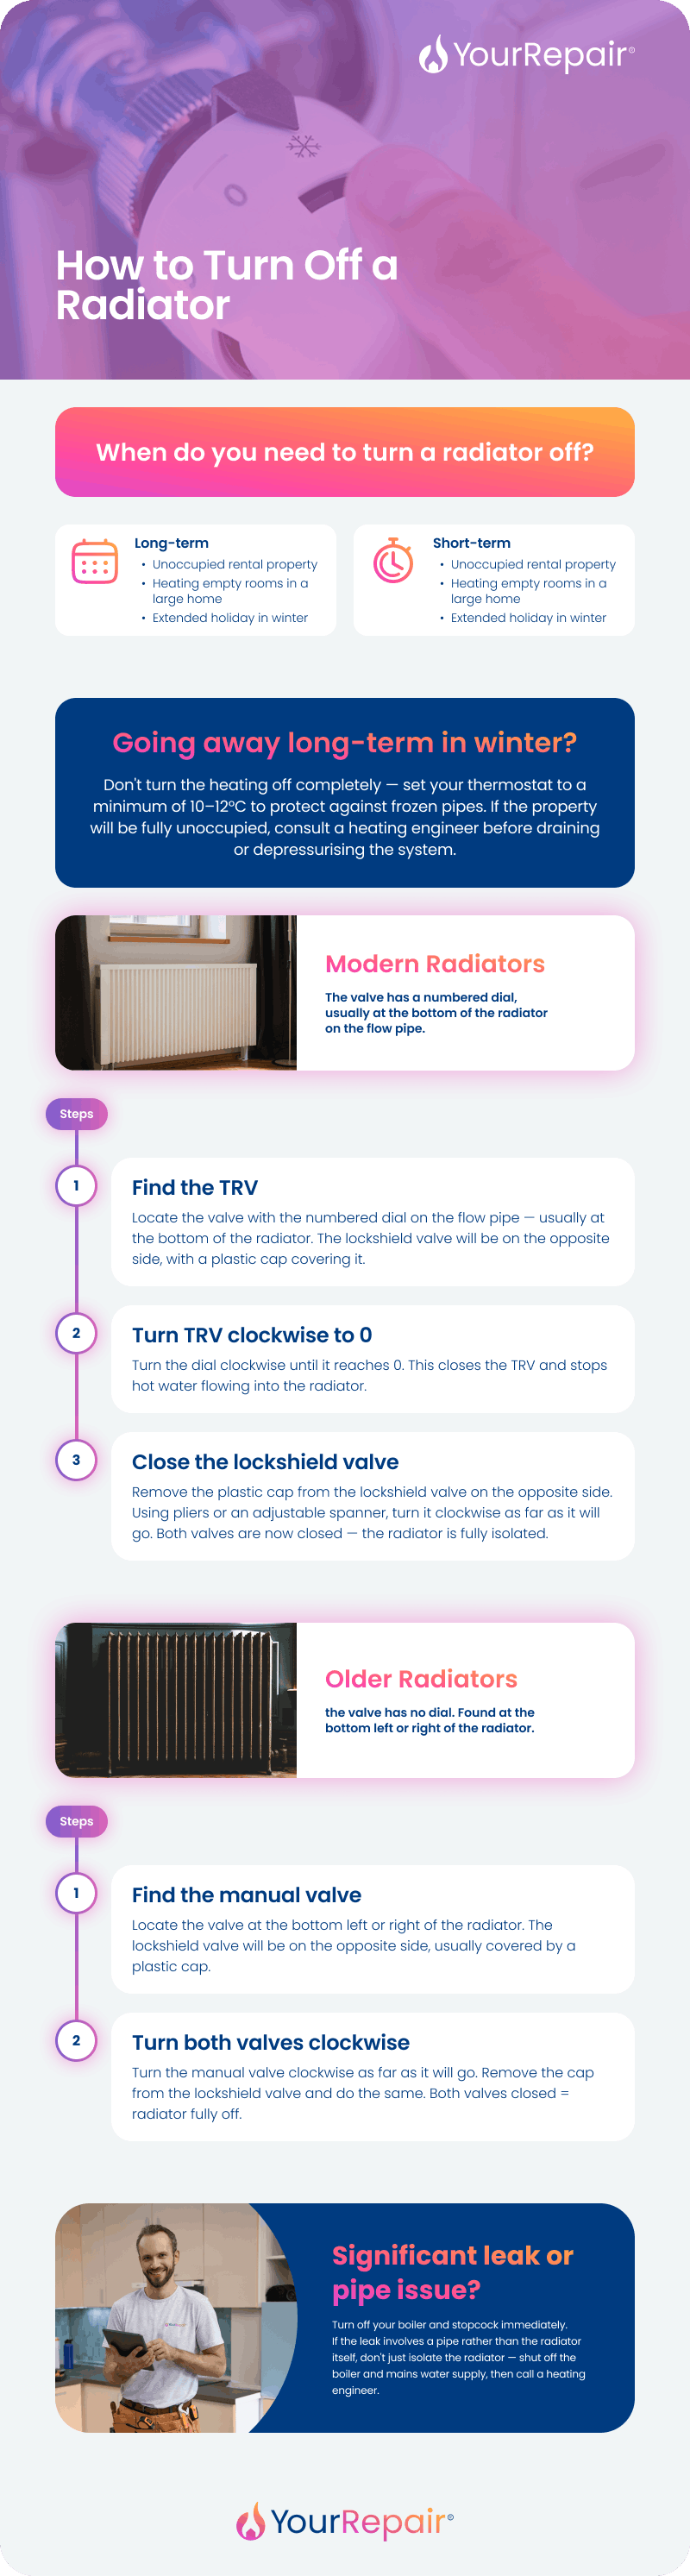
TRVs are common in modern homes but require a two-step process for full isolation. Closing only the TRV head leaves the return side open.
Set the TRV Dial to Zero
Turn the numbered dial clockwise until it points to 0 or the snowflake symbol. This signals the internal pin to close and stops automatic water flow. However, this setting alone does not fully isolate the radiator if the lockshield remains open.
Pro Tip: Setting the dial to zero only tells the valve to close. If the internal pin is stuck, the radiator will keep heating. Always verify by checking the unit after a few minutes.
Remove the Lockshield Cap
Move to the opposite side of the radiator. Pull off the plastic cap covering the lockshield valve. Some caps have a small retaining screw that needs a flathead or Phillips screwdriver before the cap lifts away.
Close the Lockshield Spindle
Expose the metal spindle underneath. Grip it with pliers or an adjustable spanner and turn clockwise until it stops. Avoid excessive force, as over-tightening can crack the valve body. Once closed, the radiator is fully isolated.
Confirm the Radiator Is Cooling
Wait 10 to 15 minutes and touch the radiator. If it begins cooling, both valves are working correctly. If it stays hot, the TRV pin may be jammed or the head may be faulty.
How to Turn Off a Manual Radiator Valve
Manual valves are simpler in design but still need both ends closed for complete isolation.
Turn the Wheel-Head Clockwise
Grasp the wheel-shaped head and rotate it clockwise by hand until it won’t move further. This cuts off incoming hot water on the flow side.
Warning: Avoid using pliers on a manual wheel-head unless absolutely necessary. The extra force can strip the plastic or crack the metal, creating a leak.
Close the Lockshield on the Return Side
Remove the plastic cap from the lockshield valve. Use pliers or a spanner to turn the exposed spindle clockwise until fully closed. This stops water from leaving the radiator and completes the isolation.
Verify Both Ends Are Sealed
With both valves turned clockwise to their stops, the radiator should no longer receive or release water. Give it time to cool before any maintenance or removal work.
Fix a Stuck or Broken TRV Head

A radiator that stays hot even at zero usually points to a mechanical issue inside the TRV. Diagnosing the cause helps you choose the right fix.
Diagnose a Jammed TRV Pin
Unscrew or pull off the TRV head and look inside. You should see a small metal pin that moves up and down. Press it gently with your finger. A healthy pin springs back up. If it stays down or won’t move, dirt, corrosion, or a broken spring is likely the culprit.
Free a Stuck Pin Mechanism
Apply a few drops of WD40 around the pin and wait 5 to 10 minutes. Use needle-nose pliers to gently work the pin up and down. Avoid bending it. Lightly tapping the side of the valve body with a screwdriver can also dislodge debris.
Replace a Faulty TRV Head
If the pin moves freely but the radiator still heats, the head itself is broken. Unscrew the old head and replace it with a compatible model. Measure the valve connection (commonly 8mm or 15mm) before buying a new one.
Note: TRV heads are not universal. Match the thread size and brand whenever possible to ensure a proper fit.
Handle Seized Lockshield Valves
Older heating systems often have lockshield valves frozen in place from paint buildup or rust. Forcing them can cause serious damage.
Scrape Away Paint from the Spindle
Use a utility knife or fine sandpaper to remove dried paint around the spindle threads. Never attempt to turn a painted-over valve, as it will round off and become impossible to grip.
Use Grip Aids and Lubricant Together
Wrap a rubber band or cloth around the spindle for better traction. Apply WD40 and wait 10 minutes. Then use pliers with jaw protection or a pipe wrench to turn clockwise. Apply steady, increasing pressure rather than sudden jerks.
Know When to Stop and Call a Professional
If the spindle breaks or won’t budge after lubrication, stop immediately. Forcing it can snap the pipe and cause flooding. A qualified heating engineer can cut out and replace the valve safely after draining the system.
Emergency Steps for a Leaking Radiator
A sudden leak demands fast action to minimize water damage and pressure buildup.
Cut Power and Water Supply Immediately
- Turn off the boiler without delay.
- Shut off the mains water stopcock, usually located under the kitchen sink.
- Close both radiator valves fully.
This sequence stops pressure buildup and limits damage.
Contain the Leak
Place towels or a bucket under the drip. If the leak is at a valve joint, wrap plumber’s tape around it or use a temporary repair clamp as a short-term fix.
Contact a Heating Engineer
Even small leaks can worsen quickly. Always have a qualified professional inspect and repair the system before turning the boiler back on.
Prepare a Radiator for Removal or Decoration

Painting behind a radiator or replacing the unit requires proper isolation and a smart reinstallation trick.
Count the Lockshield Turns Before Closing
Before turning the lockshield valve fully closed, count how many complete turns it takes to shut. Write this number down (for example, “3.5 turns”). This preserves the original system balance.
Why this matters: Reopening the lockshield to the same position keeps other radiators heating evenly. Skipping this step can leave some rooms cold and others overheating.
Rehang and Reopen Safely
After reattaching the radiator:
1. Open the lockshield valve to the recorded number of turns.
2. Slowly open the flow valve (TRV or manual).
3. Bleed the radiator to release trapped air.
This prevents gurgling noises and restores efficient heating.
Prevent Valve Problems with Regular Maintenance
A little upkeep goes a long way toward avoiding emergencies and keeping valves responsive.
Lubricate TRV Pins Annually
Twice a year, remove TRV heads and apply a drop of WD40 to the pin. Work it up and down gently. This prevents sticking and keeps the mechanism responsive.
Keep TRVs Unobstructed
Furniture, curtains, or radiator covers can block airflow to the TRV sensor. This causes inaccurate readings, making rooms feel cold while the radiator blasts heat. Maintain at least 15 cm of clearance around the valve.
Bleed Radiators Regularly
If a radiator is warm at the bottom but cold at the top, it has trapped air. Use a radiator key to open the bleed valve at the top corner until water escapes. Bleeding releases air, while turning off the valve isolates water. They are different procedures.
When to Call a Heating Professional
Some valve issues go beyond simple DIY fixes and require expert intervention.
Signs You Need a Plumber
- The valve body is leaking or visibly cracked.
- The lockshield won’t close even after lubrication.
- The radiator won’t stop heating despite a working TRV.
- You need to drain the entire system.
A Gas Safe registered engineer can diagnose deeper issues like system imbalance or pump failure.
Weigh Cost Against DIY Risk
Turning a valve costs nothing if done carefully. A burst pipe from forced turning can cost hundreds in water damage. When in doubt, pause and call a professional.
Frequently Asked Questions About Turning Off a Radiator Valve
Do I need to turn off the boiler before closing a radiator valve?
Yes. Always turn off the boiler and wait at least one hour for the system to cool before touching valves. Manipulating a hot, pressurized system risks scalding and sudden water ejection.
Why is my radiator still hot when the TRV is set to zero?
The internal pin may be stuck in the open position due to dirt, corrosion, or a broken spring. Remove the TRV head, inspect the pin, and lubricate it with WD40. If the pin moves freely but the radiator stays hot, the head itself is likely faulty and needs replacement.
Can I turn off a radiator without closing the lockshield valve?
You can stop heat output by closing only the flow valve, but the radiator will not be fully isolated. Water can still circulate through the return side. For maintenance, painting, or leak control, always close both valves.
How do I turn off a radiator for a long absence?
Instead of fully shutting off radiators, set the thermostat to a frost-protection temperature of 10 to 12°C. This keeps pipes warm enough to prevent freezing and bursting. If total isolation is necessary, close both valves tightly and consider draining the radiator.
What tools do I need to close a lockshield valve?
You need pliers or an adjustable spanner to grip and turn the exposed metal spindle. A flathead or Phillips screwdriver may also be required to remove a retaining screw on the plastic cap.
Is bleeding a radiator the same as turning it off?
No. Bleeding releases trapped air from the top of the radiator, improving efficiency. Turning off a valve stops water flow into and out of the unit. Both procedures serve different purposes and may be needed at different times.
Key Takeaways for Turning Off a Radiator Valve Safely
Mastering how to turn a radiator valve off puts you in control of your heating system. Start by identifying your valve type, then close both the flow and return sides for full isolation. Use WD40 and gentle pressure for stuck components, and never force a seized valve.
For long-term peace of mind, lubricate TRV pins twice a year, keep valves unobstructed, and bleed radiators regularly. If a leak appears or a valve refuses to close, shut off the boiler and mains water immediately, then contact a qualified engineer.
Your next step is simple: walk to your nearest radiator, identify the valve type, and practice the steps above. Knowing how to turn a radiator valve off turns a potential headache into a quick, confident fix.



