

Is your freezer struggling to stay cold, or is your refrigerator not cooling properly despite a running compressor? If so, low refrigerant could be the culprit, especially if the evaporator coil isn’t frosting evenly or the suction line stays warm. While refrigerators are sealed systems, refilling refrigerator coolant using R134a is possible with a bullet piercing valve, even without professional HVAC tools. This guide walks you through the exact steps, tools, and safety practices to refill your refrigerator’s coolant safely and effectively.
You’ll learn how to diagnose a true refrigerant leak, install a line tap valve, charge the system by weight or pressure, and verify performance. We cover everything from gathering the right equipment to monitoring temperature and pressure after charging.
Diagnose Cooling Problems Before Adding Refrigerant
Before touching refrigerant, confirm the issue isn’t electrical or mechanical. Many cooling problems mimic low coolant but have different causes.
Rule Out Non-Refrigerant Issues
Several common issues can cause poor cooling without being refrigerant related:
- Iced-up evaporator coil points to a failed defrost heater, thermostat, or timer, not low charge.
- No airflow from a faulty evaporator or condenser fan can cause temperature problems.
- A faulty thermostat may fail to signal the compressor to run.
- Blocked vents or dirty condenser coils restrict heat transfer.
Critical Check: If the coil is fully iced, defrost the unit completely before proceeding. Charging a clogged system wastes refrigerant and may damage components.
Confirm Compressor Is Functional
The compressor must run steadily for refrigerant charging to make sense. Listen for a healthy continuous hum. Feel the discharge line, which should be warm or hot, while the suction line should be cold. Use a multimeter to check for electrical continuity at the compressor terminals.
Warning: If the compressor clicks on and off repeatedly, it may be locked or failing. Repairing refrigerant won’t help in this case.
Identify Low Refrigerant Symptoms
True low-charge signs are distinct once you know what to look for. The freezer compartment running above 10°F despite long run cycles indicates potential low refrigerant. The refrigerator section above 40°F is another warning sign. The suction line staying warm instead of cold is a strong indicator. The compressor running nonstop without improving cooling is also typical. Low-side pressure in vacuum range, such as 10 inHg, when the system is running confirms low charge.
Pro Tip: Use a digital thermometer to monitor internal temperatures over 1 to 2 hours. Stable high temperatures confirm poor heat transfer, likely due to low refrigerant.
Gather Required Tools for Refrigerant Refill
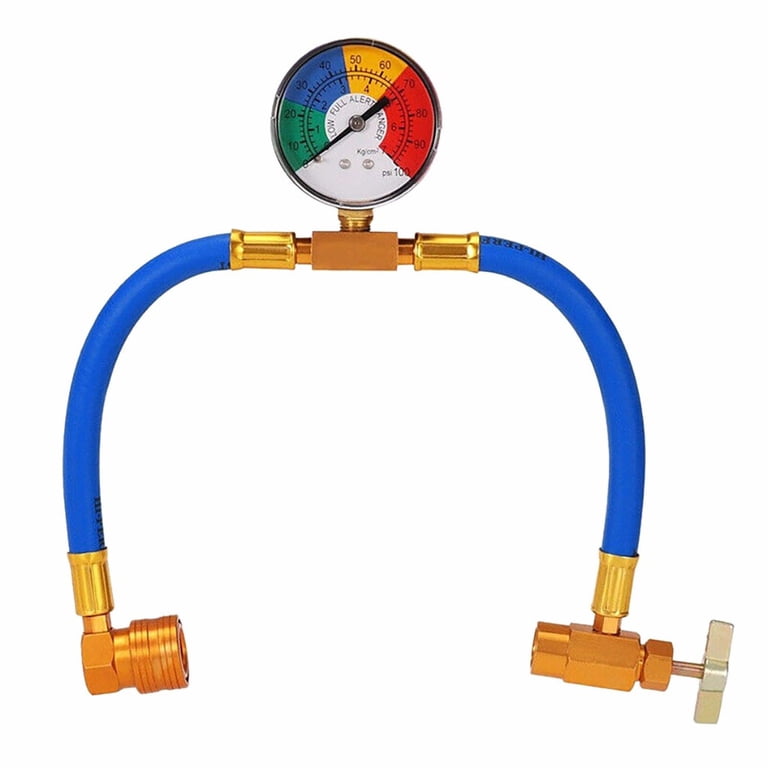
You’ll need specific tools to access and charge the sealed system safely.
Essential Repair Kit
| Item | Purpose |
|---|---|
| Bullet piercing valve (line tap) | Creates permanent access to suction line |
| R12-to-R134a conversion adapter | Connects R134a gauges to piercing valve |
| R134a refrigerant can (DOT-approved) | Recharge source |
| Digital refrigerant scale | Accurate weight-based charging |
| Refrigerant gauge manifold (R134a-compatible) | Monitors pressure and vsat |
| Fine-grit sandpaper (220-400) | Cleans copper tubing before valve install |
| 3mm or 5/32 inch Allen wrench | Tightens piercing valve screws |
| Vacuum pump (optional but recommended) | Removes air and moisture before charging |
| Multimeter and thermometer | Diagnoses electrical issues and verifies cooling |
Pro Tip: Buy a complete R134a line tap kit. Most include the valve, adapter, and Allen tools in one package.
Locate and Prepare the Suction Line
The low-pressure suction line is where you’ll install the piercing valve for proper access to the system.
Find the Correct Copper Tube
The suction line is the larger diameter copper tube returning to the compressor. The discharge line is smaller and hotter, leaving the compressor. Always install the valve on the suction line, close to the compressor.
Ideal Spot: Choose a flat, straight, clean section of tubing free from bends or corrosion.
Clean the Surface
Unplug the refrigerator before working. Sand the copper surface with 220 to 400 grit sandpaper to remove oxidation and paint. Wipe completely clean to ensure a tight seal and prevent leaks at the piercing point.
Install the Bullet Piercing Valve
This valve allows future access without opening the system again, making it a practical permanent modification.
Step-by-Step Installation
- Open the valve housing by loosening the three outer Allen screws.
- Slide the correct adapter sleeve over the copper line. Use smaller inside larger if needed.
- Reassemble the valve around the tube, aligning the side service port for easy access.
- Tighten the three housing screws evenly. Don’t crush the copper.
- Insert the center Allen bolt (piercing needle) and turn clockwise until it punctures the tube.
- Back the center bolt out 1/4 to 1/2 turn to open the internal valve.
Success Signal: A brief hiss of refrigerant confirms successful penetration.
Warning: Overtightening can cause leaks or block the line. Use even torque on all three screws.
Evacuate the System Before Charging
Removing air and moisture prevents contamination that can freeze and block the capillary tube.
Vacuum Procedure
Connect the vacuum pump via the R12-to-R134a adapter to the service port. Open the piercing valve completely. Run the pump until the gauge reads 29 to 30 inHg. Hold the vacuum for 5 to 10 minutes. If pressure rises, a leak is present somewhere in the system.
Important: Skipping evacuation risks moisture buildup, which can freeze and block the capillary tube. This step is critical for long-term system health.
Reality Check: Many field technicians skip this step for quick repairs on slow-leak systems, accepting shorter system life for faster service.
Charge the Refrigerator With R134a
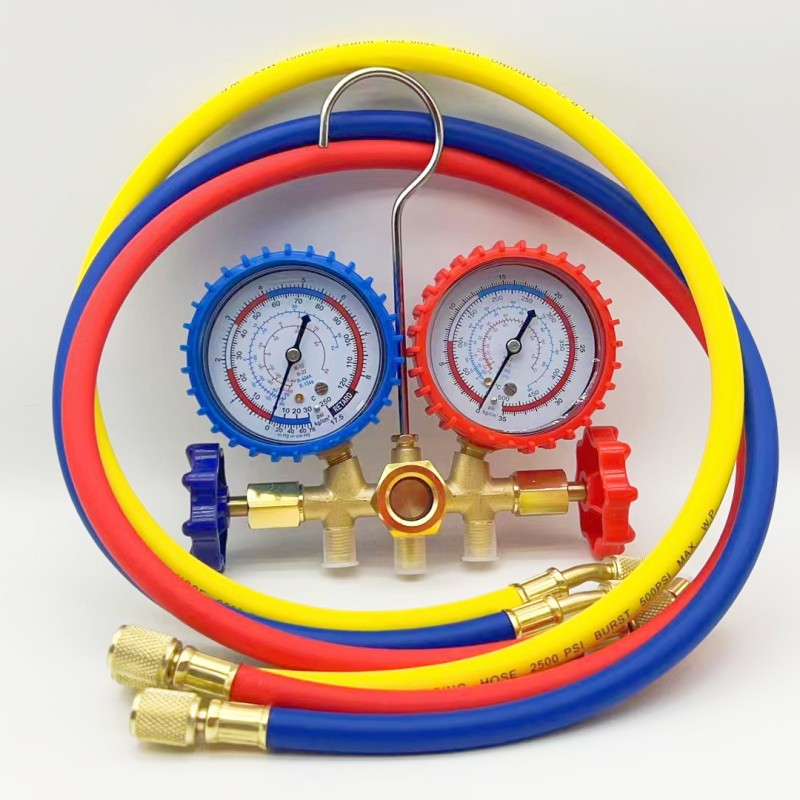
Now add refrigerant using weight, pressure, or temperature methods. Choose the most accurate approach available.
Know the Correct Charge Amount
Check the nameplate or manual for the exact factory charge specification. Mini fridges typically need about 1.4 oz (40 g). Frost-free freezers usually require around 4.2 oz (120 g). Other units may need up to 7.6 oz (215 g).
Warning: Never guess the charge amount. Undercharging reduces cooling performance. Overcharging damages the compressor and increases head pressure.
Use Weight-Based Charging (Most Accurate)
Place the R134a can on a digital scale. Tare the scale to zero after placing the can. Connect the recharge hose to the service port. Add refrigerant in 2 to 3 second bursts, monitoring weight loss carefully. Stop when the target weight is reached.
Pro Tip: For known slow leaks, add 0.2 to 0.4 oz extra to extend time between recharges.
Monitor Pressure and vsat
Connect the R134a gauge to monitor low-side pressure and vapor saturation temperature (vsat). Target vsat should be 0 to 5°F for freezers. For example, if box temperature is 23°F, vsat should be approximately 3°F. For mini fridges, aim for 5 to 10 psi on the low side.
Flow Tip: The line tap restricts flow naturally, which helps prevent overcharging during the process.
Charging Procedure
- Plug in the refrigerator. The system must run during charging.
- Keep the can upright for vapor charging (safer), or inverted for liquid (faster).
- Open the piercing valve one turn.
- Add refrigerant in short bursts, pausing 30 seconds between additions.
- Monitor can weight, vsat or pressure, and internal temperature throughout.
Critical Warning: Never flood the compressor. Liquid slugging can destroy the motor internally.
Verify Performance After Charging

Let the system stabilize and test results to confirm successful recharge.
Final System Checks
Close the piercing valve fully. Disconnect hoses and replace the service cap. Reinstall the back panel. Let the fridge run for 30 to 60 minutes before evaluating performance.
Confirm Cooling Success
A successful recharge achieves freezer temperature at 10°F or lower. Refrigerator compartment should reach 32 to 40°F. The suction line feels cold to the touch. Condenser walls feel warm, indicating proper heat rejection. Low-side pressure stays above 0 psi with no vacuum reading.
Success Example: A freezer stuck at 23°F dropped to 14°F after proper recharge with R134a.
Troubleshoot Common Post-Charge Issues
Pressure Still in Vacuum
If pressure remains in vacuum after charging, the cause is likely a plugged capillary tube or clogged filter dryer. Disassemble and replace the restriction point to restore flow.
Cooling Fades After Hours
If cooling improves initially but fades after hours or days, a slow refrigerant leak is the cause. Recharge every 2 to 5 years if the leak is minimal. If recharging is needed every few months, consider replacing the unit.
Compressor Overheats or Cycles Fast
Overheated or rapidly cycling compressor indicates an overcharged system or air trapped in lines. Recover excess refrigerant, then evacuate and recharge properly for best results.
No Improvement After Charging
If there’s no improvement after charging, the issue isn’t refrigerant related. Recheck the defrost system, fans, and control board for faults.
Maintain and Monitor Long-Term
A line tap lets you recharge without new tools, making ongoing maintenance practical.
Manage Slow Leaks
Recharge every 2 to 4 years if the leak is minimal and slow. If you need to recharge every few months, the unit likely needs replacement rather than continued patching.
Detect Leaks
Apply soapy water test at joints and valve connections. Bubbles indicate escaping refrigerant. UV dye can be added during charging and inspected later with a black light. Electronic leak detectors are more sensitive but cost more upfront.
Follow Safety and Legal Guidelines
EPA Compliance Notes
Section 608 certification is required for systems containing more than 5 lbs of refrigerant. Most household refrigerators contain less than 5 lbs, making DIY servicing technically permissible. However, venting refrigerant into the air is illegal under any circumstances.
Safety Practices
Work in well-ventilated areas to prevent refrigerant accumulation. Wear gloves and safety glasses when handling tools and refrigerant. Store refrigerant cans upright, away from heat sources. Handle piercing tools carefully, as copper shavings can clog lines.
Know When Not to Proceed
Some systems shouldn’t be charged by DIY methods due to safety or technical concerns.
Avoid These Cases
R600a (isobutane) systems are flammable and require special handling. TXV metering systems need superheat measurement, which is beyond DIY scope. Hermetic seal damage with a burned-out compressor means replacement is more practical. A warranty still active means piercing voids the manufacturer coverage.
Final Tips for Successful Refrigerant Refill
Diagnose first because most cooling issues aren’t refrigerant related. Charge by weight whenever possible, as it’s the most accurate method. Add slowly using 2 to 3 second bursts with pauses between. Target the factory charge exactly, only overcharging slightly for known slow leaks. Verify temperatures and pressure after 60 minutes of operation.
Bottom Line: Refilling refrigerator coolant with R134a using a bullet piercing valve is a proven way to restore cooling in aging units. While not EPA best practice, it’s a practical, cost-effective fix for slow leaks, especially when replacement isn’t an option. With the right tools and care, you can extend your fridge’s life by years.
Frequently Asked Questions About Refilling Refrigerator Coolant
Can I refill the refrigerant in my refrigerator myself?
Yes, you can refill refrigerator coolant yourself using a bullet piercing valve and R134a refrigerant. Most household refrigerators contain less than 5 lbs, which makes DIY servicing technically permissible under EPA regulations. However, you must avoid venting refrigerant into the air.
How do I know if my refrigerator needs more coolant?
Signs that indicate low refrigerant include freezer temperature above 10°F, refrigerator compartment above 40°F, warm suction line instead of cold, and compressor running constantly without improving cooling. Low-side pressure reading in vacuum range also confirms low charge.
What tools do I need to refill refrigerator coolant?
Essential tools include a bullet piercing valve (line tap), R134a refrigerant can, digital refrigerant scale, R134a-compatible gauge manifold, R12-to-R134a adapter, fine-grit sandpaper, Allen wrench set, and a vacuum pump (recommended but optional).
How much R134a does a refrigerator need?
The charge amount varies by model. Mini fridges typically need about 1.4 oz (40 g). Frost-free freezers usually require around 4.2 oz (120 g). Full-size refrigerators may need up to 7.6 oz (215 g). Always check the nameplate or manual for the exact specification.
Is it safe to use a bullet piercing valve on my refrigerator?
Yes, installing a bullet piercing valve is safe when done correctly. The valve creates a permanent access point without fully opening the system. However, overtightening can crush the copper line, and improper installation can cause leaks. Follow the step-by-step procedure carefully.
How often do I need to recharge my refrigerator?
For slow leaks, recharge every 2 to 5 years may be sufficient. If you need to recharge every few months, the leak is too significant for repeated charging, and unit replacement is recommended.
Key Takeaways for Refilling Refrigerator Coolant
Refilling refrigerator coolant with R134a using a bullet piercing valve is a practical solution for restoring cooling performance in aging refrigerators with slow leaks. Always diagnose cooling problems thoroughly first to ensure the issue is actually low refrigerant before proceeding with charging. Use weight-based charging for the most accurate results, and add refrigerant in short bursts while monitoring pressure and temperature. Follow EPA guidelines by never venting refrigerant, and wear appropriate safety gear throughout the process. With proper tools and careful attention to procedure, you can extend your refrigerator’s operational life by several years without professional service.



