

You’ve just finished a coolant flush, replaced your radiator, or installed a new thermostat. Now your engine runs hot, the heater blows cold, or your temperature gauge bounces wildly. This is a classic air lock in the coolant system, and it can quickly escalate from an annoyance to serious engine damage if you don’t address it.
This guide covers every proven method to get air out of your coolant system, from simple DIY techniques to professional vacuum filling. You’ll learn exactly what tools you need, which symptoms to watch for, and how to prevent air locks from happening again.
Why Your Engine Overheats After Coolant Service
Air enters your cooling system through several common avenues. Coolant flushes and replacements naturally introduce air as old fluid drains out. When you repair components like the water pump, radiator, or thermostat, opening the system allows air to slip in. Small leaks at hoses, clamps, or the radiator cap can actually pull air into the system during cooldown cycles as the engine cools and creates suction.
Once trapped inside, air seeks out the highest points in your system. The thermostat housing, heater core, and radiator neck are typical trapping spots. Here’s the problem: air does not transfer heat the way coolant does. It acts as an insulator, creating hot spots that lead to overheating, warped cylinder heads, or blown head gaskets if left untreated.
Recognizing Air Lock Symptoms in Your Cooling System
Watch for these telltale signs after any cooling system work:
Engine overheating happens quickly even with a full coolant reservoir. The temperature gauge may fluctuate erratically, jumping between normal and hot zones without logic. Your heater delivers lukewarm or cold air at idle, especially when the engine is still warming up.
Gurgling or bubbling sounds from the dashboard or under the hood indicate air moving through the heater core. You might see bubbles in the overflow tank when the engine is warm, though this can also signal a blown head gasket. The coolant level drops after the engine cools, requiring repeated topping off.
If these symptoms persist after bleeding the system, have a mechanic check for a head gasket leak before assuming it’s simply trapped air.
Preparing Your Vehicle Properly
Success starts with proper preparation. Never skip these essential steps.
Wait for a Cold Engine
Never open the radiator or expansion tank cap on a hot engine. Pressures exceed 15 psi and temperatures top 250°F, causing severe burns. Wait 1 to 2 hours after shutdown. Use a thick rag to slowly release pressure before removing the cap.
Elevate the Front End
Park on level ground or, better yet, ramp up the front of your vehicle. Even a slight 3 to 5 degree incline helps air rise toward the radiator or expansion tank where it can escape. This step is critical for Subaru boxer engines and vehicles with rear-mounted thermostats.
Fix Leaks First
Inspect all hoses, clamps, water pump, and radiator for leaks before bleeding. Air will keep entering the system through any leak, making your bleeding efforts pointless. Repair all leaks first.
Essential Tools for Bleeding a Coolant System
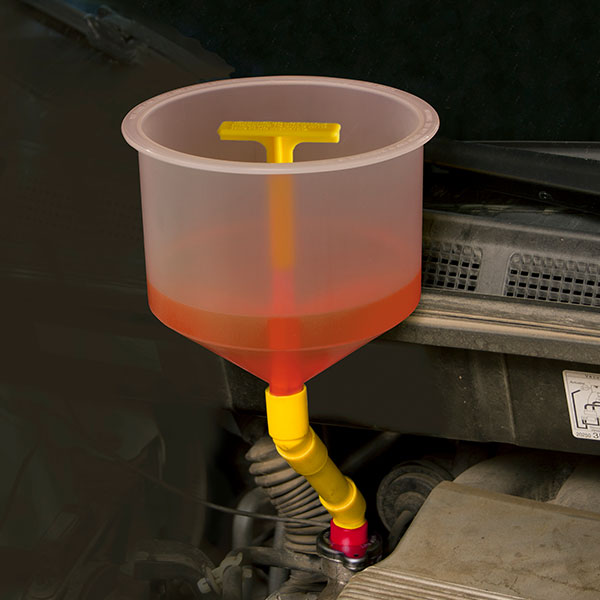
Having the right tools makes bleeding faster, cleaner, and far more effective.
A spill-free funnel attaches to your radiator or expansion tank and acts as an elevated reservoir. It catches air bubbles as they rise and prevents air from re-entering during warm-up. This tool is the single best investment for reliable bleeding. If you need a DIY alternative, cut the top off a plastic water bottle and tape it securely to the filler neck.
Other essentials include the correct coolant type for your vehicle, wrenches for bleed screws, heat-resistant gloves, eye protection, and your owner’s manual for bleed point locations and coolant capacity.
The Best Way to Bleed Your Cooling System
The spill-free funnel method is the gold standard for home mechanics. Follow these steps precisely.
Attach the funnel securely to your radiator or expansion tank. Fill it about one-third full with proper coolant. Start the engine and set the heater to maximum heat with the fan on low. Let the engine idle until it reaches normal operating temperature.
Watch for bubbles rising into the funnel. Gently squeeze the upper radiator hose repeatedly to dislodge trapped air. Keep the funnel topped up as the level drops. Once bubbling stops and both hoses feel equally hot, turn off the engine.
Insert the funnel’s fluid stopper before removal to prevent spillage. Reinstall the radiator cap and let the engine cool completely. Recheck the coolant level after cooldown and top off to the cold mark.
Alternative Methods for Removing Air Pockets
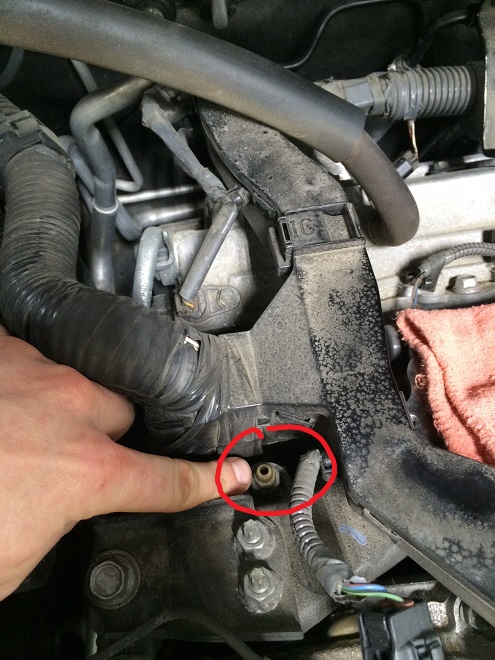
Radiator Cap Off While Running
Remove the cap with the engine cold, then start the engine and set heater to max. Watch for bubbles escaping the filler neck. Top off coolant as the level drops. Continue until flow is steady and bubble-free, then reinstall the cap only after the engine fully warms.
Use Bleed Screws If Equipped
Many European vehicles and some domestic models have bleed screws at high points. Common locations include the thermostat housing, top of engine block, and heater core lines. Place a container under the screw, loosen it a quarter to half turn, and add coolant through the filler neck. Air will escape first, followed by steady coolant flow. Tighten once bubble-free.
Hose Squeezing Method
Remove the radiator cap and fill to the neck. Start the engine and turn heater to max heat. Repeatedly squeeze the upper radiator hose to force air through the system. Squeeze the lower hose occasionally too. Top off as needed until both hoses are equally hot and no bubbles appear.
Vacuum Fill Method
This professional technique draws coolant into the system under vacuum, eliminating nearly all air. Attach a vacuum cooling system filler to the radiator neck. Pull 15 to 20 inHg of vacuum and hold for 2 minutes. If vacuum holds, open the valve to draw coolant from a bucket into the system. Remove the tool, install the cap, and run through a full warm-up cycle.
How to Prevent Air Locks After Future Coolant Services
Prevention beats cure. Try these techniques for future coolant work.
Drill a 1/16 inch hole in the edge of your thermostat flange. This tiny vent allows air to bypass the closed thermostat during warm-up. It doesn’t affect flow once the thermostat opens, and many OEMs use this on hard-to-bleed systems.
Use gravity filling before starting. Disconnect the upper radiator hose and pour coolant directly into it to pre-fill the engine block. Reconnect and fill the radiator slowly with the engine off, then start and continue topping off.
After initial warm-up, briefly rev to 2,500 to 3,000 RPM for 5 to 10 seconds. Repeat 3 to 4 times to dislodge stubborn bubbles. Only do this with a spill-free funnel in place, never with an open radiator.
What to Do After Bleeding the System
Do not assume the job is done after the first warm-up.
Let the engine cool completely, waiting 1 to 2 hours or overnight. Coolant contracts as it cools, so the level will drop. Recheck the coolant level and top off to the cold mark on your overflow tank. Do not overfill because expansion needs space.
Take a normal test drive including city, highway, and hill climbing. Let the engine cool again and recheck the level a second time. Monitor temperature stability, heater performance, and bubbling in the reservoir.
It can take 2 to 3 thermal cycles for all micro-bubbles to fully escape.
Mistakes That Keep Air in Your Coolant System
Avoid these common errors that trap air and cause repeat problems.
Opening the cap on a hot engine causes severe burns from pressurized coolant. Pouring coolant too fast traps air due to turbulence. Skipping heater activation leaves air trapped in the heater core. Revving without a funnel causes coolant surge and spillage. Not rechecking after cooldown leaves you with low coolant once the system contracts.
Vehicle-Specific Air Lock Solutions

Subaru Boxer Engines
These engines are prone to air locks due to their flat layout. Elevate the front of the vehicle, use the throttle body bleed screw, and squeeze the upper hose repeatedly.
European Cars
BMW, Audi, and Mercedes often have multiple bleed screws. Some require a scan tool to activate the water pump or open the thermostat. Check your service manual for specific procedures.
Modern Expansion Tank Systems
Many newer vehicles have no accessible radiator cap. Bleed at the overflow tank and use a spill-free funnel on the tank neck if possible.
How to Know If Your Air Lock Is Gone
Your bleeding worked if the upper and lower radiator hoses are equally hot at operating temperature. The heater should deliver consistent, hot air even at idle. The temperature gauge stays steady in the normal range with no fluctuation. There should be no bubbles in the overflow tank when the engine is warm. The coolant level should stabilize after two full cooldown cycles.
If problems persist, check for a faulty radiator cap, failing water pump, or head gasket leak allowing combustion gases into the coolant.
Frequently Asked Questions About Air Locks in Coolant Systems
Can I drive with an air lock in the cooling system?
Driving with an air lock is not recommended. The trapped air creates hot spots that can warp cylinder heads, damage head gaskets, or crack engine components. Address the issue before driving.
How long does it take to get all the air out of a coolant system?
Most bleeding procedures take 10 to 30 minutes of engine running time. However, it may require 2 to 3 full thermal cycles for all micro-bubbles to fully escape. Be patient and recheck after each cycle.
Does the aspirin trick actually work for air locks?
The aspirin trick involves placing an uncoated aspirin tablet in the thermostat housing to hold it slightly open during warm-up. While some older mechanics recall this from vintage repair days, it is not recommended for modern aluminum-intensive systems due to potential chemical interactions.
Why does my heater blow cold after a coolant flush?
Cold heater air after a coolant flush typically indicates air trapped in the heater core. The heater core is often the highest point in the system, making it a prime location for air pockets. Running the heater to maximum heat and squeezing the upper radiator hose helps push air through the heater core.
Can a bad radiator cap cause air lock symptoms?
Yes. A faulty radiator cap can cause coolant to boil or allow air to be drawn into the system during cooldown cycles. Replace the radiator cap every 3 to 5 years or if the seal shows cracks.
Is vacuum filling better than traditional bleeding methods?
Vacuum filling is the most effective method for complete air removal. It draws coolant into the system under negative pressure, eliminating nearly all air pockets. It also detects hidden leaks by monitoring vacuum hold. This method is used by dealerships and professional shops for major coolant work.
Final Thoughts on Getting Air Out of Your Coolant System
An air lock is a common but solvable problem that every mechanic faces after cooling system service. Whether you use a spill-free funnel, bleed screws, or professional vacuum filling, the key is methodical execution and verification. Elevate the vehicle, run the heater to max heat, monitor for bubbles, squeeze the upper hose to force air out, and recheck the coolant level after full cooldown.
Patience pays off. Rushing through the bleeding process leads to repeat work and potential engine damage. With the right tools and careful attention to detail, you can purge air completely and restore full cooling efficiency, heater performance, and long-term engine reliability.



