
Your engine overheats on the highway, the cabin heater barely blows warm air, and the coolant looks rusty or gritty. These symptoms often point to mineral scale clogging your cooling system. Learning how to clean a radiator with vinegar offers a low-cost home remedy that many DIYers swear by for dissolving calcium and lime deposits left behind by hard water.
This guide walks you through the entire process safely. You’ll learn when vinegar cleaning makes sense, the real risks to aluminum components, exact solution ratios, exposure time limits, and safer alternatives for modern vehicles. By the end, you’ll know whether vinegar belongs in your cooling system or whether you should reach for a different solution entirely.
When Vinegar Cleaning Actually Makes Sense
Telltale Signs Your Radiator Needs a Flush
Your cooling system rarely fails without warning. Watch for these indicators that mineral buildup may be restricting flow:
- Slow engine warm-up or persistent overheating despite a functional thermostat
- Weak or absent cabin heat during cold mornings
- Coolant that looks discolored, sludgy, or gritty when you check the reservoir
- A history of topping off with tap water instead of proper coolant
Vinegar targets mineral scale specifically. It won’t dissolve oil contamination or heavy organic sludge, so if your coolant resembles chocolate milk, the problem runs deeper than vinegar can reach.
Best and Worst Candidates for Vinegar Flushing
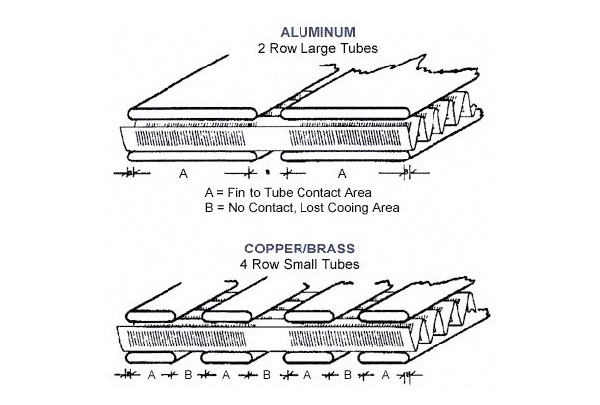
Older vehicles with copper-brass radiators respond best to vinegar flushes because those metals resist acid corrosion far better than aluminum. Systems with partial blockages, especially restricted heater cores, also benefit when flow is reduced but not eliminated.
Modern aluminum radiators tell a different story. The thin metal walls designed for maximum heat transfer also make them highly vulnerable to acid attack. If your car was built after the 1980s and has high mileage, the corrosion risk typically outweighs any cleaning benefit.
Critical Risks of Putting Vinegar in Your Radiator

Aluminum Corrosion: The Hidden Danger
Modern radiators, engine blocks, and cylinder heads rely on thin aluminum for efficient heat transfer. When acetic acid contacts aluminum, it forms water-soluble salts that simply wash away, exposing fresh metal to continued attack. This cycle doesn’t stop when you drain the vinegar.
The consequences appear weeks or months later: thinning radiator walls, deep pitting in engine components, and leaks at the soft metal welsh plugs (core plugs) sealing the engine block. Once this damage begins, repair often requires full engine disassembly.
Gasket Degradation and Stop Leak Complications
Rubber hoses, thermostat gaskets, and water pump seals all suffer when exposed to acidic solutions. Vinegar is milder than commercial flushes, yet prolonged contact still breaks down these elastomers, especially in older engines with already-weakened components.
Stop leak additives create an even bigger problem. If you’ve previously used these products to seal minor leaks, vinegar dissolves the temporary patch. The original leak returns immediately after flushing, sometimes worse than before. Many shops refuse to flush such engines due to liability concerns.
Toxic Gas Warnings You Must Heed
Never mix vinegar with bleach or any chlorine-based cleaner. Even trace chlorine from tap water can react with acetic acid to produce chlorine gas, a dangerous lung irritant. Always flush thoroughly with clean water before introducing vinegar, and ensure no bleach residue remains in the system.
Preparing the Right Vinegar Solution
Mix Ratios That Minimize Risk
A 50/50 blend of white vinegar and distilled water offers the safest starting point. Straight vinegar increases corrosion risk dramatically and should only be used in extreme cases on acid-resistant copper systems.
Distilled water matters more than most people realize. Tap water introduces chlorine and dissolved minerals that accelerate corrosion and create new scale deposits. The myth that distilled water is “ionically hungry” or corrosive is marketing fiction designed to sell additives. Mechanics universally agree that distilled water prevents mineral buildup without harming components.
Step-by-Step Vinegar Cleaning Procedure
Drain the Old Coolant Completely
Start with a fully cooled engine. Opening a hot radiator causes severe burns from pressurized steam and boiling coolant.
- Position a catch pan beneath the radiator and engine block
- Open the radiator drain valve if your vehicle has one
- Remove the lower radiator hose or engine block drain plug to evacuate every drop
- Inspect the drained coolant for sludge, oil contamination, or metal flakes
If the old coolant looks thick or oily, vinegar won’t solve the underlying problem. Investigate potential head gasket failure instead.
Fill the System with Vinegar Solution
Pour your prepared 50/50 vinegar and distilled water mix into the radiator until the system fills completely. Top off the overflow reservoir to the indicated mark. Confirm the heater control is set to maximum heat so coolant circulates through the heater core.
Soak Versus Circulate: Choosing Your Method
Two approaches work for cleaning a radiator with vinegar, each with different risk profiles:
- Cold soak (1–4 hours): Lower risk, suitable for mild scale in copper radiators
- Hot circulation (15–45 minutes): Higher risk, better for stubborn deposits in heater cores
Never run the engine with vinegar for more than 30 to 45 minutes. Heat dramatically accelerates aluminum corrosion, and extended exposure can thin radiator cores in as little as one hour.
Circulating the Solution Safely
If you choose the circulation method, start the engine and let it reach normal operating temperature. The thermostat will open, allowing the vinegar solution to flow through the entire cooling system. Shut the engine off immediately once it reaches temperature, then allow it to cool completely before draining.
Flushing Out Every Trace of Vinegar
Rinse Multiple Times Until Water Runs Clear
Residual vinegar continues attacking metal even after you think you’ve removed it. Complete rinsing requires multiple cycles:
- Drain the vinegar solution fully
- Refill with clean distilled water
- Run the engine to operating temperature, then cool and drain
- Repeat this process 3 to 4 times until the outflow water shows no vinegar smell and runs completely clear
Cloudy or acidic-smelling drainage means vinegar remains in the system. Keep flushing until the water comes out neutral.
Neutralize Remaining Acidity with Baking Soda
Adding a baking soda flush provides extra protection against leftover acid. Mix one tablespoon of sodium bicarbonate per gallon of distilled water, fill the system, and run the engine for 10 minutes. Drain and rinse again with plain distilled water.
This neutralization step prevents residual acid from attacking metal after you refill with proper coolant. Don’t leave the baking soda mixture in the system long-term, since sodium can cause its own corrosion issues if not fully removed.
Refilling with Proper Coolant
Use the Correct 50/50 Mix
Refill your system with manufacturer-specified coolant. Most vehicles use a 50/50 premixed formula or a concentrate blended with distilled water. Never use tap water for the final fill, since chlorine and minerals neutralize the corrosion inhibitors in modern coolant.
Bleed all air from the system after refilling. Many vehicles have dedicated bleed valves, while others require running the engine with the radiator cap off until the thermostat opens and bubbles stop rising. Air pockets create hot spots that cause localized overheating and inaccurate temperature readings.
Safer Alternatives for Aluminum Cooling Systems

Water-Only Flushing: The Mechanic’s Favorite
Professional mechanics consistently recommend distilled water flushes for aluminum systems. This method removes loose debris without any corrosion risk.
The process mirrors vinegar flushing: drain old coolant, fill with distilled water, run to operating temperature, cool, and drain. Repeat 3 to 4 times until drainage runs clear, then refill with proper coolant. Water alone won’t dissolve bonded scale, but it clears most contamination safely.
Citric Acid for Stubborn Rust Deposits
Citric acid chelates iron oxide and mineral scale with less aggressive action on aluminum than vinegar. Mix one ounce per gallon of distilled water and circulate for no more than 30 minutes at operating temperature. Flush thoroughly afterward.
This approach works best on rust-heavy systems rather than lime scale. Like vinegar, citric acid still requires strict time limits to prevent metal damage.
The Dishwasher Pod Method
Some DIYers report success dropping a single dishwasher pod into the radiator, running the engine until warm, then flushing twice. The enzymes and surfactants break down organic deposits without excessive foaming, and the alkaline formula poses less risk to aluminum than acidic cleaners.
This method remains untested for long-term compatibility, so use it cautiously and flush thoroughly afterward.
When to Skip Vinegar Entirely
High-Risk Scenarios That Demand Alternatives
Certain conditions make vinegar flushing too dangerous to attempt:
- Aluminum radiators in vehicles built after 1980
- High-mileage engines with aging gaskets and seals
- Previous use of stop leak additives
- Complete flow blockage indicating severe internal damage
- Visible corrosion or rot in any cooling system component
If your radiator is already failing, vinegar can accelerate the collapse. Replacement often makes more sense than cleaning in these situations.
Heater Core Cleaning: Vinegar’s Best Application
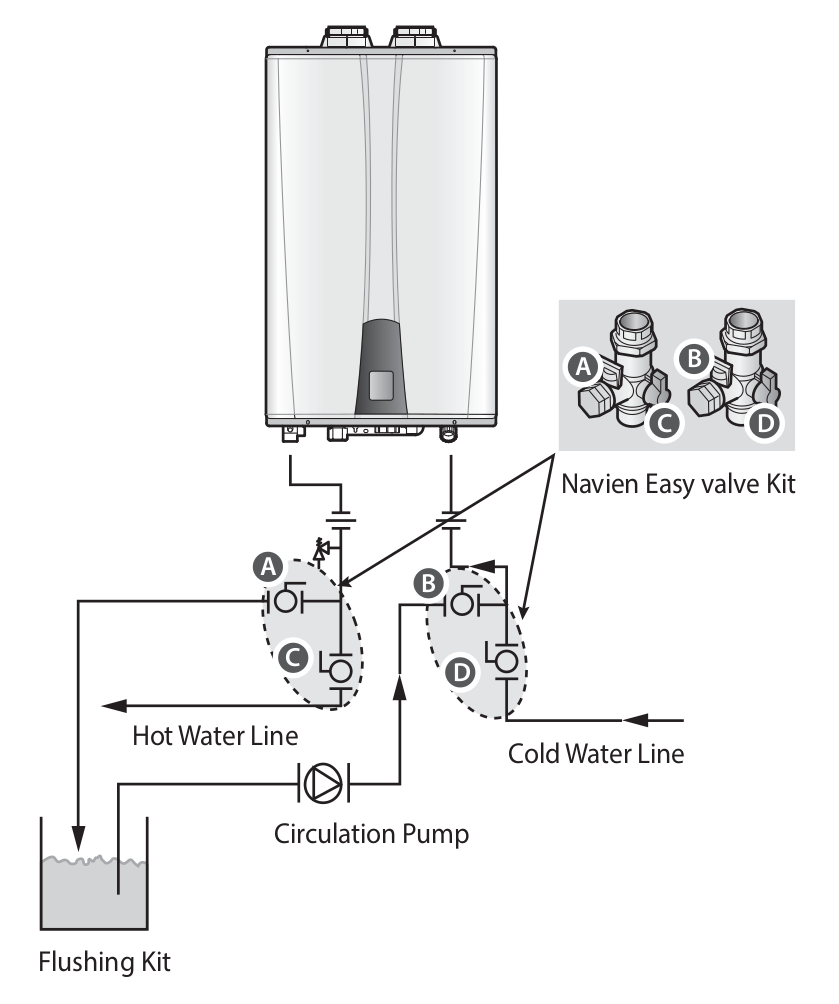
Heater cores contain tiny tubes with internal turbulators that clog easily. Vinegar excels here when you isolate the core from the rest of the system.
Disconnect both heater hoses and circulate vinegar only through the heater core using a hand pump or external bucket. Flush in both directions until the outflow runs clear, then reconnect and refill the system normally. This approach contains the acid to a single component and dramatically reduces overall corrosion risk.
Verifying Success After the Flush
System Integrity Checks
After completing any flushing procedure, confirm everything works correctly:
- Bleed all air pockets to prevent hot spots
- Verify the thermostat opens at its rated temperature
- Inspect every connection for leaks, especially at older gaskets
- Test heater output, full warmth should arrive within 5 to 10 minutes
If cabin heat remains weak after flushing, the heater core may be too severely clogged for chemical cleaning. Replacement becomes the only viable option.
Preventing Future Radiator Problems
Long-Term Maintenance Habits
The best flush is the one you never need. Adopt these practices to keep your cooling system clean:
- Always use a 50/50 coolant mix blended with distilled water
- Never top off with tap water, even in emergencies
- Inspect coolant color every 6 months, bright fluid indicates a healthy system
- Replace coolant according to manufacturer schedules, typically every 5 to 10 years
Modern coolants contain corrosion inhibitors that tap water neutralizes. Protecting these additives prevents the scale buildup that makes vinegar flushing necessary in the first place.
Frequently Asked Questions About Cleaning a Radiator with Vinegar
Can vinegar damage my car’s aluminum radiator?
Yes, vinegar can seriously damage aluminum radiators. Acetic acid reacts with aluminum to form water-soluble salts that wash away, exposing fresh metal to continued corrosion. This process thins radiator walls and can cause leaks within weeks or months. The risk increases significantly with longer exposure times and higher temperatures.
How long should I leave vinegar in my radiator?
Limit vinegar exposure to 30 to 45 minutes when circulating at operating temperature, or up to 4 hours for a cold soak. Never leave vinegar in the system overnight, especially in aluminum components. Extended exposure dramatically increases corrosion risk and can destroy welsh plugs and thin radiator cores in as little as one hour.
Is white vinegar or apple cider vinegar better for radiator cleaning?
White vinegar is the only acceptable choice. Apple cider vinegar contains sugars and organic compounds that can promote bacterial growth and leave residue in the cooling system. Use plain white vinegar with 5% acetic acid concentration for predictable results.
Can I clean a clogged heater core with vinegar?
Yes, vinegar works well for heater cores when you isolate them from the rest of the cooling system. Disconnect both heater hoses and circulate vinegar through the core only using an external pump. This contains the acid to a single component and prevents damage to the engine block and radiator. Flush thoroughly in both directions before reconnecting.
What should I do if my coolant looks like oil?
Oil-contaminated coolant indicates a failing head gasket or cracked engine component. Vinegar cannot fix this problem. Stop driving the vehicle and have a mechanic perform a compression test and inspect the cooling system for internal leaks. Continuing to drive risks severe engine damage.
Are commercial radiator flushes safer than vinegar?
Commercial flushes like Prestone, Gunk, and Bar’s Leaks are specifically formulated for automotive cooling systems. They maintain proper pH balance and include corrosion inhibitors that protect seals and gaskets. For modern aluminum systems, professional mechanics generally consider these products safer than household vinegar.
Final Verdict on Cleaning a Radiator with Vinegar

Cleaning a radiator with vinegar delivers real results in the right situations. Older vehicles with copper-brass radiators and mild mineral scale respond well to a controlled 50/50 vinegar and distilled water flush. The method costs almost nothing and effectively dissolves calcium deposits that restrict flow.
Modern aluminum systems tell a different story. The corrosion risk is genuine and well-documented by chemical engineers. For vehicles built after 1980, mechanics consistently recommend water-only flushing or commercial products designed for aluminum compatibility.
If you decide to proceed with vinegar, follow every precaution strictly. Use the 50/50 ratio, never exceed 30 to 45 minutes of heated circulation, flush thoroughly multiple times, and refill with proper coolant. When in doubt, isolate the cleaning to the heater core only and protect the rest of your cooling system from acid exposure.
Your safest next step: assess your radiator type before anything else. Copper-brass systems can handle vinegar with reasonable confidence. Aluminum systems deserve a water-only flush or a commercial cleaner instead.



