
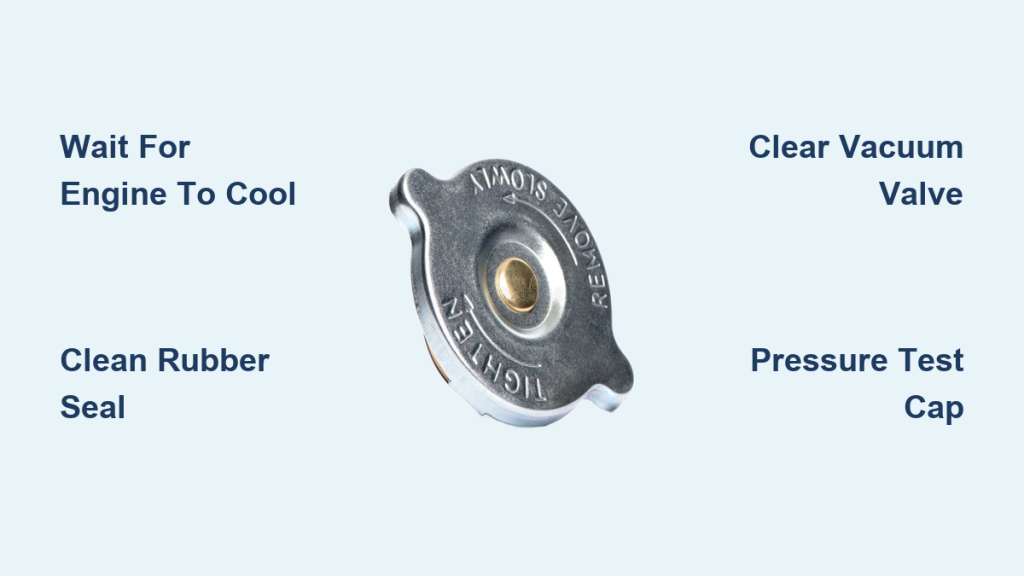
A dirty radiator cap is one of the most overlooked causes of cooling system problems. Tiny particles of grit, oil residue, or old coolant deposits can prevent the seal from holding pressure, mimicking the symptoms of a broken cap. Learning how to clean a radiator cap properly can save you from unnecessary replacement costs and prevent misdiagnosis of cooling issues like coolant loss or overheating.
This guide breaks down the entire process using professional repair protocols. You will discover how to safely remove the cap, clean every critical sealing surface, and pressure test the cap to confirm it still works. By the end, you will know exactly when to clean, when to test, and when to replace.
Critical Safety Precautions Before You Start
Never Open a Hot Cooling System
The cooling system operates under pressure and reaches extremely high temperatures while running. Removing the cap on a warm engine can release scalding steam and boiling coolant.
- Wait until the engine is completely cool, ideally overnight.
- Press the upper radiator hose gently to confirm it feels soft, not pressurized.
- Wear safety glasses and work in a ventilated area.
Skipping this step can cause severe burns. Safety always comes first.
Why Radiator Cap Hygiene Matters
Debris Causes False Failures
The seal between the cap and the filler neck must be completely clean. Any grit or debris in this zone becomes embedded in the rubber the moment you tighten the cap.
- Embedded particles prevent the cap from sealing properly.
- A dirty cap often fails pressure tests even when the spring is fine.
- Cleaning rules out contamination before you spend money on a replacement.
This is why every cooling system service should include cap and filler neck cleaning as a standard step.
Inspect the Cap Before Cleaning
Look for Structural Damage First
Before washing anything, check the cap for signs of physical wear. Cleaning will not fix a cap that is already structurally compromised.
- Examine the rubber gasket for cracks, swelling, or hardening.
- Check the handle and housing for warping or fractures.
- Replace the cap immediately if the rubber feels brittle or torn.
Even if the cap looks fine, always clean it whenever the cooling system is opened.
Clean the Rubber Seal Surfaces

Wash With Water and a Soft Brush
The main sealing edge must be spotless to hold system pressure. Use only gentle tools to avoid damaging the rubber.
- Turn the cap over to access the rubber gasket.
- Scrub all rubber surfaces with clean water and a soft bristle brush.
- Focus on the main sealing edge and any secondary seals.
- Avoid solvents, degreasers, or abrasive pads that degrade rubber.
Rinse thoroughly and dry with a lint-free cloth. Never use paper towels or shop rags, as they leave fibers that interfere with sealing.
Clean the Negative Pressure Valve
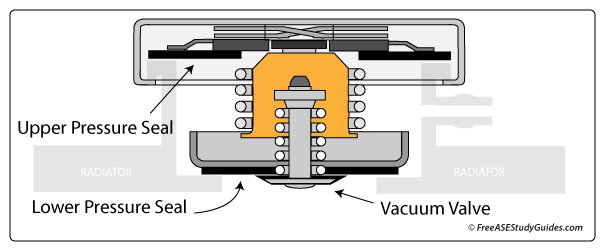
Clear the Vacuum Valve Mating Surface
The radiator cap contains two valves: a high-pressure relief valve and a vacuum valve. The vacuum valve opens as the engine cools, allowing coolant to return from the overflow tank.
- Gently pry open the lower valve to access the seat.
- Use the soft brush and water to clean the valve seat and mating surface.
- Flush thoroughly and confirm the valve moves freely afterward.
Microscopic debris in this area is enough to prevent proper sealing. Many technicians skip this step, which leads to misdiagnosis of a perfectly good cap.
Clean the Radiator Filler Neck
Wipe the Sealing Surface Clean
A clean cap cannot seal against a dirty filler neck. Both surfaces must be contaminant-free.
- Shine a flashlight into the neck to inspect the sealing surface.
- Wrap a damp microfiber cloth around your finger and wipe the rim.
- For stubborn buildup, lightly scrub with a soft brush and water.
- Dry the surface with a lint-free cloth before reinstalling.
Do not use metal scrapers or wire brushes. Scratching the sealing surface creates a permanent leak point.
Pressure Test the Cap After Cleaning
Verify Functionality With a Cap Tester
Cleaning alone does not prove the cap works. You must confirm it still holds the rated pressure.
- Attach a radiator cap tester to the filler neck or test fixture.
- Pump to the pressure rating printed on the cap (typically 13 to 18 psi).
- Hold pressure for 30 to 60 seconds and watch for drops.
If pressure holds steady, the cap is reusable. If it drops or hisses below the rated value, replace the cap.
Know When Replacement Is Necessary
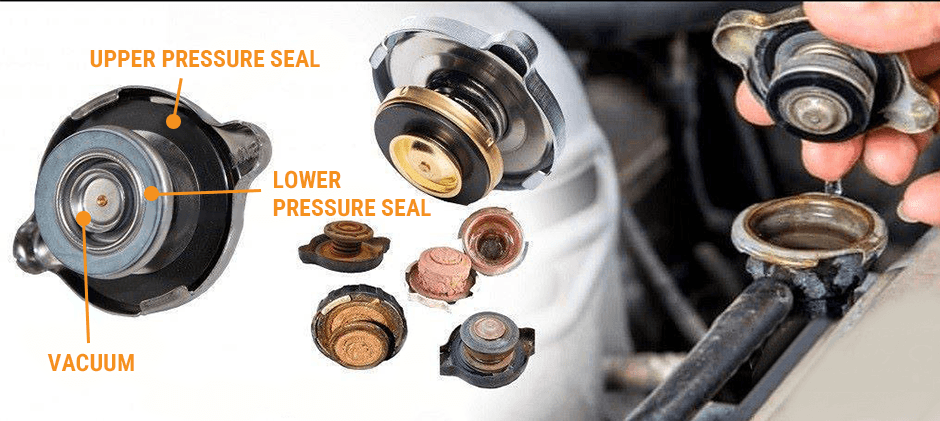
Replace After Overheating Events
Even a clean, passing cap may not be safe if the vehicle has a history of overheating. Extreme heat degrades rubber compounds internally, and this damage is not always visible.
- Replace the cap if the vehicle has overheated previously.
- Replace if the rubber shows swelling, softening, or brittleness.
- Replace if the spring feels weak or fails to retract.
- Replace if the cap fails the pressure test after cleaning.
When performing a coolant flush or major cooling service, a new cap is cheap insurance against future failure.
Prevent Future Cooling System Issues
Make Cleaning a Standard Practice
Incorporate cap and filler neck cleaning into every cooling system service. This habit prevents false diagnostics and extends component life.
- Clean both surfaces whenever the system is opened.
- Verify the cap pressure rating matches your vehicle’s specification.
- Use the exact rating listed in your service manual.
Installing the wrong pressure rating can cause early boiling or stress hoses and the radiator.
Avoid Common Cleaning Mistakes
Skip Cleaning and Replace Unnecessarily
The most frequent error is replacing a functional cap without cleaning it first. Debris on the seal mimics a failed spring and leads to wasted money.
Ignore the Vacuum Valve
Many people clean only the main seal and overlook the negative pressure valve. This small component is essential for coolant return and vacuum control.
Reuse a Heat-Damaged Cap
Reusing a cap after severe overheating risks future failure. Heat damage compromises rubber integrity even when the cap passes a pressure test today.
Final Checklist
Confirm each step before finishing the job:
- Engine is completely cool.
- Cap removed safely.
- Rubber seals cleaned with water and soft brush.
- Negative pressure valve inspected and cleaned.
- Filler neck sealing surface wiped clean.
- Cap reinstalled and system refilled with proper coolant mix.
- Pressure tested if possible.
- No leaks observed after the engine reaches operating temperature.
Frequently Asked Questions About Cleaning a Radiator Cap
Can a dirty radiator cap cause overheating?
Yes. Debris on the seal prevents the cap from holding pressure, which lowers the boiling point of the coolant and leads to overheating or coolant loss.
How often should I clean my radiator cap?
Clean the cap and filler neck every time the cooling system is opened for service. This includes coolant flushes, thermostat replacements, or radiator repairs.
What tools do I need to clean a radiator cap?
You only need clean water, a soft bristle brush, a lint-free cloth, and a flashlight. A radiator cap tester is optional but recommended for verification.
Is it safe to reuse a radiator cap after cleaning?
Yes, if the cap passes a pressure test after cleaning and shows no signs of rubber damage or heat degradation. Replace it if it fails the test or if the vehicle has overheated.
Can I use soap or degreaser on the rubber seal?
No. Harsh chemicals can degrade rubber compounds. Use only clean water and a soft brush to avoid damaging the sealing surfaces.
What pressure rating should my radiator cap have?
Check the rating printed on your old cap or consult your vehicle’s service manual. Using the wrong rating can cause cooling system failure or component damage.
Key Takeaways for Cleaning Your Radiator Cap Safely
Learning how to clean a radiator cap is a simple maintenance task that prevents misdiagnosis and protects your engine. Always let the engine cool completely, clean every sealing surface with water and a soft brush, and pressure test the cap before reusing it. When in doubt, especially after an overheating event, replace the cap. A small investment in a new cap can save you from costly engine repairs down the road.



