
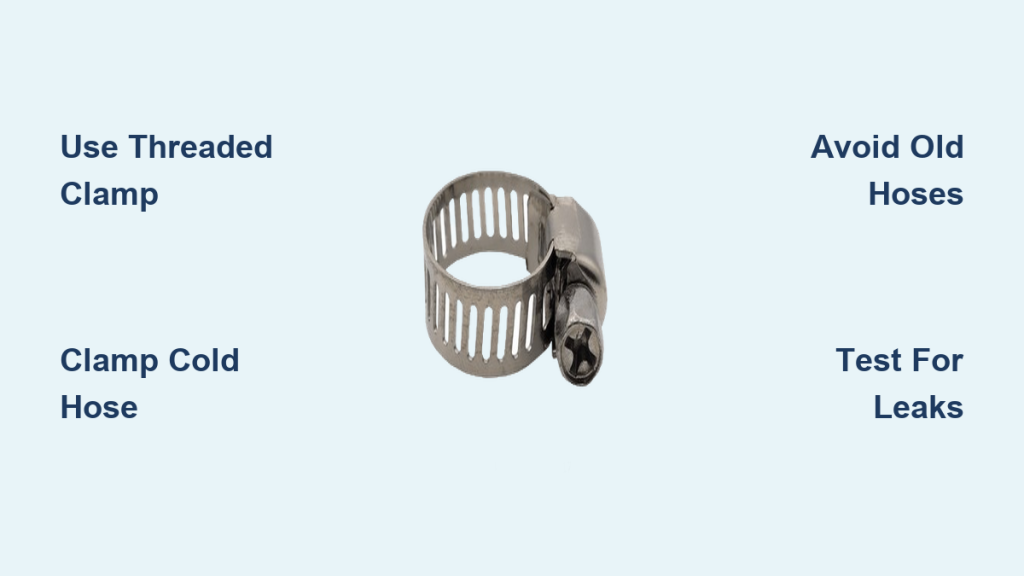
If you’ve ever tried replacing a thermostat or radiator, you know the mess a leaking coolant hose can create. Clamping off a coolant hose is the smart way to stop coolant flow without draining the entire system. This method saves time, reduces waste, and keeps your workspace clean, especially in tight engine bays or when working on luxury vehicles. In this guide, you’ll learn the best tools, techniques, and safety steps to clamp coolant hoses effectively.
But not all clamps work the same. Using the wrong tool can lead to leaks, hose damage, or even injury. The key is choosing the right coolant hose clamp tool for your vehicle’s layout and hose condition. From threaded pinch clamps to vice-grip styles, we’ll walk you through what works and what to avoid.
Choose the Right Clamping Tool

Selecting the correct tool ensures a secure seal and prevents coolant spillage. Different designs offer varying levels of control, access, and safety.
Threaded Coolant Hose Clamps
These clamps use a rotating knob to gradually compress the hose shut. As you turn the knob, the jaws close with increasing pressure, fully pinching the hose.
- Best for: Upper radiator hoses, heater lines near the firewall
- Why it works: Provides a leak-proof seal with no risk of accidental release
- Tip: Ideal when you need hands-free operation during disassembly
Use on straight hose sections only. Avoid clamping near bends where compression may be uneven.
Vice-Grip Flexible-Jaw Clamps
This style combines a locking plier mechanism with a curved, flexible jaw that conforms to tight spaces.
- Best for: Bottom radiator hoses, rear heater lines under dash
- Why it works: Locks in place securely and fits where other tools cannot
- Pro Tip: Applies instant closure. Just squeeze and lock.
Engineers favor this design for low-clearance areas because it will not slip, even under vibration.
Plier-Style Pinch Tools
These resemble locking pliers with flat jaws that crush the hose flat when clamped.
- Brands: Snap-on, Craftsman, OTC
- Best for: Quick jobs on accessible hoses
- Caution: Can deform or damage older rubber hoses if over-tightened
Test on a spare hose first if your hoses are more than 5 years old.
Soft-Jaw Crimpers for Sensitive Lines
Equipped with rubber or plastic caps over metal jaws, these protect hose exteriors.
- Best for: Silicone-reinforced or high-mileage hoses
- Note: Not ideal for thick-walled coolant lines but useful when preserving hose integrity is critical
Step-by-Step: How to Clamp a Coolant Hose
Follow these steps to safely isolate coolant flow before beginning any repair.
Cool the Engine Before Starting
Never clamp a hot hose. A pressurized cooling system can burst open when disturbed, spraying scalding coolant.
- Wait at least 2 to 3 hours after shutdown
- Confirm the radiator cap is cool to touch
- Relieve pressure by slowly opening the cap with a rag if needed
Warning: Working on a hot engine risks severe burns and tool slippage.
Locate the Correct Hose Section
Target a straight, flexible segment of hose. Never clamp near a bend, connector, or reinforced area.
- Common targets: Upper heater hose to thermostat housing, lower radiator inlet
- Avoid wire-braided or crimped sections. They resist compression.
Look for smooth, pliable rubber. Brittle or cracked hoses should be replaced, not clamped.
Apply the Clamp Securely
Position the tool so the jaws fully engage the hose diameter.
- Open the clamp jaws and place them around the hose
- Tighten or lock until the hose is completely flattened
- Verify no coolant seeps through
Check: Gently tug the disconnected end. If no fluid drips, your seal is solid.
Use Two Clamps for Major Repairs
When removing components like the water pump or thermostat, block both inlet and outlet paths.
- Example: Threaded clamp on top heater hose plus vice-grip on bypass line
- Prevents backflow from unexpected directions
Bidirectional systems, common in German cars, often route coolant through multiple loops.
Prevent Hose Damage During Clamping
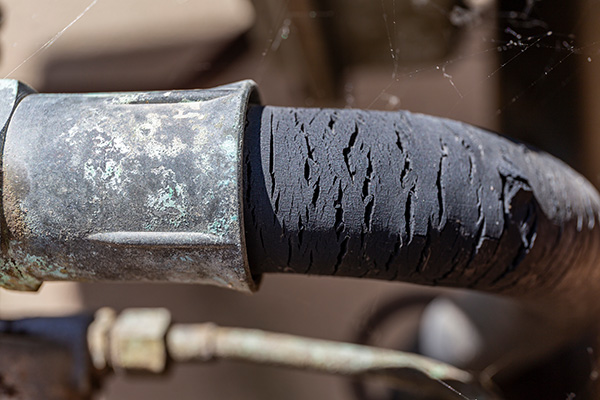
Even the best tools can ruin a hose if used incorrectly. Protect your investment with these precautions.
Inspect Hoses First
Old hoses lose elasticity and crack under pressure.
- Squeeze the hose. It should feel firm but slightly soft
- Look for cracks, bulges, or mushy spots
- Replace any suspect hose before clamping
A ten-dollar hose failure can lead to a five-hundred-dollar overheating incident.
Avoid Over-Tightening
Crushing a hose too hard creates internal liner collapse, visible only after reassembly.
- Stop tightening once flow stops
- If using a threaded clamp, one full turn past closure is enough
Internal damage may not leak immediately but causes slow restrictions or bursts later.
Do Not Reuse Pinched Sections
The compressed area weakens over time.
- Mark clamped zones with tape during repair
- Cut out and replace that section during reassembly if possible
- Or rotate the hose slightly so the pinch point is not reused
When Not to Clamp: Alternatives and Warnings
Clamping is not always safe or effective. Know when to switch strategies.
Old or Brittle Hoses
Pinching aged rubber risks splitting the hose wall.
- Alternative: Drain coolant into a catch pan
- Place a 5-gallon bucket under the radiator petcock
- Open slowly and let fluid drain before disconnecting hoses
Yes, it takes longer, but better than a surprise geyser mid-repair.
No Clearance for Tools
Some engines, like transverse V6s, hide hoses deep behind brackets.
- Alternative: Remove nearby components for access
- Or drain system partially instead of full flush
Sometimes 10 extra minutes of prep saves 30 minutes of cleanup.
Risk of Accidental Release
Cheap lever-release clamps can pop open if bumped.
- Avoid: Older original design clamps with slippery levers
- Use instead: Threaded or mechanically locked types
One accidental release can dump half your coolant onto the exhaust manifold.
Real-World Repair Applications
See how professionals apply clamping in common scenarios.
Replace a Thermostat Without Draining
- Let engine cool overnight
- Clamp the upper heater hose at the thermostat housing
- Remove housing bolts and extract old thermostat
- Install new gasket and unit
- Reconnect and slowly release clamp
Done right, you will lose less than a cup of coolant.
Swap a Radiator Efficiently
- Cool engine and depressurize
- Use vice-grip clamp on lower radiator hose for tight space
- Apply threaded clamp to upper hose if accessible
- Open petcock to drain residual fluid into pan
- Disconnect hoses and remove radiator
Clamping cuts refill time and prevents air pockets during bleeding.
Tool Recommendations by Use Case
| Scenario | Best Clamp Type | Why It Wins |
|---|---|---|
| Open engine bay like truck V8 | Threaded clamp | Secure, drip-free, no release risk |
| Tight space like FWD sedan | Vice-grip flexible-jaw | Fits where others will not |
| Fast job, good hoses | Plier-style Snap-on | Quick deploy, strong grip |
| High-mileage vehicle | Soft-jaw crimper | Minimizes outer damage |
| European car Mercedes BMW | Combo threaded plus vice-grip | Handles complex routing |
Pro Tip: Keep both threaded and flexible-jaw clamps in your kit. One size does not fit all.
Final Tips for Success
Clamping off a coolant hose is not just about stopping flow. It is about doing it safely and cleanly.
Always Work Cold
Repeating this for emphasis: never clamp a hot hose. Thermal expansion increases internal pressure, raising the risk of rupture.
Test Before You Trust
After clamping, slightly loosen the connection to test for drips.
- If fluid escapes, reposition or tighten the clamp
- Ensure full collapse across the entire hose diameter
Clean Up Spills Immediately
Even small coolant leaks are toxic to pets and damaging to surfaces.
- Use absorbent pads or kitty litter
- Store used coolant separately for proper disposal
Refill and Bleed Properly
After repair, refill slowly to avoid airlocks.
- Open bleed screws if equipped
- Run engine with heater on high to circulate fluid
- Top off reservoir once system stabilizes
Frequently Asked Questions About Clamping Off a Coolant Hose
What is the best tool to clamp off a coolant hose?
Threaded clamp tools provide the most secure, drip-free seal with no risk of accidental release. Vice-grip flexible-jaw clamps are best for tight spaces where you cannot turn a threaded knob.
Can clamping a coolant hose damage the hose?
Yes, any pinch tool can cause internal damage, especially on old or brittle hoses. The compressed area weakens over time, so mark and replace that section during reassembly if possible.
How long should I wait before clamping a coolant hose?
Wait at least 2 to 3 hours after the engine has shut down. Always confirm the radiator cap is cool to touch before working on any cooling system component.
Can I use regular pliers to clamp a coolant hose?
Regular pliers are not recommended. They apply uneven pressure and can crack or split the hose. Use dedicated coolant hose clamp tools like threaded clamps, vice-grip style clamps, or plier-style pinch tools designed for this purpose.
Should I clamp both sides when replacing a thermostat?
Yes, for major repairs, clamp both inlet and outlet paths. This prevents backflow from unexpected directions and keeps coolant from leaking during the repair process.
What if I cannot fit a clamp in my engine bay?
If there is no clearance for tools, remove nearby components for access, or resort to draining the coolant into a catch pan instead. Sometimes 10 extra minutes of prep saves 30 minutes of cleanup.
Key Takeaways for Clamping Coolant Hoses
Clamping off a coolant hose is a simple step that makes complex repairs manageable. With the right coolant hose clamp tool, especially a threaded or vice-grip style, you can avoid messy drains, reduce waste, and complete jobs faster. Always inspect hoses before clamping, work on a cool engine, and never force a clamp onto compromised rubber.
The best approach combines tool types based on your specific vehicle and repair scenario. Use threaded clamps where you have access to turn the knob, and vice-grip style clamps in tight spaces. Keep both in your toolkit to handle any cooling system repair efficiently.
By following these guidelines, you will protect your vehicle, your workspace, and your safety every time you open the hood.



