

Your engine relies on proper coolant levels to prevent overheating, corrosion, and costly damage. But figuring out exactly how far to fill coolant isn’t always straightforward, especially when reservoir labels like “Full” can be misleading depending on whether your engine is hot or cold. Overfilling when cold or opening a hot system can lead to dangerous pressure release, spills, or environmental hazards. This guide walks you through exactly how much coolant to add, where to pour it, and when based on your engine’s temperature and vehicle design. You’ll learn to interpret confusing reservoir markings, avoid common mistakes, and maintain optimal coolant levels for long-term engine health.
Radiator vs. Reservoir Fill Points
Fill the Radiator When Accessible
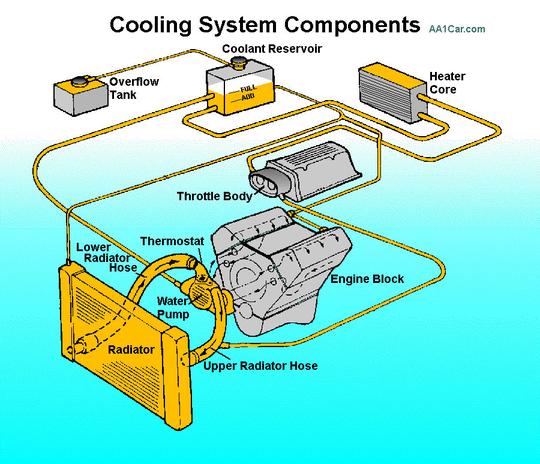
Some vehicles have a radiator cap that allows you to fill coolant directly into the radiator neck when the engine is cold. In these cases, fill coolant until it reaches just below the base of the filler neck. Never fill to the very top, as this leaves room for thermal expansion. After filling, squeeze the upper radiator hose several times to release trapped air, a process called “burping” the system.
Use the Overflow Reservoir on Sealed Systems
Most modern cars use a closed cooling system with no accessible radiator cap. On these vehicles, you must add coolant only to the overflow (expansion) reservoir, a translucent plastic tank usually located near the radiator. Never attempt to remove the radiator cap on sealed systems unless your service manual specifically instructs you to do so.
Pro Tip: If you’re unsure where to add coolant, consult your owner’s manual. It clearly identifies the correct fill point for your specific make, model, and year.
Cold Engine: Fill to Cold Mark
.png)
Check Level Before Starting
Always inspect and refill coolant when the engine has been off for at least 30 minutes, preferably longer. When cold, coolant contracts, so levels appear lower than when the engine is at operating temperature. On the overflow reservoir, look for specific markings that indicate the correct cold fill level.
On the overflow reservoir, you may see:
– “COLD” mark → fill coolant to this line
– “Low” and “Full” only → fill to “Full” (this is the cold-fill target despite the label)
Warning: Never open the radiator or reservoir cap on a hot engine. Pressure buildup can cause scalding steam or hot coolant to erupt, causing serious burns.
Why “Full” Can Be Misleading
Many drivers assume “Full” means always fill to that line, but this is incorrect when the engine is cold. Filling to “Full” when cold may push the level above capacity when hot, causing overflow and potential environmental contamination from toxic coolant.
Golden Rule: When cold, fill to the lower end of the “Full” range if no “Cold” mark exists. This accounts for thermal expansion when the engine heats up.
Hot Engine: Never Open, Just Observe
Let It Cool First
Never attempt to open any coolant cap when the engine is hot. Wait 30 to 60 minutes after shutdown before checking or filling. If you must check the level while warm, only observe the reservoir level through the translucent plastic. Do not remove the cap.
Read the Hot Indicator Line
Once the engine reaches operating temperature, coolant expands and flows into the reservoir. The level should rise to the “HOT” or “Full” mark. If the level is below “Low” when the engine is hot, there may be a leak, airlock, or insufficient system volume.
Visual Cue: On most reservoirs, the “HOT” mark sits higher than the “COLD” mark, reflecting the thermal expansion of coolant when heated.
Correct Fill Levels by Component
Radiator Fill Level
| Condition | Fill Level |
|---|---|
| Cold Engine | Just below filler neck rim |
| Hot Engine | Do not open |
For the radiator, pour coolant slowly into the neck. Squeeze the upper radiator hose to burp air. Recheck the level after the engine cools following operation.
Common Mistake: Overfilling the radiator causes excess pressure and coolant ejection through the overflow tube.
Overflow Reservoir Fill Levels
| Label Type | Cold Engine | Hot Engine |
|---|---|---|
| “COLD” / “HOT” | Fill to COLD | Should reach HOT |
| “Low” / “Full” | Fill to Full | Should be near Full, not above |
The reservoir is designed to hold excess coolant during expansion. It should never be filled to the brim when cold.
Expert Note: Always account for thermal expansion. Underfill slightly when cold and top off after the engine reaches operating temperature.
Step-by-Step Coolant Fill Procedure
1. Confirm Engine Is Cold
Wait at least 30 minutes after turning off the engine. Test by touching the hood or upper radiator hose. If either feels warm, wait longer.
2. Locate the Fill Point
Look for a radiator cap on or near the radiator. If none exists, use the overflow reservoir with level markings etched on the side.
3. Prepare the Correct Coolant Mix
Use pre-mixed 50/50 coolant or mix concentrate with distilled water at a 50:50 ratio. Avoid tap water, as minerals can cause scaling and corrosion inside the cooling system.
Pro Tip: Use the coolant type specified in your owner’s manual, such as OAT, HOAT, or IAT. Mixing incompatible types can cause gel formation and blockages.
4. Remove Cap Safely
Place a thick rag over the cap. Turn counterclockwise slowly and listen for hissing. If pressure is detected, stop and wait longer.
Emergency Stop: If coolant sprays or bubbles out, close the cap immediately and wait 15 or more additional minutes.
5. Add Coolant to Proper Level
For the radiator, fill to just below the neck. For the reservoir, add to “COLD” or “Full” if designated for cold fills. While adding, squeeze the upper radiator hose repeatedly to release trapped air. Repeat until no bubbles are felt.
6. Secure the Cap
Twist clockwise until fully tight. Inspect the rubber seal and replace it if cracked or swollen.
7. Run Engine and Recheck
Start the engine and let it run 5 to 10 minutes until the thermostat opens. Monitor the temperature gauge. It should stay in the normal range. Shut off and let cool completely, then recheck the level and top off if needed.
Airlock Warning: If the engine overheats shortly after refilling, trapped air may be blocking proper coolant flow. Some vehicles require a specific bleed procedure. Consult your service manual.
Common Mistakes to Avoid
Overfilling When Cold
Adding coolant to the “Full” line on a cold engine without understanding thermal expansion leads to overflow when hot. This wastes coolant and creates toxic puddles on the ground.
Fix: Fill to the middle or lower end of the “Full” range when cold if no “COLD” mark exists.
Ignoring Label Confusion
Many modern reservoirs only show “Low” and “Full,” but “Full” is intended for cold fills, not hot. This confusing labeling increases the risk of user error.
Upgrade Option: Consider replacing with a reservoir that has clear “Cold” and “Hot” etched markings for improved clarity.
Using Wrong Coolant Type
Mixing incompatible coolants, such as green IAT with orange OAT, can form sludge, clog passages, and damage water pumps.
Rule: Always use the manufacturer-recommended coolant type. When in doubt, check your VIN at an auto parts store for a match.
Maintenance and Monitoring Tips
Check Coolant Monthly
Inspect the reservoir when refueling or during oil changes. Look for sudden drops or recurring low levels, as these indicate leaks or internal issues.
Inspect for Leaks Regularly
Check under the car for puddles or stains. Examine hoses, radiator, water pump, and heater core for dampness or crusty residue.
Follow Replacement Intervals
| Coolant Type | Replacement Interval |
|---|---|
| IAT (Green) | Every 2-3 years or 30,000 miles |
| OAT (Orange/Red) | 5 years or 150,000 miles |
| HOAT (Yellow/Turquoise) | 5 years or 100,000 miles |
Note: Intervals vary by manufacturer. Always follow your owner’s manual recommendations.
Address Low Coolant Immediately
Frequent need to top off often signals external leaks, internal leaks from blown head gaskets, or evaporation due to overheating.
Urgent Sign: Sweet-smelling steam from the exhaust may indicate coolant burning in the combustion chamber. Have this checked immediately.
Frequently Asked Questions About Filling Coolant
How far should coolant be in the reservoir when cold?
Fill to the “COLD” mark or the “Full” line if that’s the only option. Never fill above “Full” when the engine is cold.
Can I use water instead of coolant?
Only in emergencies. Distilled water is acceptable temporarily, but it lacks freeze protection, boil-over resistance, and corrosion inhibitors. Replace with proper 50/50 mix as soon as possible.
Why is my coolant reservoir empty but radiator full?
This may indicate a cracked reservoir, failed cap seal, or blocked overflow hose. It’s also possible the system was overfilled and expelled coolant when hot.
Should I fill radiator or reservoir?
If a radiator cap is accessible, fill the radiator when cold, then top off the reservoir to “COLD” mark. If no radiator cap exists, fill only the reservoir. Never try to open a sealed radiator system.
What happens if coolant is too low?
Low coolant reduces heat transfer, leading to engine overheating, warped cylinder heads, blown head gasket, and permanent engine damage.
Key Takeaways for Proper Coolant Fill Levels
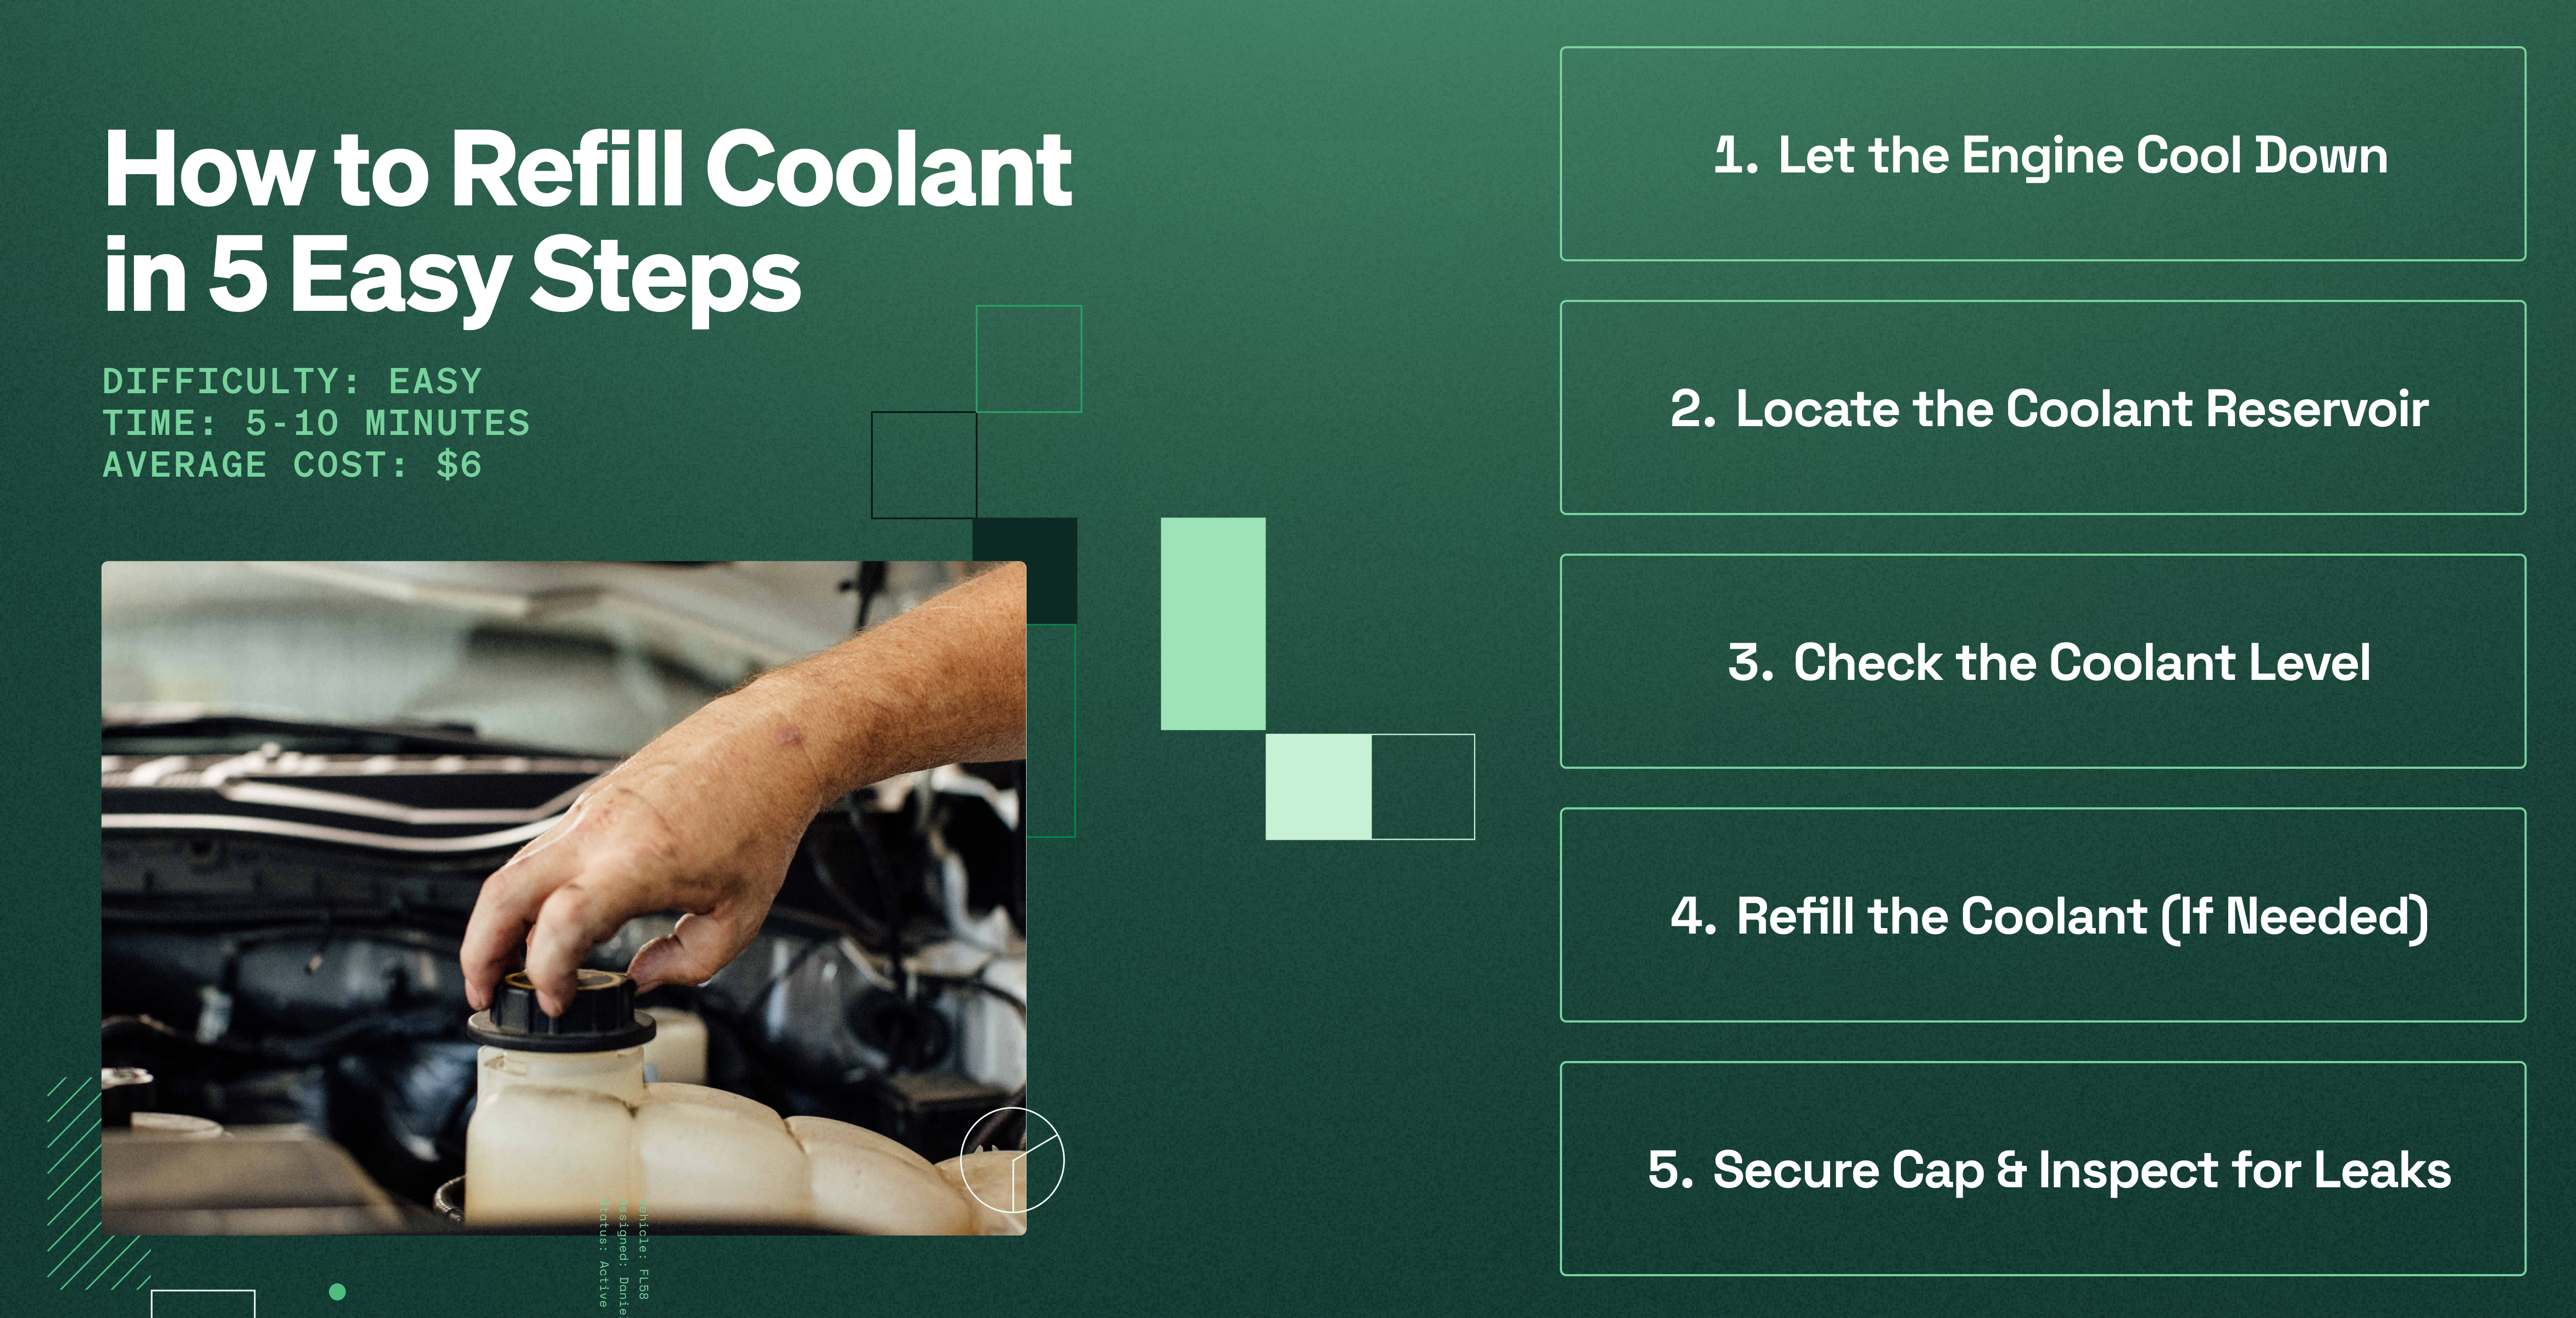
Understanding how far to fill coolant depends entirely on engine temperature and fill location. When the engine is cold, fill the radiator to just below the neck or the reservoir to the “COLD” mark or lower “Full” range. Never open the system when hot. When in doubt, underfill slightly and recheck after the engine cools. Always use the correct coolant type specified by your manufacturer, and never ignore recurring low coolant levels, as they often signal serious problems. Maintaining proper coolant levels protects your engine, keeps repair costs low, and prevents environmental harm from toxic spills. Stay safe, read labels carefully, and follow manufacturer guidelines for optimal engine longevity.



