
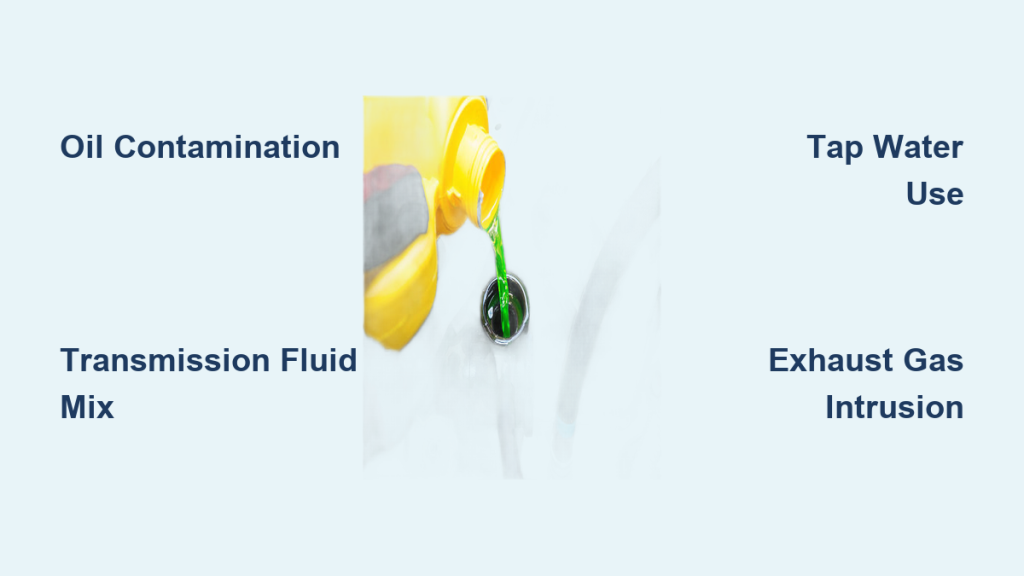
Coolant contamination is a silent but serious threat to engine health. When foreign substances like oil, transmission fluid, exhaust gases, or water enter the cooling system, they compromise the coolant’s ability to regulate temperature, prevent corrosion, and protect metal components. Left unchecked, contaminated coolant can lead to overheating, internal engine damage, and even complete engine or transmission failure. The root causes are often mechanical failures such as a blown head gasket or cracked radiator, but poor maintenance practices like mixing incompatible coolants or topping off with tap water also play a major role. Understanding how coolant gets contaminated empowers drivers to spot early warning signs and act before irreversible damage occurs. This guide breaks down the five primary contamination pathways, how to identify them, and what you can do to prevent or fix them.
Oil Entering the Cooling System
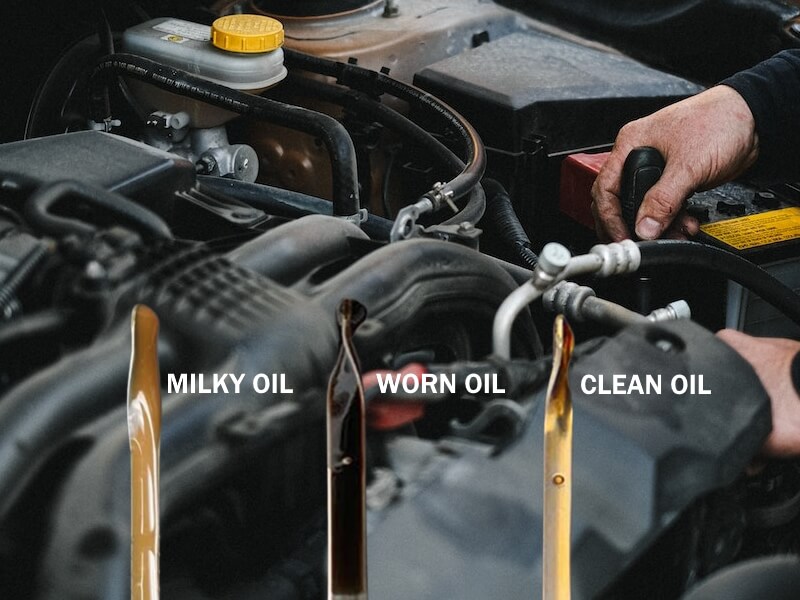
Engine oil in coolant is a red flag for internal engine failure. It degrades coolant performance and signals a breach in critical engine components.
Faulty Oil Cooler or Housing
In many vehicles, especially turbocharged and European models, an oil cooler is integrated into the cooling system. Over time, internal seals or metal cores can fail, allowing oil to leak into coolant passages. Plastic oil filter housings on VW and Audi engines are particularly prone to cracking due to heat cycling. Once compromised, oil seeps into the cooling system, forming a milky brown sludge in the radiator or reservoir. Because oil floats, the contamination often appears as a foamy layer on top of the coolant. Proactively replacing plastic units with metal alternatives during oil changes can prevent this costly failure.
Blown Head Gasket Symptoms
A blown head gasket is one of the most common causes of oil-coolant mixing. When the seal between the engine block and cylinder head fails, oil and coolant galleries connect, leading to bidirectional contamination. This creates a thick, mayonnaise-like sludge in both the coolant reservoir and on the oil dipstick. Additional signs include white, sweet-smelling exhaust smoke, engine overheating, and low compression. A block test that detects hydrocarbons in the coolant confirms the diagnosis. Immediate repair is essential because delay increases the risk of warped heads or engine seizure.
How to Diagnose Oil Contamination
Start with a visual inspection. Remove the radiator cap when cool and look for oily sheen or brown foam. Check the oil dipstick for a milky appearance. For confirmation perform a compression test to detect cylinder leakage. Use a combustion gas detector, also called a block tester, and a color change in the chemical fluid confirms exhaust gases in the coolant. Send a coolant sample for lab analysis if uncertainty remains. If oil is present, assume internal engine damage and avoid driving the vehicle.
Transmission Fluid in Coolant
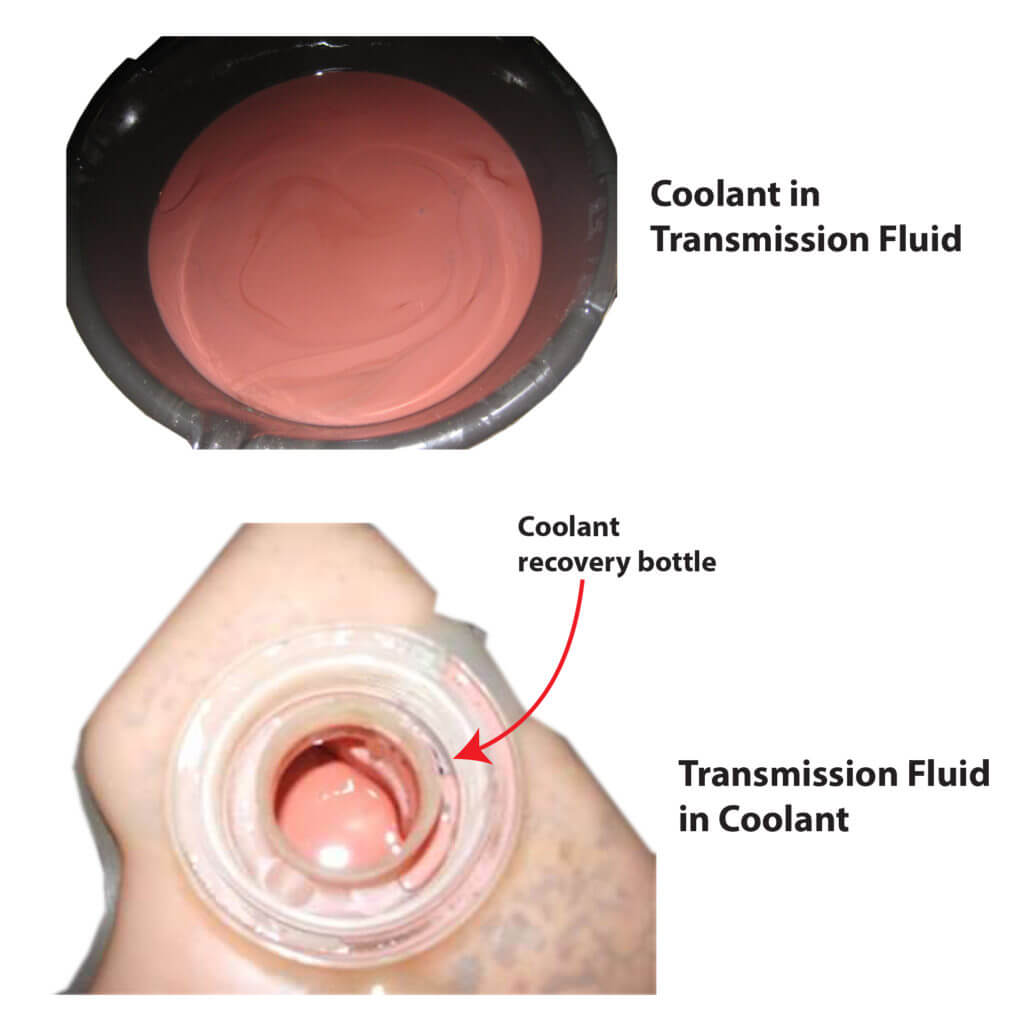
Automatic transmission fluid mixing with coolant points to radiator failure, not transmission issues alone.
Radiator Cooler Core Failure
Many radiators house a transmission cooler core inside one of the tanks. Coolant flows around it, absorbing heat from the ATF. Over time, thermal stress or corrosion can crack the internal barrier. When this happens, ATF leaks into the coolant, or coolant enters the transmission. Either scenario is damaging. The coolant takes on a pink, foamy, or milky appearance, distinct from oil’s brown sludge. Simultaneously, the transmission may lose fluid and begin slipping due to coolant contamination, which breaks down ATF additives and damages clutches.
Risks of Cross-System Mixing
Coolant in the transmission is catastrophic. Ethylene glycol reacts with ATF, forming varnish and sludge that clogs valve bodies and solenoids. Even a small amount can lead to complete transmission failure. Conversely, ATF in the coolant reduces heat transfer efficiency and accelerates pump wear. Flushing alone will not fix internal transmission damage. A rebuild or replacement may be necessary.
Repair Steps for Transmission Contamination
Replace the radiator. Do not attempt repair because internal leaks cannot be sealed. Flush both cooling and transmission systems thoroughly using OEM-approved procedures. Inspect transmission fluid condition. If burnt or sludgy, disassemble for internal assessment. Refill with correct fluids and use only manufacturer-specified coolant and ATF. Test drive and monitor for shifting issues or overheating. Ignoring this issue risks dual-system failure and five-figure repair bills.
Water and Coolant Dilution
Adding plain water to the cooling system seems harmless, but it is a fast track to contamination.
Tap Water Introduces Minerals
Coolant is a precise blend of ethylene glycol and corrosion inhibitors, typically mixed 50/50 with distilled water. Tap water contains calcium, magnesium, and chlorides that form scale deposits when heated. These deposits clog radiator tubes, heater cores, and water jackets. Classic cars like the Triumph Spitfire often suffer heater core blockages after years of tap water use. Scale also insulates metal surfaces, reducing heat transfer and promoting localized overheating.
Coolant Chemistry Breakdown
Water lacks the pH stabilizers and anti-corrosion agents in proper coolant. Without them, aluminum components corrode rapidly. Solder joints in radiators degrade. Water pump seals fail prematurely. The boiling point drops and freeze protection weakens. Even a few top-offs with tap water can throw off the ideal mixture, especially in regions with hard water.
Emergency Use of Distilled Water
If coolant is low and only water is available, use distilled water only. Never use tap water. Distilled water will not introduce minerals and buys time until a proper refill. However, schedule a complete coolant flush and refill within 500 miles. Long-term use of diluted coolant risks overheating and internal corrosion.
Exhaust Gases in the Cooling System
Exhaust gas intrusion means combustion pressure is leaking into the cooling circuit, a sign of severe engine damage.
Causes: Head Gasket or Cracked Head
A blown head gasket or cracked cylinder head allows high-pressure exhaust gases to enter coolant passages. This pressurizes the system, forcing coolant out through the overflow and causing rapid coolant loss without visible leaks. Bubbles in the reservoir when the engine runs are a telltale sign. Over time, repeated overheating can warp the head further, creating a vicious cycle.
How to Test for Combustion Gases
Use a coolant combustion leak tester, also known as a block tester. Fill the tester with blue chemical solution. Place it over the radiator opening with the engine off and cool. Run the engine and hydrocarbons in the coolant turn the fluid green or yellow. A positive result confirms exhaust gas contamination. For definitive diagnosis, a cylinder leak-down test can pinpoint the faulty cylinder.
Consequences of Ignored Gas Intrusion
Continuous overheating damages the head and block. Coolant enters combustion chambers, causing hydrolock, a condition where liquid prevents piston movement. Carbon buildup fouls spark plugs. The engine misfires, loses power, and may fail to start. Repair requires major engine work including head resurfacing or replacement, new head gasket, and full coolant system flush.
Particulate and Chemical Sludge
Sludge, rust, and debris in coolant reduce flow and damage components, even without foreign fluid mixing.
Mixing Incompatible Coolants
Coolant types are not interchangeable. OAT, HOAT, and IAT coolants use different additives. Mixing them, like pouring green IAT into orange DEX-COOL, triggers chemical reactions that form thick gel or sludge. This sludge clogs thermostat housings, heater cores, and radiator fins. Always check your vehicle’s specification and never mix brands unless confirmed compatible.
Residual Debris After Repairs
Failing to flush the system before installing a new radiator or water pump leaves behind old coolant, rust, and scale. This debris circulates, accelerating wear on the new water pump and thermostat. Always perform a full reverse flush using a pressurized flushing tool to remove all contaminants.
Air Pockets and Flow Disruption
Air trapped in the cooling system creates hot spots that lead to localized overheating. Air also causes cavitation in the water pump, eroding the impeller. After any coolant service, bleed the system by running the engine with the radiator cap off until the thermostat opens. Squeeze upper and lower hoses to release air bubbles. Top off as the system self-bleeds.
Visual Signs of Contamination
| Contaminant | Coolant Appearance | Key Clues |
|---|---|---|
| Engine Oil | Brown milky sludge, foamy top layer | Milky oil on dipstick, white exhaust smoke |
| Transmission Fluid | Pink or reddish foam | Transmission slipping, low ATF level |
| Tap Water | Cloudy with white or rust particles | Scale in radiator, clogged heater core |
| Exhaust Gases | Bubbles in reservoir, normal color | Overheating, pressure in cooling system |
| Sludge | Thick gel, floating debris | Poor heating, pump noise, blocked passages |
Use this chart for quick diagnosis. When in doubt, pull a coolant sample in a clear container and inspect under light.
Preventing Coolant Contamination
Avoiding contamination starts with discipline, using the right fluids and following maintenance schedules.
Use Only Specified Coolant Type
Never guess. Check your owner’s manual or coolant reservoir cap for the required type. Common specs include VW/Audi G12++ or G13, GM DEX-COOL which is HOAT, Toyota Type T2 for hybrid vehicles, and Ford WSS-M97B44-D. Using the wrong coolant voids protection and risks sludge formation.
Flush Every 30,000 to 100,000 Miles
Modern coolants last up to 100,000 miles, but only if uncontaminated. Over time, inhibitors deplete and pH drops, making coolant corrosive. Flush intervals are 30,000 miles for standard green coolant, 50,000 to 100,000 miles for OAT/HOAT long-life, and every 40,000 miles for turbocharged or towing vehicles. Always flush before installing new components.
Replace Vulnerable Plastic Parts
On VW/Audi engines, replace the plastic oil filter housing with a metal unit. It costs more upfront but prevents catastrophic oil-coolant mixing. Do this during major services or oil cooler replacement. The cost exceeds £100 but saves far more in avoided repairs.
Test Coolers Under Pressure
If contamination is suspected, pressure-test the oil cooler, transmission cooler lines, and radiator core. A professional shop can perform these tests for under £100, far cheaper than engine repairs.
Monitor Fluids Monthly
Make it a habit to check coolant color and level. The coolant should be clear, not cloudy or foamy. Inspect the oil dipstick for milky residue. Look under the radiator cap when cool for sludge or oil. Early detection saves engines.
When Contamination Occurs: Repair Protocol
Once contamination is confirmed, follow this sequence. Stop driving because continued operation risks engine seizure. Identify the source using visual, chemical, and pressure tests. Replace the faulty component such as head gasket, radiator, or oil cooler. Flush both cooling and related systems, for example transmission if crossover occurred. Replace fluids with OEM-specified types. Bleed the cooling system completely. Pressure-test the system post-repair. Skipping any step risks recurrence.
Frequently Asked Questions About Coolant Contamination
What does contaminated coolant look like?
Contaminated coolant often appears milky, foamy, or discolored. Oil contamination creates brown sludge. Transmission fluid mixing turns coolant pink or reddish. Water contamination makes it cloudy with white particles. Refer to the visual guide above for specific indicators.
Can I drive with contaminated coolant?
Driving with contaminated coolant is not recommended. Oil or transmission fluid in coolant indicates serious mechanical failure. Exhaust gas intrusion causes rapid overheating. Continuing to drive risks catastrophic engine or transmission damage. Stop immediately and diagnose the issue.
How do I test for head gasket failure at home?
Use a combustion leak tester, also called a block tester. Place the chemical tester over the radiator opening after the engine cools. Run the engine and watch for a color change from blue to green or yellow. This indicates hydrocarbons from exhaust gases in the coolant, confirming head gasket failure.
Does mixing different coolants cause contamination?
Yes, mixing different coolant types causes chemical reactions that form sludge. OAT, HOAT, and IAT coolants use different additive packages. Mixing them, like green IAT with orange DEX-COOL, creates gel-like deposits that clog cooling passages. Always use one type specified by your manufacturer.
How often should I flush my cooling system?
Flush intervals depend on coolant type. Standard green coolant needs flushing every 30,000 miles. Long-life OAT or HOAT coolants last 50,000 to 100,000 miles. Turbocharged vehicles or those used for towing should flush every 40,000 miles. Always flush before installing new components.
What happens if water gets into my coolant?
Water dilutes the coolant’s protective properties. Tap water introduces minerals that form scale deposits. This clogs radiator tubes and heater cores. Water also reduces boiling point and freeze protection. In an emergency, use distilled water temporarily, then schedule a proper flush and refill within 500 miles.
Key Takeaways for Preventing Coolant Contamination
Coolant contamination is rarely just a fluid issue. It is a symptom of deeper mechanical failure or neglect. Whether it is oil from a failing gasket or transmission fluid from a cracked radiator, the fix requires more than a flush. Prevention through correct coolant use, regular maintenance, and proactive replacement of high-risk parts is the best defense.
The five primary contamination pathways are oil intrusion from failed oil coolers or head gaskets, transmission fluid crossover from damaged radiator cooler cores, water dilution from tap water or improper mixing, exhaust gas intrusion from blown head gaskets or cracked heads, and particulate sludge from incompatible coolants or residual debris. Each requires specific diagnostic approaches and repair procedures.
Stay vigilant by inspecting fluids monthly. Check coolant color, oil condition, and transmission fluid levels regularly. Act fast when something looks off. Use only manufacturer-specified coolant, flush at recommended intervals, and replace vulnerable components like plastic oil filter housings before they fail. Your engine’s longevity depends on maintaining clean, properly formulated coolant at all times.



