
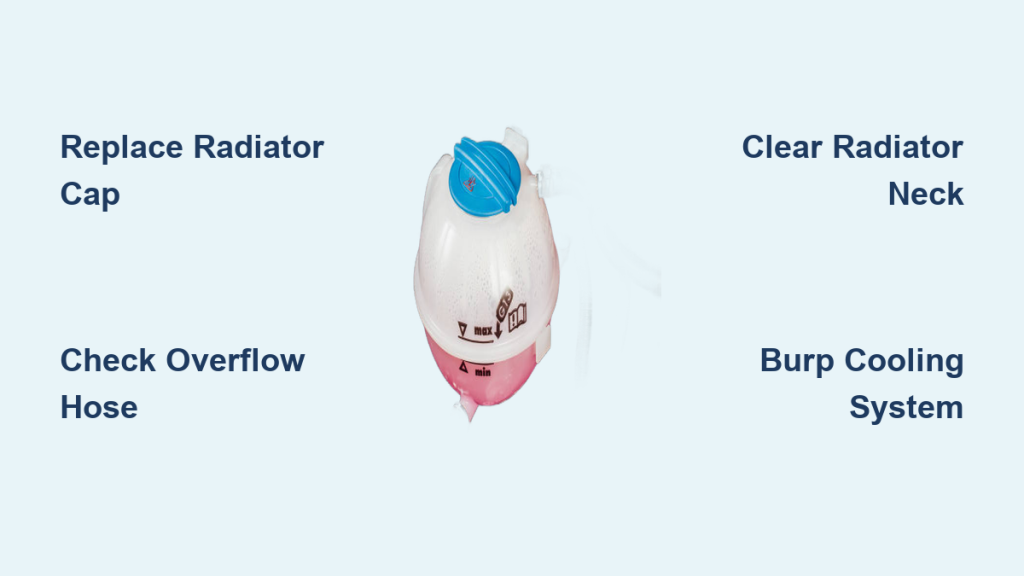
You start your car cold, the coolant reservoir is full but the radiator stays low. You drive it, the engine heats up, and coolant spills into the reservoir. Then when it cools down, nothing returns. This is a classic sign your coolant reservoir is not working as intended. The system fails to maintain a closed-loop vacuum, breaking one of the most critical functions of modern cooling systems.
A non-functional reservoir does not just mean topping off coolant more often. It signals a deeper issue that can lead to overheating, air pockets, and engine damage over time. This guide walks you through every possible failure point, how to test each component, and what fixes actually work.
Faulty Radiator Cap: Most Common Cause
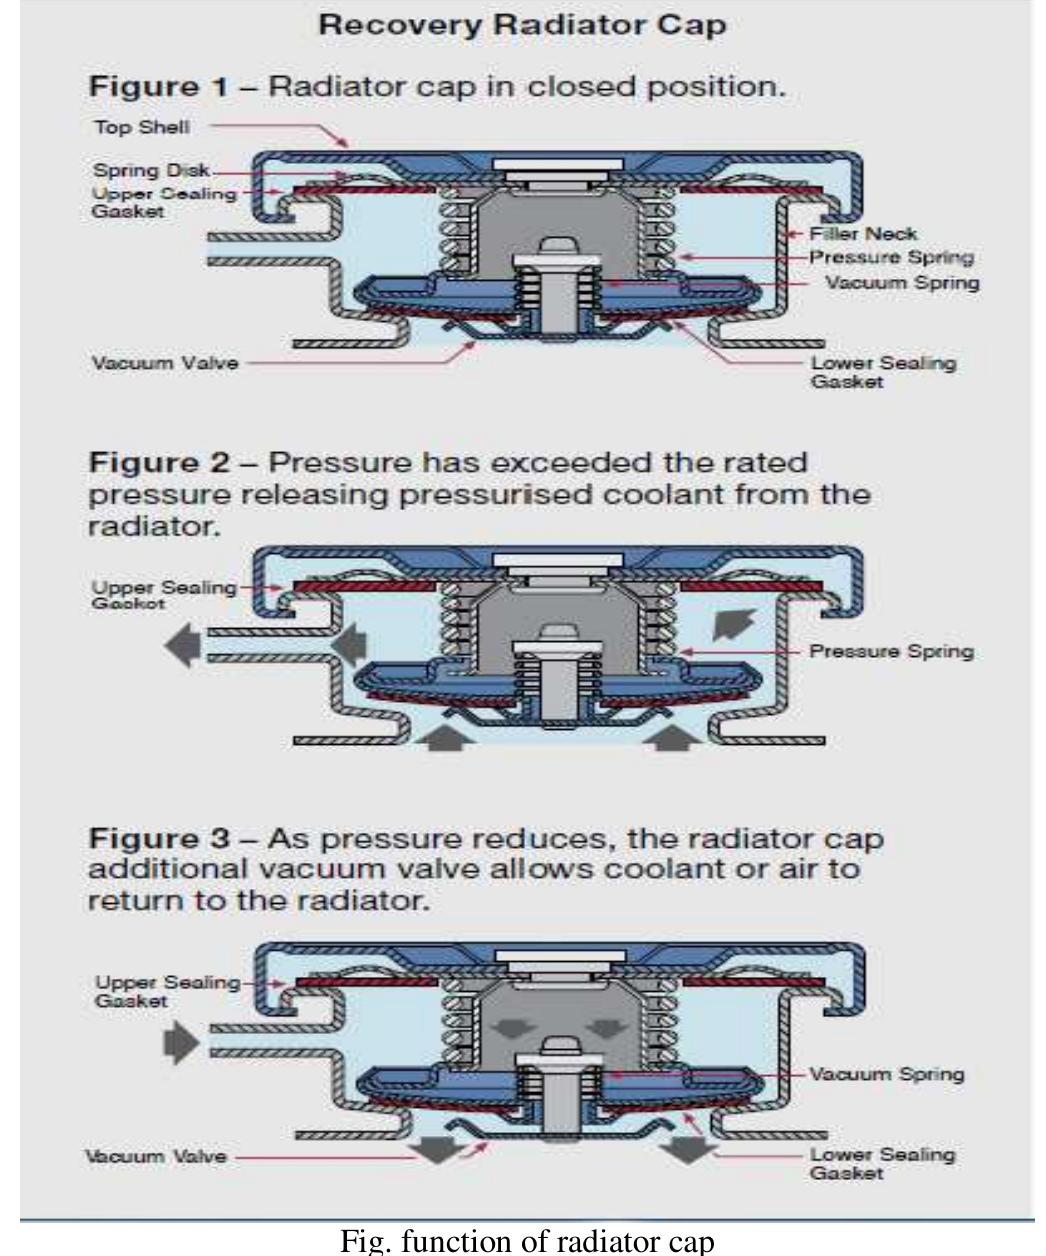
The radiator cap is the gatekeeper of your cooling system pressure and vacuum cycle. When it fails, coolant flows out but never comes back.
How the Cap Should Work
Under normal operation, the cap performs two essential functions. When the engine is hot, pressure builds between 13 and 18 psi, pushing excess coolant into the reservoir. When the engine cools, the internal vacuum valve opens and draws coolant back from the tank. If the vacuum valve is clogged, corroded, or the seal is damaged, the return phase fails completely.
Signs of a Bad Cap
Coolant stays in the reservoir when the engine is cold. You hear a hissing sound when opening the cap on a cold engine. The upper radiator hose feels spongy, indicating air in the system. You experience repeated overheating despite having a full reservoir. The small inner valve inside the cap is often overlooked. Sludge, old coolant deposits, or rust can block it, even if the cap looks fine externally.
Fix: Test or Replace the Cap
Remove the cap when the engine is completely cool. Inspect the seal for cracks, warping, or hardening. Check spring tension, which should resist compression. Clean internal parts carefully with warm water and a soft brush. Use a pressure tester to verify it holds rated pressure, such as 15 psi. Replace with an OEM-specified cap and never use a generic or wrong-pressure cap.
Even new caps can be defective. If you have replaced it once and the problem persists, try a second OEM-grade cap before moving to complex diagnostics.
Air Leaks Break the Vacuum Loop

No vacuum means no coolant return. An air leak anywhere in the overflow system prevents the siphoning action needed to pull coolant back into the radiator.
Where Leaks Happen
Air leaks commonly occur in several locations. The overflow hose may be cracked, loose, or disconnected. Hose clamps may be corroded or improperly tightened. The radiator neck may have pitting, dirt, or a warped sealing surface. The reservoir tank may have hairline cracks or a warped lid seal. There has to be a vacuum between the overflow tank and radiator, and a hole in the hose will prevent a vacuum from occurring.
How to Find an Air Leak
Pressurize the system with a cooling system tester at 15 psi. Wait 10 to 15 minutes and watch for pressure drop. Listen closely near hoses, connections, and the cap. Spray soapy water at joints, as bubbles indicate leaks. Check the overflow hose path and ensure it is not submerged in coolant, which would mask a below-fluid leak.
Critical Detail: Leak Position Matters
A leak below the coolant level causes coolant to drip out. A leak above the coolant level causes air to be sucked in when the engine cools. This explains why your reservoir stays full: air enters the system instead of coolant being drawn back.
Fix: Replace Hoses and Re-Seal Connections
Use OEM or reinforced coolant hose for the overflow line. Replace all clamps with stainless steel screw-type clamps. Clean the radiator neck thoroughly before reinstalling the cap. Ensure the reservoir cap seals tightly if it has a vent.
Collapsed or Blocked Overflow Hose
Even if the cap and seals are good, a kinked, soft, or blocked hose can act like a one-way valve, letting coolant out but not back in.
Why Hoses Fail
Old rubber hoses lose rigidity. Under vacuum as the engine cools, they collapse inward and seal off flow. The hose between the radiator and the recovery tank appeared to be fine but would collapse when the car was shut off, acting as a check valve.
Visual and Functional Test
Remove the hose from both ends. Inspect for kinks, soft spots, or swelling. Blow through it, and air should pass easily. Suck on one end, and if there is no suction, there is a blockage or internal collapse.
Fix: Replace with Rigid Hose
Use a reinforced silicone or hard plastic hose designed for vacuum applications. Ensure the hose runs straight and avoid sharp bends. Confirm it reaches below the minimum fill line in the reservoir. This fix often costs under $20 and takes 10 minutes but solves the problem in older vehicles.
Blocked Radiator Neck or Inlet Tube
Sometimes the hose and cap are fine, but the metal tube just below the radiator cap is clogged.
Where the Blockage Forms
Blockages form inside the radiator neck just beneath where the cap seals. They also occur at the connection point for the overflow hose. The cause is often rust, scale, or old stop-leak residue. I cannot blow air into that part, and this seems to be where the blockage is.
How to Clear It
Remove the overflow hose from the radiator end. Use compressed air to blow backward through the port. Probe gently with a stiff wire such as an unbent paperclip to dislodge debris. Flush with water using a garden hose or pressure washer on low setting. Reconnect and test.
Never force a wire too deep, as scratching internal surfaces can cause future leaks.
When to Replace the Radiator
If flushing does not restore flow, internal corrosion may be too severe. Consider replacement, especially on high-mileage or older aluminum radiators.
Internal Engine Faults: Head Gasket or Cracked Block
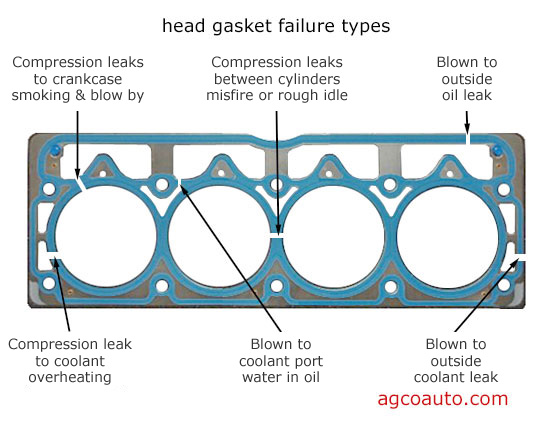
If all external components check out, the problem may be internal engine damage, most commonly a blown head gasket.
How a Bad Head Gasket Breaks the System
Combustion gases enter the cooling system. These gases pressurize the radiator even when the engine is off. No vacuum forms, and coolant cannot return from the reservoir.
Key Symptoms
Watch for white smoke from the exhaust, which indicates burning coolant. Check for milky oil on the dipstick, meaning coolant has mixed with oil. Look for bubbles in the radiator when the cap is off and engine is running. Notice a fluctuating temperature gauge. Watch for the D4 light blinking in some Acuras.
Diagnostic Tests
Cooling System Pressure Surge Test: Pressurize the system to 10 or 12 psi. Start the engine and rev to 2,500 RPM. Watch the gauge, and a spike with each rev indicates combustion gas intrusion.
Block Test: Uses a chemical tester over the radiator neck. It changes color if exhaust gases are present.
Compression Test: Measures cylinder pressure, and low or unequal readings in adjacent cylinders suggest head gasket failure.
Cylinder Leak-Down Test: More precise than a compression test, this identifies which cylinder is leaking into coolant passages.
These issues are common in high-mileage engines. Do not ignore early signs, as delaying repair can warp the cylinder head.
Improper Refill Procedure Traps Air
After a coolant flush, many drivers accidentally trap air in the system, mimicking a faulty reservoir.
Why It Happens
Filling only the reservoir and not the radiator causes this problem. Not running the engine with the cap off also contributes. Skipping the burping process leaves air trapped. The result is an air pocket that prevents proper circulation and vacuum formation.
Correct Refill Steps
Cool the engine and remove the radiator cap. Fill the radiator directly to the top. Start the engine and let it warm up with the cap off. Rev slightly at 1,500 to 2,000 RPM to open the thermostat. Squeeze the upper radiator hose to help purge air. Add coolant as the level drops. Once stable, replace the cap and top off the reservoir to the cold fill line.
Advanced Burping Tips
Use a coolant filling funnel that stays on during warm-up. Drive in stop-and-go traffic for 10 to 15 minutes to cycle the thermostat. Repeat the process if temperature fluctuates after refill.
Stop-Leak Products Cause Hidden Clogs
Many drivers use stop-leak additives to fix small leaks, but these can backfire.
How Stop-Leak Causes Problems
Stop-leak seals micro-leaks temporarily. Over time, particles accumulate in narrow passages, including the radiator cap vacuum valve, the overflow hose inlet, and the radiator neck tube. Flushing removes the sealant and re-opens leaks while exposing degraded components. Perhaps there was some stop-leak in the system, and flushing it caused problems.
What to Do
Avoid stop-leak unless it is a last resort. If used, flush the system within 1,000 miles. Replace the radiator cap and inspect the hose after removal.
Step-by-Step Diagnostic Flow
Follow this sequence to avoid unnecessary repairs.
Check the radiator cap first. Test it or replace it with the correct PSI rating. Inspect the overflow hose and look for collapse, kinks, or cracks. Verify hose routing, as it must reach the bottom of the reservoir. Perform a pressure test and hold 15 psi for 15 minutes or more. Clean the radiator neck port and clear any blockage. Refill properly by filling the radiator directly and burping air. Test for a head gasket if steps one through six fail.
Prevent Future Failures
Maintenance Tips
Replace the radiator cap every 3 to 5 years. Use the correct coolant type, whether OAT, IAT, or HOAT, and never mix colors. Inspect hoses annually. Always burp the system after coolant work. Never rely solely on reservoir filling.
Coolant Best Practices
Use the right coolant for your vehicle. IAT coolant is green and lasts 2 to 3 years in older vehicles. OAT coolant is orange or red and lasts 5 years in GM and Chrysler vehicles. HOAT coolant is yellow or blue and lasts 5 years in Ford and Asian models. Mixing types can form gel, so flush and refill with the correct type if unsure.
Frequently Asked Questions About Coolant Reservoir Not Working
Why does coolant flow out of the radiator but not return from the reservoir?
This happens because the vacuum loop is broken. The most common causes are a faulty radiator cap vacuum valve, an air leak in the overflow hose, or a collapsed hose that acts like a one-way valve. Without vacuum, the system cannot draw coolant back into the radiator.
Can a bad radiator cap cause the reservoir to stay full?
Yes. The radiator cap contains a vacuum valve that pulls coolant back from the reservoir when the engine cools. If this valve is clogged or the cap seal is damaged, coolant stays in the reservoir instead of returning to the radiator.
How do I know if my overflow hose is collapsed?
Remove the hose and inspect it for soft spots or kinks. Blow through it to ensure air passes freely. Suck on one end, and if you feel no suction, the hose has collapsed internally or is blocked. A collapsed hose often looks fine from the outside but collapses under vacuum.
Can a blown head gasket cause the reservoir not to return coolant?
Yes. A blown head gasket allows combustion gases to enter the cooling system, creating pressure even when the engine is off. This prevents vacuum from forming, so coolant cannot be drawn back from the reservoir. Other symptoms include white smoke from the exhaust, milky oil, and bubbles in the radiator.
Do I need special tools to diagnose this issue?
A cooling system pressure tester is the most important tool. It lets you pressurize the system and check for leaks. You can also use a chemical block test kit to detect combustion gases in the coolant. Basic hand tools and a garden hose are sufficient for most hose and cap inspections.
Why does my car overheat even though the reservoir is full?
The reservoir being full does not mean the radiator has enough coolant. If the return flow is broken, the radiator stays low while the reservoir overflows. This reduces coolant flow through the engine, causing overheating. The issue is not the amount of coolant but the distribution within the system.
Key Takeaways for Fixing Your Coolant Reservoir
A coolant reservoir not working is not a minor annoyance. It is a red flag that your cooling system is not maintaining vacuum, which can lead to overheating, warped cylinder heads, and engine failure. Most fixes are simple and inexpensive. Replace the radiator cap, swap the overflow hose, clean the radiator neck, and refill correctly using the proper burping procedure. If those steps fail, suspect internal damage such as a blown head gasket, cracked head, or combustion gas intrusion. Use a cooling system pressure tester and block test to confirm. Do not ignore symptoms like bubbling, white smoke, or milky oil. Fix it early, save your engine, and drive with confidence.



