Brown coolant is never normal. If you have popped the hood and found murky, sludge-filled fluid in your radiator or reservoir, your engine is signaling trouble. While fresh coolant can be green, orange, pink, or blue, brown coolant always indicates contamination or breakdown, and ignoring it risks overheating, corrosion, and catastrophic engine damage. The fix depends on the cause: simple sediment buildup may only need a thorough flush, but a blown head gasket or internal leak demands major repairs.
This guide walks you through diagnosing the root cause, step-by-step repair procedures, and proven prevention tips so you can act fast and avoid costly breakdowns. You will learn exactly how to fix brown coolant based on what is causing the problem.
Identify the Source of Brown Coolant
Before touching tools, determine whether the discoloration is due to degradation or mechanical failure. Your next steps depend entirely on this diagnosis. Take time to perform these checks before spending money on parts or repairs.
Check for Oil-Coolant Mixing
Open the oil filler cap and inspect the underside. Look for milky white or brown residue that looks like mayonnaise. Also check the valve cover area for sludge buildup. Pull the dipstick and examine the oil: if it appears cloudy or tan, coolant has entered the oil system, which is strong evidence of head gasket failure.
Clean oil with brown coolant likely means coolant breakdown or rust. Milky residue on the oil cap means stop driving immediately, as an internal leak is probable.
Inspect Coolant Appearance
With the engine cool, remove the radiator or expansion tank cap. Observe the coolant directly. Thick, gel-like sludge is a classic sign of degraded Dexcool. An oily sheen or milky texture suggests oil or transmission fluid intrusion. Murky brown with floating particles indicates rust or sediment buildup.
Pro Tip: Shine a flashlight into the radiator. Floating debris or clumps confirm contamination that needs flushing.
Test for Combustion Gases in Coolant
Use a coolant block tester available at auto parts stores to detect exhaust gases. Fill the tester with blue chemical fluid and position it over the coolant reservoir with the engine off and cool. Draw air from the system using the hand pump and watch the fluid color. If it stays blue, there is no combustion leak. If it turns yellow or green, exhaust gases are present, indicating a blown head gasket or cracked block. This test is critical because a positive result means engine disassembly may be needed.
Decode Common Causes of Brown Coolant
Understanding the cause helps you determine whether a simple flush will work or if major repairs are necessary. Each cause produces specific symptoms that guide your next steps.
Rust and Corrosion Buildup
Iron engine blocks and aging cooling systems are prone to internal rust. Over time, flakes mix with coolant, turning it brown. Vehicles at risk include older models with outdated coolant, systems using tap water instead of distilled water, and units past their recommended flush interval. Warning signs include gradual darkening over time, sediment in the radiator, and reduced heating performance.
Dexcool Breakdown (GM Sludge Problem)
Vehicles from the 1990s through 2000s, especially GM models, used Dexcool, an orange OAT coolant known to form brown gel when neglected. The typical scenario involves 85,000 or more miles on the original fill with no flushes performed. The coolant becomes chunky and pudding-like despite the oil remaining clean. This is not a mechanical failure; it is chemical degradation from heat and oxidation.
Blown Head Gasket
A failed head gasket allows combustion gases and oil to enter the cooling system. Key symptoms include milky residue on the oil cap, white smoke from the exhaust, bubbling in the overflow tank, and overheating. Even small leaks can cause permanent damage if not addressed quickly.
Oil or Transmission Cooler Leak
Some radiators house engine oil coolers or transmission fluid coolers. A crack in these internal lines lets fluids mix with coolant. The distinguishing factor is that coolant looks milky brown, but the oil remains clean. There is no white exhaust smoke. This is common in trucks and performance vehicles. Repair requires replacing the radiator or cooler core.
Flush the System (If No Mechanical Failure)
If oil is clean and the block test is negative, proceed with a complete cooling system flush. This is a moderate difficulty task that takes 1.5 to 3 hours with basic tools.
Difficulty: Moderate | Time: 1.5 to 3 hours | Tools: Basic
Prepare Tools and Materials
Gather the following items before starting. You will need a radiator flush chemical such as Blue Devil, Prestone, or Gunk. You need the correct 50/50 pre-mixed coolant that matches your vehicle specification. Have a large drain pan that holds at least 2 gallons. Also gather a funnel, coolant-safe gloves and goggles, distilled water, and a hose adapter for backflushing if needed.
Never mix coolant types because this causes sludge. Using the wrong type creates more problems than it solves.
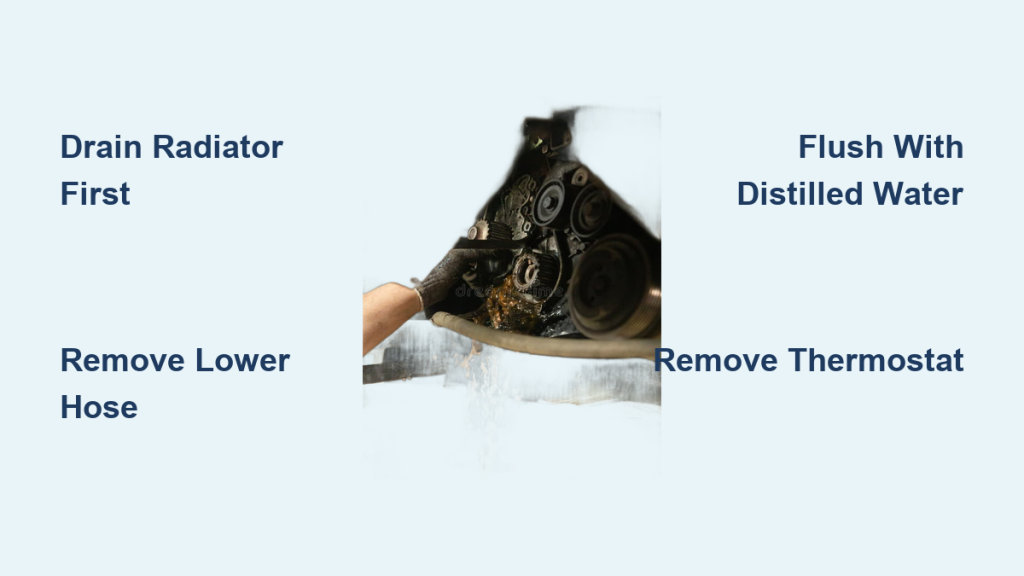
Step 1: Drain Old Coolant Safely
Ensure the engine is completely cool before starting. Place the drain pan under the radiator. Open the radiator drain petcock on the lower driver side or remove the lower hose. Remove engine block drain plugs if accessible for full drainage. Drain the coolant into the container for proper disposal.
Dispose of old coolant as hazardous waste because it is toxic to pets and wildlife. Auto parts stores often accept old coolant for recycling.
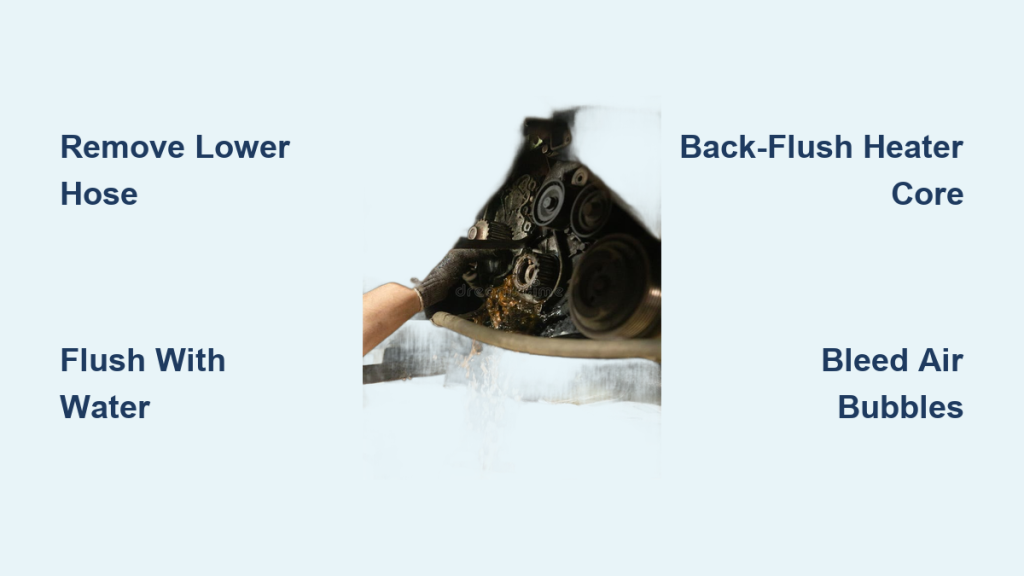
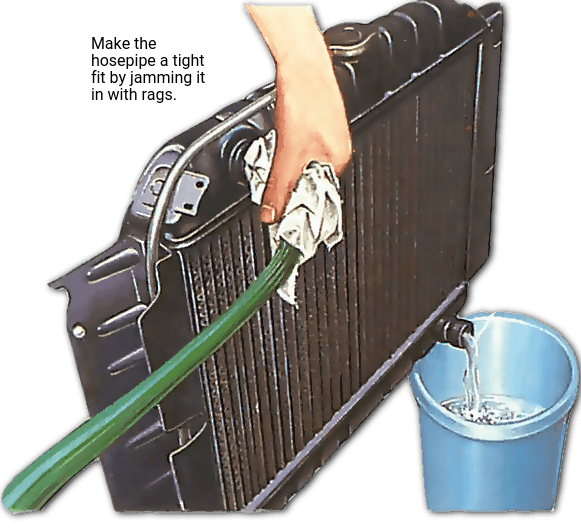
Step 2: Flush With Water
Close all drains after emptying the system. Fill the system with tap water. Start the engine, run it for 1 to 2 minutes, then shut off. Let it cool slightly, then drain again. Repeat this process 3 to 4 times until the water runs clear.
Pro Tip: For stubborn sludge, disconnect the upper and lower radiator hoses and backflush using a garden hose. This forces water through in the opposite direction of normal flow.
Step 3: Use Chemical Flush Cleaner
Reinstall plugs and close petcocks. Pour the radiator flush additive into the reservoir. Top off with water. Run the engine for 10 to 15 minutes with the heater on maximum. For best results, drive 5 to 10 miles to reach operating temperature and fully activate the thermostat. Follow the product label because some cleaners require longer dwell times.
Step 4: Final Rinse and Refill
Cool the engine, then drain the flush solution. Refill with clean water, run 2 to 3 minutes, and drain again. Refill with the correct 50/50 coolant mix. Use OAT coolant for GM vehicles such as Dexcool equivalent. Use HOAT for Ford, Chrysler, and imports. Check the reservoir cap or owner’s manual for the specific type your vehicle requires.
Step 5: Bleed Air From System
Air pockets cause overheating, so bleeding the system is critical. Use one of these methods. Open the bleed screw while filling if your vehicle has one. Elevate the front of the vehicle on ramps. Run the engine with the radiator cap off until the thermostat opens and bubbles stop. Use a bleeding funnel, which is highly effective for modern engines. Once stable, install the cap and let the engine cool. Recheck the level and top off as needed.
Repair Mechanical Failures (If Present)
A flush alone will not fix leaks. If diagnostics point to internal failure, repairs are mandatory. Skipping this step leads to continued damage and potential engine failure.
Replace Blown Head Gasket
Symptoms are confirmed by a positive block test, milky oil, white exhaust smoke, and low compression. The repair steps involve removing the intake manifold, valve covers, and cylinder head. Inspect the head for warping or cracking and send it for resurfacing if needed. Replace the head gasket and torque bolts to manufacturer specifications. Replace intake manifold gaskets, which are common failure points on GM V6 engines. Flush the cooling system after the repair is complete.
This is a labor-intensive job that typically costs $1,200 to $2,500 at a shop. DIY is possible with proper tools and mechanical experience.
Fix Oil or Transmission Cooler Leak
If coolant is milky but oil is clean, the cooler is likely the culprit. Pressure-test the cooler lines to confirm. Replace the radiator if the internal cooler is damaged. Alternatively, install an external transmission cooler to prevent recurrence. Some radiators require specialized brazing, so replacement is often the better option than repair.
Prevent Brown Coolant: Key Maintenance Tips
Prevention is far cheaper than repair. These maintenance habits keep your cooling system clean and your engine protected.
Stick to Coolant Replacement Intervals
Conventional green coolant (IAT) needs replacement every 2 years or 30,000 miles. OAT coolant such as Dexcool lasts 5 years or 150,000 miles. HOAT and T-HOAT coolants last 5 years or 100,000 to 150,000 miles. Always refer to your vehicle manufacturer’s schedule. Even long-life coolant degrades, especially if the system loses pressure.
Use the Right Coolant
Do not choose coolant by color because chemistry matters more than appearance. Use manufacturer-approved or ASTM-compliant coolant. Mixing incompatible types causes gelation and sludge. When in doubt, check your owner’s manual or ask at the auto parts store.
Inspect Coolant Regularly
Check coolant color and clarity every 6 months. Look for cloudiness, oil film, or sediment. Verify the level because low coolant often indicates a possible leak. Catching problems early prevents expensive repairs later.
Maintain Radiator Cap and Hoses
Test the cap pressure seal annually. Replace hoses every 5 to 8 years or at the first signs of softness, cracks, or swelling. Damaged hoses fail suddenly and cause overheating emergencies.
Never Use Plain Water
Tap water contains minerals that promote rust. Distilled water lacks corrosion inhibitors. Always use proper 50/50 coolant mix for top-offs and refills. Water alone dilutes the inhibitors that protect your engine.
Real-World Fixes That Worked
These examples show how other vehicle owners resolved brown coolant issues. A 2004 Impala with a 3.4L V6 at 85,000 miles had chunky brown coolant but clean oil. After flushing with Blue Devil Radiator Flush and fresh OAT coolant, cooling was restored with no further issues. A 1998 GM van that was never flushed had what a mechanic called one of the dirtiest systems seen. Three water flushes plus chemical clean removed heavy sludge successfully. A 2002 Grand Prix GTP had milky coolant and oil with a positive block test. After replacing the head gasket and flushing the system, the engine was saved.
The key takeaway is that sludge is common in older GM vehicles with Dexcool, but it is only fixable if no internal mixing occurs. If the oil is clean and block test is negative, a thorough flush resolves the problem.
Decision Tree: What Your Brown Coolant Means
Use this quick reference to determine the cause and fix.
Brown sludgy coolant with clean oil indicates coolant degradation such as Dexcool breakdown or rust. The fix is a full flush plus correct refill. Brown coolant with a milky oil cap indicates head gasket failure. The fix is replacing the gasket and flushing the system. White exhaust smoke indicates a combustion leak into coolant. Confirm with a block test, then proceed with engine repair. Brown coolant with an oily sheen indicates an oil or transmission cooler leak. The fix is replacing the radiator or cooler and flushing the system. Brown coolant after a flush indicates residual sludge or the wrong coolant mix. The fix is repeating the flush and verifying coolant type compatibility.
Frequently Asked Questions About Brown Coolant
Can I drive my car with brown coolant?
Driving with brown coolant is risky unless you have confirmed it is due to simple coolant degradation with no mechanical failure. If the oil is milky or you detect exhaust gases in the coolant, do not drive. Continuing to drive with a blown head gasket causes severe engine damage.
How much does it cost to fix brown coolant?
A simple flush costs $50 to $150 if you do it yourself or $100 to $200 at a shop. Head gasket replacement costs $1,200 to $2,500 including labor. Radiator replacement costs $300 to $800 depending on your vehicle.
Will a coolant flush fix a head gasket leak?
No. A flush cannot fix a head gasket leak because the problem is mechanical, not chemical. The flush removes contamination but cannot stop oil or exhaust gases from entering the cooling system. You must repair the head gasket first.
How often should I change my coolant?
This depends on your coolant type. Green conventional coolant needs changing every 2 years or 30,000 miles. Dexcool and other OAT coolants last 5 years or 150,000 miles. HOAT coolants last 5 years or 100,000 to 150,000 miles. Always check your owner’s manual for the exact interval.
Can I use any color coolant to replace my old coolant?
No. Coolant color does not indicate compatibility. Using the wrong type causes chemical reactions that create sludge. Always match the coolant type specified for your vehicle, regardless of the color you prefer.
What happens if I ignore brown coolant?
Ignoring brown coolant leads to reduced cooling efficiency, overheating, corrosion of engine components, clogged radiator and heater core, and eventually catastrophic engine failure. The cost of prevention is always less than the cost of repair.
Key Takeaways for Fixing Brown Coolant
Brown coolant is a warning sign that should never be ignored. The cause determines the solution: flush for contamination or repair for mechanical failure. Always diagnose before spending money on repairs. Check the oil cap, perform a block test, and inspect the coolant appearance to determine the root cause. Use the correct coolant type and change it at proper intervals to prevent recurrence. A simple flush resolves most cases where the oil is clean and no combustion gases are present. Mechanical failures like head gasket problems require immediate professional attention. Stay proactive with regular coolant inspections every 6 months. By following this guide, you can fix brown coolant effectively, protect your engine, and avoid costly breakdowns down the road.