
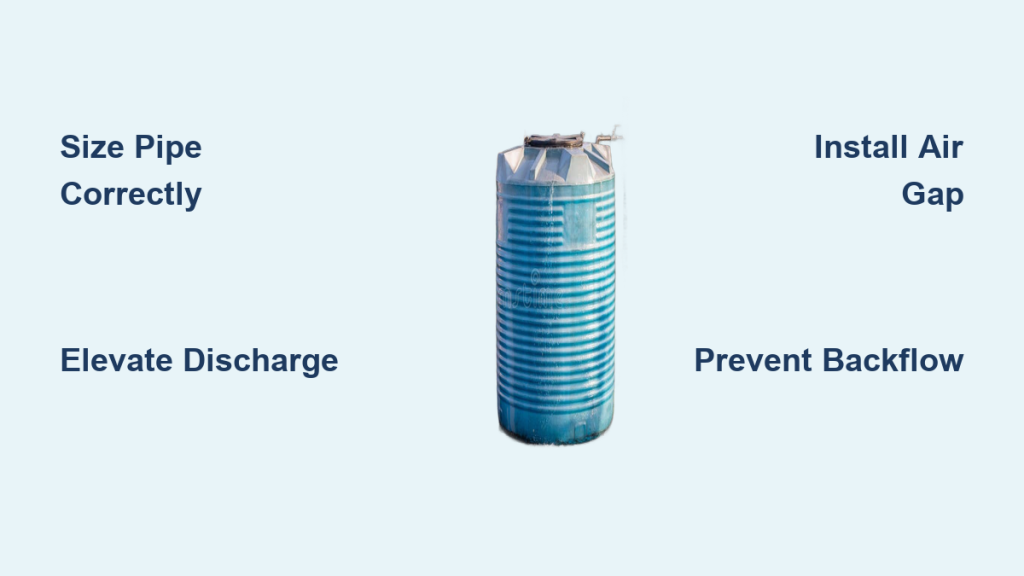
A water tank overflow is more than a messy plumbing glitch; it often signals a direct violation of critical health and safety codes. Ignoring these rules can lead to structural damage, severe contamination risks, and hefty fines for property owners. Water tank overflow regulations exist to ensure every storage system operates safely without threatening public health or the environment. These strict guidelines govern pipe sizing, discharge methods, backflow prevention, and maintenance access across residential and commercial systems.
This guide details the essential requirements found in U.S. state codes and international standards. You will learn how to size overflow pipes correctly, install safe discharge points, and prevent dangerous backflow events. Whether you are designing a new cistern or troubleshooting an existing system, these actionable steps will help you meet inspection benchmarks and avoid common compliance failures.
Overflow Pipe Sizing by Flow Rate

Correct pipe sizing is the first line of defense against tank rupture during a float valve failure. The overflow pipe must handle the maximum possible inflow rather than average daily usage.
Match Pipe Diameter to Supply Capacity
Regulations require specific pipe diameters based on the water supply line capacity. Use this matrix to determine the correct size for gravity or suction tanks:
- 0 – 50 gpm: 2 inches (51 mm)
- 50 – 150 gpm: 2½ inches (64 mm)
- 150 – 200 gpm: 3 inches (76 mm)
- 200 – 400 gpm: 4 inches (102 mm)
- 400 – 700 gpm: 5 inches (127 mm)
- 700 – 1,000 gpm: 6 inches (152 mm)
- Over 1,000 gpm: 8 inches (203 mm)
Always calculate based on the maximum inflow rate. A mismatch here risks uncontrolled discharge and potential structural failure.
Minimum Sizes by Tank Type
Specific tank categories have baseline diameter requirements regardless of flow rate. Cold water cisterns need a minimum internal diameter of 19 mm. Cisterns and hauled water tanks require overflow and drain pipes to be at least 4 inches. Roof washer devices also mandate a minimum 4-inch outlet.
When Combined Pipes Are Allowed
You may only combine overflow and warning pipes if the cistern holds 1,000 liters or less and local authorities approve it. Larger systems must keep these pipes separate to ensure one alerts while the other discharges emergency volume.
Proper Discharge and Installation Geometry
Where you route the overflow pipe matters just as much as its size. Improper discharge can cause flooding or allow contaminated water to enter the system.
Elevate Discharge Points
Overflow outlets must discharge at least 6 inches above roof drains, floor drains, or open fixtures. Finished water storage structures must direct water into a drainage inlet or splash plate away from the foundation. This elevation prevents surface runoff from entering the pipe.
Route Pipes Downward and Separately
Install all overflow pipes on a downward incline to guarantee gravity flow. Never connect these pipes to sewers, soil pipes, or building drains. Each pipe must discharge individually to the atmosphere. If a common warning pipe serves multiple cisterns, the setup must allow easy identification of the specific overflowing unit.
Prevent Freezing and Blockages
Direct overflow discharge away from walkways to prevent ice hazards. In cold climates, bury lines below frost depth or use frost-proof vent designs. All components must remain functional even during freezing conditions to maintain compliance.
Backflow Prevention and Air Gaps

Preventing contaminated water from flowing back into the potable supply is a top regulatory priority.
Install Visible Air Breaks
Overflow pipes discharging into drains must include a visible air break to meet Fluid Category 5 protection standards. This physical gap stops back-siphonage effectively.
Meet Air Gap Height Requirements
The air gap must be at least twice the diameter of the overflow pipe or 6 inches, whichever is greater. This specific measurement ensures that even under high pressure, contaminated water cannot bridge the gap.
Never Drain Into Distribution System
Finished water storage tanks must never allow overflow drainage back into the potable water system. All drains must discharge externally to the atmosphere. Hauled water tanks specifically require an atmospheric break to prevent backflow from flood-prone areas.
Screen and Guard Requirements
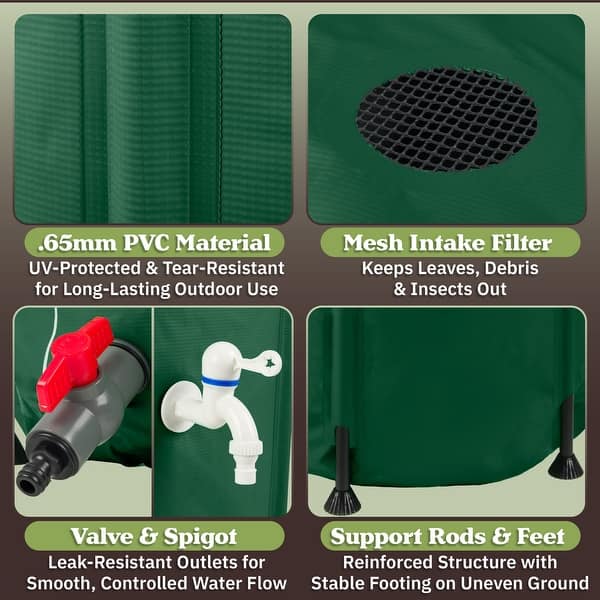
Screens keep insects, birds, and debris out of your water storage while allowing proper airflow and discharge.
Use Correct Mesh for Insect Control
Cold water cisterns require mesh no larger than 0.65 mm. General water tanks need a corrosion-resistant screen of 16×20 mesh per inch plus ¼-inch hardware cloth. Animal guards on overflow outlets must have maximum openings of 0.43 inches.
Install Removable, Vertical Screens
Mount insect screens vertically rather than horizontally. They must be easily removable for cleaning and durable enough to withstand overflow force. Some jurisdictions allow flapper valves or rubber flex valves as alternatives if approved.
Maintain Debris Traps
Roof washer devices must include a removable debris trap with a minimum ¼-inch screen opening. Use ½” to ¾” washed gravel several inches deep as filtering media. Automatic first-flush diversion of 10 gallons per 1,500 sq. ft. of roof area is also required.
Approved Materials and Construction
Using the wrong materials can lead to corrosion, leaks, and water contamination.
Use Code-Compliant Tank Materials
Acceptable materials include steel, concrete, composite, and plastic designed to AWWA standards. Concrete must meet ASTM C 913-2016. Plastic and fiberglass components must comply with NSF Standard 61-2016 or newer versions. Sealants and joints must be nontoxic and waterproof.
Ensure Watertight Penetrations
Seal all roof and wall penetrations thoroughly. Metal tanks require welded or gasketed pipes. Concrete tanks need standard wall castings with embedded flanges. Secure fittings with two-piece clamps to prevent rotation and leaks.
Apply Protective Coatings
Protect metal interiors with paints, coatings, or cathodic protection. These must comply with NSF/ANSI/CAN 61-2020 and relevant AWWA standards. Interior surfaces must remain smooth and free of cracks that could trap debris.
Alarms, Controls, and Monitoring
Modern regulations emphasize active monitoring to prevent overflow events before they happen.
Install Overflow and Low-Level Alarms
Tanks with monitoring systems must trigger alarms for overflow conditions, low water levels, and pump malfunctions. Telemetry systems with recording capability are recommended to alert personnel around the clock.
Use Proper Level Controls
Install altitude valves or equivalent controls to prevent overflow and ensure adequate tank turnover. For tanks on distribution systems, water level variation must not exceed 30 feet between high and low operational points.
Prevent Stagnation
Design your system for regular turnover by placing inlet and outlet pipes at opposite ends. Use tank mixers if necessary and avoid excessive storage capacity that degrades water quality. Clearwells must be sized to buffer filter fluctuations effectively.
Site Placement and Environmental Protection
The location of your tank affects both its safety and its compliance status.
Elevate Tanks Above Grade
Ground-level tanks must sit above finished grade for positive drainage. Tops must be at least 2 feet above ground and above the 100-year flood elevation. If below grade, the bottom must remain above the groundwater table.
Grade Surrounding Area Properly
Grade the area within 50 feet of the tank to slope away from the structure. This prevents standing water that could compromise the foundation or introduce contaminants.
Maintain Safe Separation Distances
Keep contamination sources like sewers and drains at least 50 feet from the tank. If gravity sewers are closer, they must meet water distribution pipe standards and pass pressure testing with zero leakage. Roof downspouts must never enter or pass through the tank structure.
Access, Safety, and Maintenance
Regular maintenance access is mandatory for inspection and cleaning purposes.
Provide Adequate Manholes and Hatches
Concrete tanks need a minimum 24-inch diameter opening while plastic tanks require 18 inches. Hatches must be watertight, locked, and hinged. On ground-level tanks, elevate manholes 24 to 36 inches above grade.
Include Safety Features
Install safety cages and rest platforms on ladders per VOSH standards. Catwalks over water must have solid floors with raised edges to prevent debris from falling into the water supply.
Follow Cleaning and Disinfection Protocols
Clean and disinfect tanks after installation, repair, or alteration. Remove all dirt, disinfect equipment, and use potable water for rinsing. Follow AWWA C652-19 by circulating a 50 mg/L chlorine solution until coliform bacteria are absent.
Special System Requirements
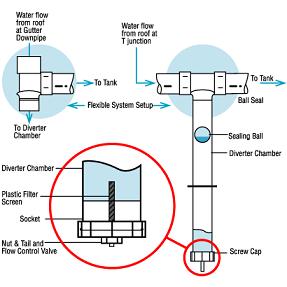
Different tank types have unique regulatory needs you must address.
Rainwater Cisterns
New cisterns must hold a minimum of 2,500 gallons per dwelling. Install one roof washer per 1,500 sq. ft. of roof area with 10 gallons of first-flush diversion. Fill pipes must extend 8 inches above ground with watertight caps.
Pressure Tanks (Hydropneumatic)
These must comply with unfired pressure vessel laws. Required components include a manway, drain, pressure gauge, and relief valves. Locate them in climate-controlled spaces to prevent freezing.
Plant Storage Tanks
Backwash tanks must handle multiple filter washes. Clearwells need a raised viewing port and submerged waterproof light. Never use a single wall to separate potable and nonpotable storage.
Testing and Compliance Verification
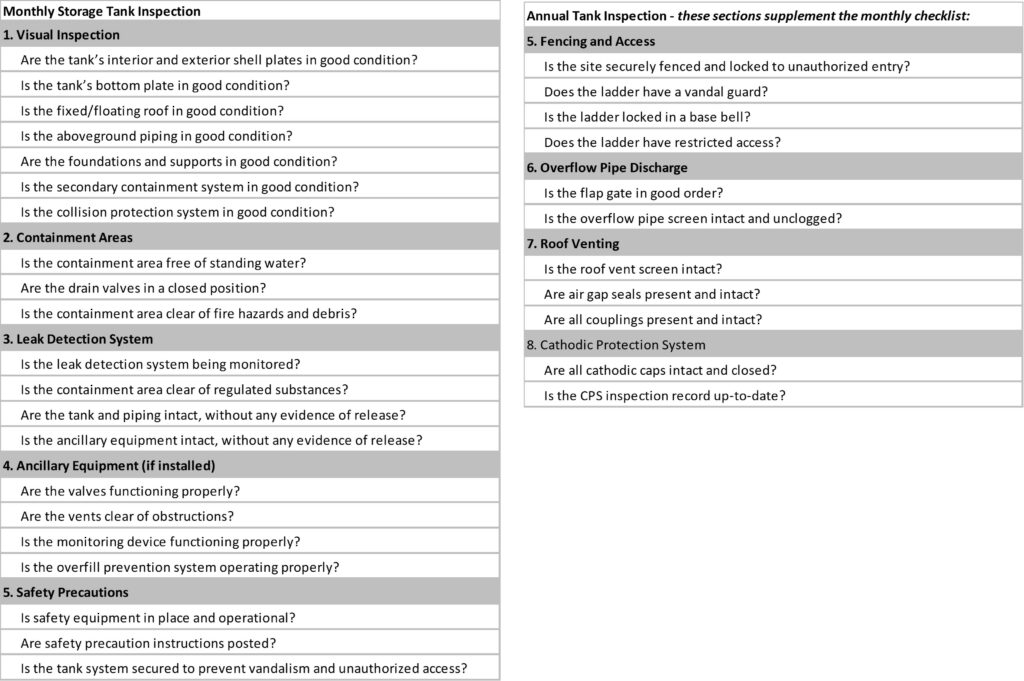
Final verification ensures your system meets all water tank overflow regulations before operation.
Perform Bacteriological Testing
Conduct coliform testing after disinfection. Repeat the process until results confirm the absence of bacteria.
Pressure Test Nearby Sewers
If gravity sewers are within 50 feet, pressure test them in place. Zero leakage is allowed to ensure no cross-contamination occurs.
Conduct Visual Inspections
Check for light ingress, screen integrity, and correct air gap height. Inspect catwalk edges to ensure they are raised and solid.
Verify Flow Capacity
Ensure overflow pipes handle maximum fault inflow without surcharging. Use flow meters or timed fill tests if necessary to confirm capacity.
Common Failure Points and Fixes
Identifying issues early saves time and prevents regulatory violations.
Freezing Pipes
Poor insulation often causes frozen pipes. Bury lines below the frost line or install heated enclosures to fix this.
Contamination via Overflow
Discharging into sewers or insufficient air gaps causes contamination. Install visible air breaks and elevate discharge points immediately.
Vector Entry
Damaged screens allow insects inside. Install 0.65mm mesh and lock hatches to prevent entry.
Structural Damage
Undersized overflow pipes cause structural stress. Resize pipes per the GPM table and ensure proper foundation bedding.
Frequently Asked Questions About Water Tank Overflow Regulations
What is the minimum air gap required for an overflow pipe?
The air gap must be at least twice the diameter of the overflow pipe or 6 inches, whichever is greater. This prevents backflow contamination effectively.
Can I connect my overflow pipe directly to the sewer?
No. Regulations strictly prohibit connecting overflow pipes to sewers, soil pipes, or building drains. They must discharge individually to the atmosphere.
How often must I disinfect my water storage tank?
You must disinfect the tank after installation, repair, or alteration. Regular testing ensures water remains free of coliform bacteria.
What mesh size is required for insect screens?
Cold water cisterns require mesh no larger than 0.65 mm. General water tanks need 16×20 mesh per inch plus ¼-inch hardware cloth.
Do rainwater cisterns have specific capacity rules?
Yes. New cisterns must have a minimum capacity of 2,500 gallons per dwelling unit. They also require specific roof washer and first-flush diversion systems.
What happens if my overflow pipe freezes?
Frozen pipes can cause tank rupture or uncontrolled discharge. Bury lines below frost depth or use frost-proof designs to prevent this failure.
Key Takeaways for Complying with Water Tank Overflow Regulations
Adhering to water tank overflow regulations protects public health and ensures your system operates legally and safely. Proper pipe sizing, correct air gaps, and regular maintenance are non-negotiable requirements for all storage facilities.
Start by auditing your current system against these standards. Check your pipe diameters, verify your air gaps, and ensure your screens are intact. If you are unsure about local variations, consult your jurisdictional authority immediately. Regular inspections and proactive repairs will keep your water safe and your facility compliant for years to come.



