
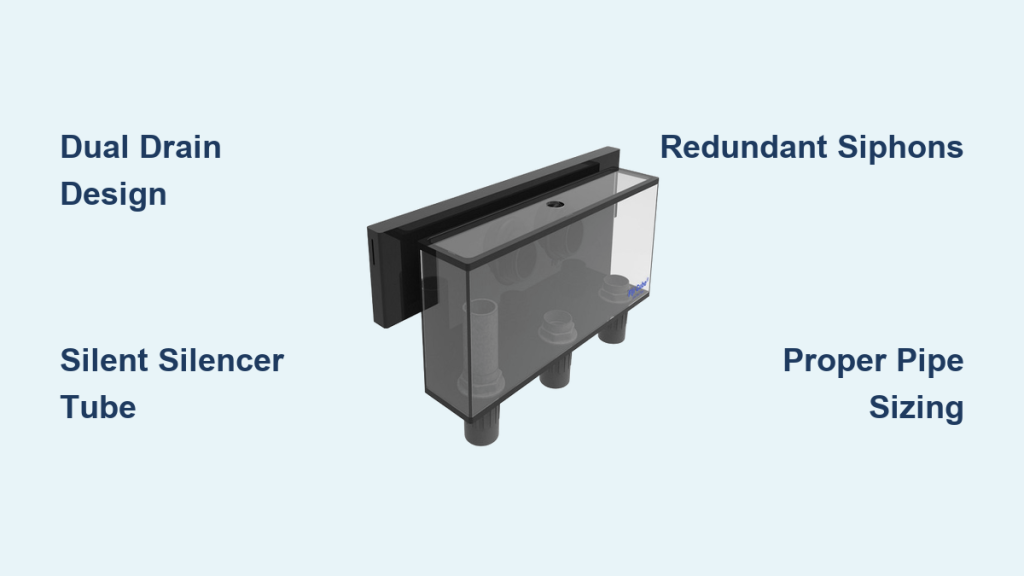
A noisy drain or a sudden flood often points to a single culprit: poor reef tank overflow design. Many aquarists ignore this critical component until water levels fluctuate or gurgling disrupts the room.
This guide explains how to select, install, and tune overflow systems for maximum safety and silence. You will learn to diagnose common failures and choose the right plumbing architecture for your specific aquarium setup.
Select the Correct Overflow Type for Your Aquarium
Choosing the right system depends entirely on your tank’s construction and your willingness to modify it. Factory options offer convenience while custom builds provide superior flow control.
Pre-Drilled Reef-Ready Systems
Most modern saltwater tanks arrive with factory-installed overflows featuring built-in weir walls. Water flows over a lip into a hidden chamber before draining through a bottom elbow fitting. These units are perfect for beginners seeking plug-and-play reliability without drilling risks. However, you cannot easily change hole sizes or positions once manufactured. Focus your efforts on maintaining flow rates and preventing clogs rather than redesigning the existing layout.
DIY Bottom-Drilled Custom Overflows
Hobbyists with non-tempered glass tanks can install custom acrylic overflow walls in the corners. This method involves drilling the tank bottom and silicone-sealing a black acrylic strip with “teeth” to block debris. You gain full control over pipe diameter and placement for high-flow applications. Warning: Never attempt to drill tempered glass as it will shatter instantly. Always verify your glass type before starting any modification work.
Back-Drilled and Side-Glass Configurations
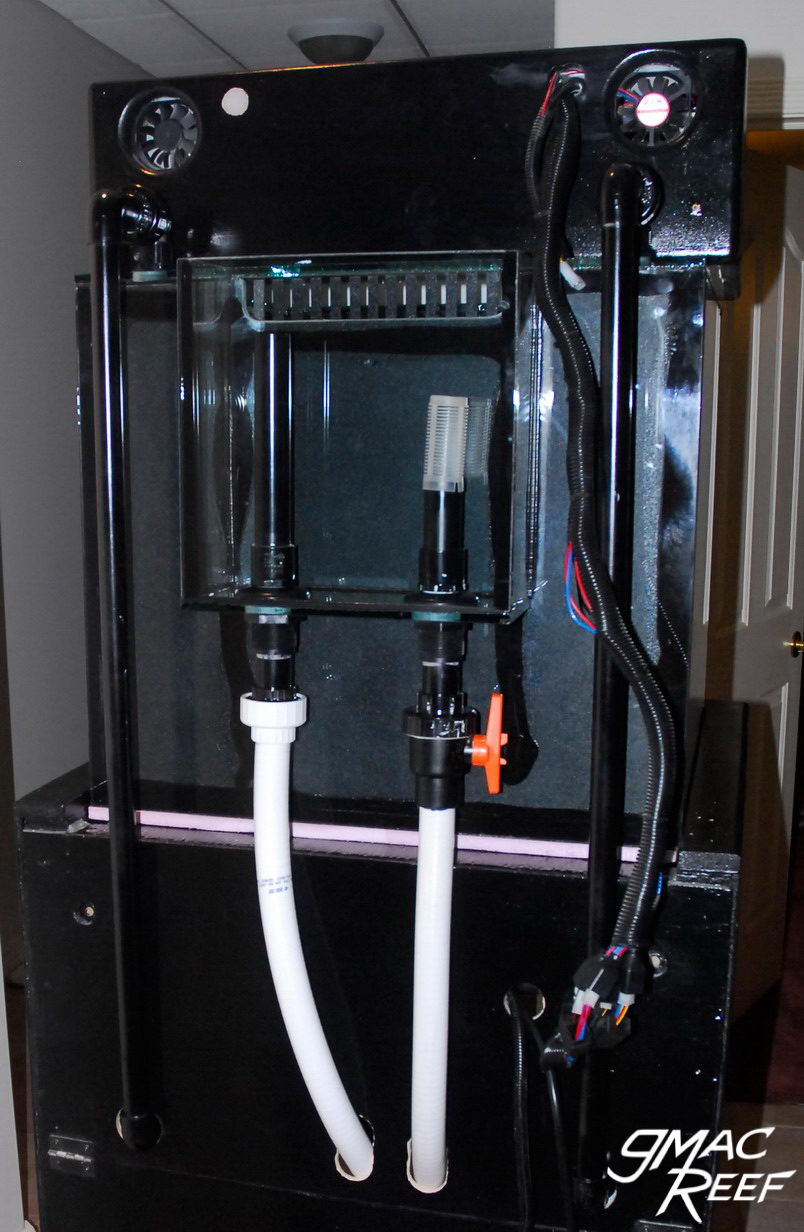
Use this method when the tank bottom is tempered but the side or back panels are safe to drill. You mount a temporary acrylic box to mark hole locations before drilling through the vertical glass. Bulkhead fittings allow for easy disassembly during cleaning sessions. This approach keeps plumbing hidden behind the tank but requires four to six inches of clearance from the wall.
Hang-On Non-Drilled Options
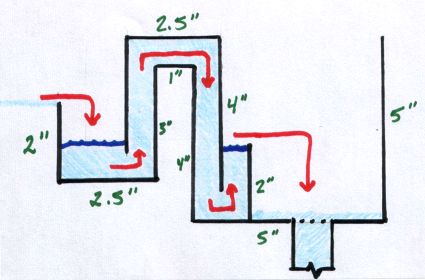
Rental properties or all-tempered tanks require surface-mounted hang-on overflows that rely on siphon physics. Popular models range from 400 to 2400 GPH to accommodate nano and large reef systems. These units are convenient but less reliable than drilled systems because a broken siphon causes immediate flooding. Always install dual redundant siphons to ensure safety during operation.
Optimize Drain Flow and Safety Protocols
Proper plumbing architecture prevents disasters by managing air and water volume effectively. Advanced designs prioritize silence while maintaining a failsafe mechanism for blockages.
Implement the Herbie Dual-Drain Design
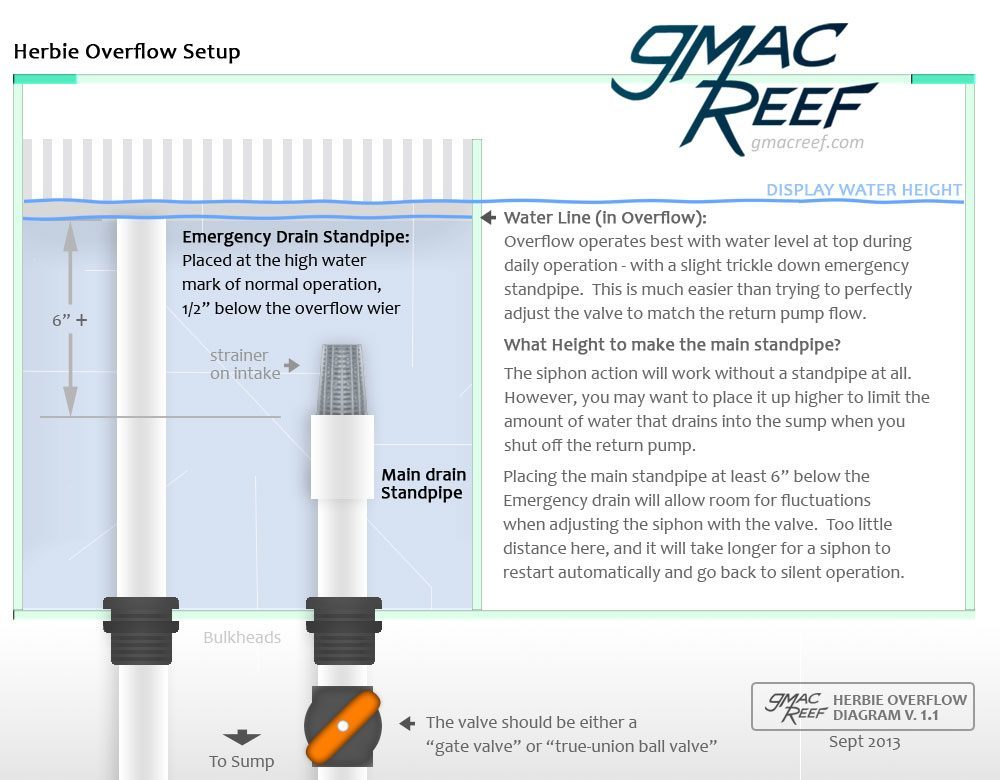
The Herbie system uses two independent pipes to achieve silence and safety simultaneously. The primary drain sits two inches below the surface and stays fully flooded to eliminate gurgling noises. A secondary safety drain sits near the rim and remains dry during normal operation. If the primary line clogs, water rises to the safety drain and creates a loud splashing alarm. This design requires precise valve tuning to keep the primary pipe flooded without sucking air.
Install Redundant Siphon Systems
Never rely on a single drain point because a single failure can flood a room in under an hour. Drilled tanks should utilize three or more holes to accommodate primary and emergency lines. Non-drilled tanks require dual hang-on units to ensure a backup path for water. This redundancy is the most critical safety feature you can add to your reef tank overflow design.
Maximize Flow with Weir Mechanics
A weir acts as a barrier that controls water level while directing surface water into the overflow. This design improves surface skimming by removing protein film before it breaks down. Variations include pipe-around-a-pipe aesthetics or air-assisted start mechanisms for easier priming. Always hard-pipe connections and use clear tubing to visually confirm that siphons are complete and bubble-free.
Reduce Noise and Prevent Clogging Issues
Silence and reliability go hand in hand when you use the right media and muffling techniques. Proper maintenance prevents the buildup that leads to noisy operation.
Add Silencer Tubes for Silent Drains
A silencer tube consists of a large outer pipe filled with pea gravel or half-inch stones surrounding the main drain. Water falling through this media loses impact noise while trapped air prevents gurgling. The outlet must remain submerged in the sump water level for maximum efficiency. Avoid small media types as they clog rapidly and restrict flow.
Use Maggie Mufflers on Standpipes
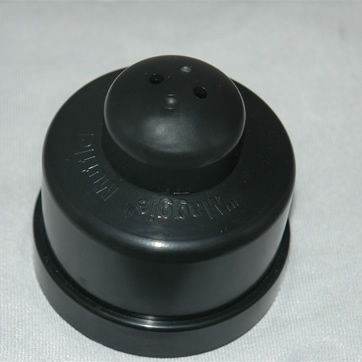
Maggie Mufflers are slip-on caps that fit over exposed one-inch or 1.5-inch standpipes to stop gurgling. These inexpensive devices trap air and smooth water entry without altering flow dynamics. They are an ideal quick fix for internal overflows where noise is a primary concern. Installation takes seconds and requires no special tools or plumbing changes.
Prevent Clogs with Proper Media and Screens
Clogs are the leading cause of overflow failure and subsequent flooding. Use large pre-filter foam pads to catch debris before it enters the overflow chamber. Install toothed acrylic strips on weirs to physically block snails and shrimp from entering the drain. Never use fine filter floss or small gravel in silencer tubes since they clog within days.
Size Pipes and Holes Correctly
Undersized plumbing creates bottlenecks that raise water levels and increase flood risk. Matching pipe diameter to your flow rate ensures smooth drainage.
Match Pipe Size to Flow Rate
Use half-inch pipes for nano tanks with low flow requirements under 500 GPH. Medium setups between 500 and 1000 GPH require three-quarter inch piping. High-flow systems exceeding 1000 GPH need one-inch diameter pipes or larger. Always oversize your gravity drains because PVC is cheap compared to the cost of water damage.
Plan Hole Configuration Strategically
Advanced systems often use five or more holes to separate primary drains from emergency overflows. Place return lines in tank corners rather than through the overflow box to reduce stress on fittings. Ensure overflow tooth slots sit above the tank trim to allow for cover placement. Strategic placement improves flow velocity and keeps the display area clean.
Install and Maintain Properly
Correct installation prevents leaks while regular maintenance ensures long-term reliability. Follow these steps to keep your system running smoothly.
Prime Siphons Correctly
Start a siphon by closing the outlet valve and submerging the tube completely. Cover the air hole with your thumb and pull suction to initiate flow. Use clear tubing to verify the line is free of air bubbles before releasing the valve. Two valves on the return and drain lines help balance flow during the startup process.
Clean Teeth and Combs Regularly
Internal overflow combs trap detritus and biofilm that restrict water flow. Inspect these areas weekly and rinse them with tank water to remove algae or snails. Blocked teeth cause water to rise over the weir and trigger emergency drains unnecessarily. Regular cleaning prevents false alarms and maintains optimal drainage speed.
Check for Leaks and Seal Integrity
DIY silicone seals must cure fully before you fill the tank with water. Inspect all bulkhead fittings and pipe joints monthly for slow drips that cause floor damage. Back-drilled systems need adequate clearance behind the tank for access during maintenance checks. A small leak behind the tank can lead to significant mold or structural issues over time.
Compare Internal vs External Overflows
Your choice between internal and external boxes affects both aesthetics and tank hydraulics. Each option has distinct trade-offs regarding space and installation.
Internal Overflow Trade-Offs
Internal boxes fit inside the tank and connect to existing bulkheads for added surface skimming. They require no wall clearance and are easy to access from the front of the aquarium. However, they reduce internal volume and can create dead zones in corners behind rockwork. These units are best for tanks placed directly against walls with limited rear access.
External Overflow Advantages
External mounts attach behind the tank to offer seamless viewing and better internal flow. They eliminate internal dead zones and hide plumbing completely from view. The downside is the requirement for four to six inches of wall clearance behind the aquarium. These are ideal for show tanks where aesthetics and uninterrupted flow are top priorities.
Select Based on Your Specific Setup
Tailor your overflow choice to your living situation and performance goals. Different scenarios demand different engineering solutions.
For Rental or Temporary Tanks
Use non-drilled hang-on overflows like the Eshopps PF series to preserve tank integrity. These units remove easily when you move and do not require permanent modifications. Dual siphons add necessary safety for unattended operation in rental properties. Avoid drilling holes since landlords rarely approve of permanent aquarium alterations.
For Maximum Viewing and Flow
Choose external back-wall overflows or ultra-slim internal weirs to minimize visual obstructions. A Herbie-style dual drain with corner returns keeps plumbing hidden while optimizing flow. Use clear PVC piping for easy diagnostics and leak detection. This setup provides the cleanest look for display-focused reef environments.
For Silent Operation
The gravel-filled silencer tube offers the quietest gravity drain solution available. A properly tuned Herbie system is the second-best option for noise reduction. Avoid commercial “silent” boxes that still gurgle due to imperfect siphons. True silence comes from flooded pipes or media-dampened water falls.
For Safety and Redundancy
Always use dual drains with one primary line and one emergency backup. Drilled tanks should have three holes to accommodate two primary drains and one emergency line. Install threaded bulkheads for quick disassembly during cleaning emergencies. Never skip redundancy because a flooded floor is the most expensive reef tank failure possible.
Frequently Asked Questions About Reef Tank Overflow Design
What is the safest overflow design for preventing floods?
The Herbie dual-drain system is safest because it separates the primary drain from an emergency overflow. If the main line clogs, the secondary line activates an audible alarm before flooding occurs. This design ensures your tank remains safe even during power outages or blockages.
How do I stop my overflow box from gurgling?
Install a silencer tube filled with large pea gravel or switch to a flooded drain design. You can also add a Maggie Muffler cap to exposed standpipes to trap air and smooth water entry. Ensuring pipes are oversized also reduces turbulence and noise significantly.
Can I drill a hole in my tempered glass tank?
No, you cannot drill tempered glass because it will shatter immediately upon contact with a drill bit. You must use a hang-on overflow system or verify that your tank sides are non-tempered before attempting modifications. Always check manufacturer specifications before drilling any glass.
How often should I clean my overflow teeth and screens?
Inspect and clean overflow teeth weekly to remove snails, algae, and debris buildup. Blocked teeth reduce flow efficiency and can cause water levels to rise unexpectedly. Regular maintenance prevents clogs that lead to emergency drain activation.
What pipe size do I need for a 100-gallon reef tank?
A 100-gallon tank typically requires at least a one-inch pipe for the main drain to handle high flow rates. Always oversize your plumbing slightly to provide a safety margin against clogs and slow drainage. Larger pipes also help reduce noise by allowing water to flow more freely.
Key Takeaways for Successful Reef Tank Overflow Design
Selecting the right reef tank overflow design balances safety, silence, and simplicity for your specific environment. Prioritize dual drains and proper pipe sizing to prevent catastrophic flooding and ensure reliable operation.
Regular maintenance of teeth, screens, and media keeps your system running quietly for years. Start by evaluating your tank’s drilling options and choose a design that offers redundancy above all else.



