When heavy rain fills your tank, poor rainwater tank overflow options can cause flooding or foundation damage. A weak system forces water out through filters or lids instead of draining safely.
You will learn to size pipes for your roof area and install gasketed or silicone seals correctly. This guide covers 3-inch and 4-inch kits plus pest screens to keep your system efficient.
Match Overflow Pipe Size to Roof Catchment Area
Your overflow pipe diameter must equal or exceed your inlet pipe size to prevent dangerous backpressure. Ignoring this rule causes water to force its way out of weak seams during storms.
Why 3-Inch Pipes Fail on Large Roofs
A 3-inch overflow works well for homes with roof catchment areas of 1,000 square feet or less. Larger roofs generate massive flow rates that overwhelm small pipes, causing backups before water can drain.
When to Upgrade to a 4-Inch System
Roof areas exceeding 3,000 square feet require a 4-inch overflow system regardless of tank volume. This larger diameter handles the high velocity of water entering the tank simultaneously during peak rainfall.
- Small roofs: Use 3-inch kits for catchment areas under 1,000 sq. ft.
- Large roofs: Install 4-inch systems for anything over 3,000 sq. ft.
- Risk factor: Undersized pipes act like straws, creating pressure that damages tank structures.
Install Gasketed Seals on Plastic Tanks
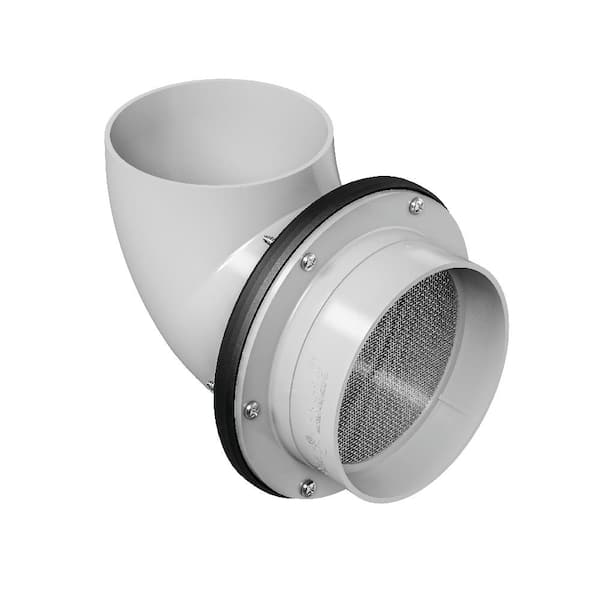
Polyethylene tanks require a gasketed mechanical seal for a reliable and removable connection. This standard method uses rubber compression to create a watertight barrier without permanent adhesives.
Drill Precise Holes for 3-Inch Kits
You must use a 3.875-inch hole saw for standard 3-inch overflow kits like the TATO111 model. Drilling the exact size ensures the flange fits snugly against the tank wall without gaps.
- Mark the height: Position the fitting just below the rim to maximize storage capacity.
- Cut the hole: Use the correct hole saw size to create a clean opening.
- Remove burrs: Sand all rough edges smooth since they are the number one cause of leaks.
- Dry fit the unit: Insert the fitting to confirm alignment before adding the gasket.
- Tighten gently: Use low torque on your drill and stop when the gasket barely bulges.
Avoid Over-Tightening Screws
Cranking down screws too hard distorts the flange and cracks the tank wall. Stop tightening immediately once you see the gasket begin to compress slightly.
Apply Silicone Sealant for Metal Tanks
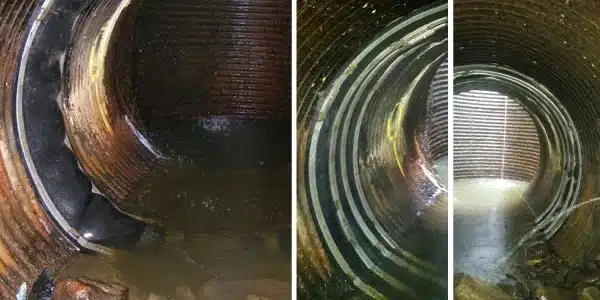
Corrugated metal tanks need silicone sealant because gaskets cannot conform to uneven surfaces. This chemical sealing method provides superior adhesion on rough or ribbed materials.
Scribe Cut Lines for Accuracy
Dry fit the overflow component on the exterior surface before cutting. Mark the exact position on the interior to ensure your cut aligns perfectly with the flange.
Bond Flanges with Tank-Safe Silicone
Apply a thick and continuous bead of tank-safe silicone to the back of the mounting flange. Focus extra material around screw holes since these are common leak points.
- Pre-drill holes: Create pilot holes in the metal to prevent stripping during installation.
- Press firmly: Push the flange flush against the tank to ensure full contact.
- Cure time: Wait 24 to 48 hours before filling the tank to let the bond set completely.
Maximize Storage Using Internal Elbow Configurations

Standard overflow placements sacrifice usable water height, but internal elbows let you fill the tank to within one inch of the top. This advanced setup uses UniSeal fittings and Schedule 40 PVC pipe.
Chamfer PVC Pipe Ends Before Insertion
Forcing dry PVC pipe into tight rubber seals can split the material. You must prepare the pipe end with a 20-degree bevel using a bench grinder followed by a 45-degree deburr.
Lubricate Seals with Dish Soap
Soapy water works better than silicone lube for sliding pipes through tight UniSeals. Avoid petroleum-based products as they degrade rubber components over time.
- Drill lower: Place the seal lower on the tank wall than standard kits.
- Insert pipe: Run the PVC pipe through the seal into the tank interior.
- Attach elbow: Connect a 90-degree elbow inside pointing upward toward the ceiling.
- Secure internally: Use set screws to hold the elbow in place without gluing the external seal.
Prevent Pests and Clogs with Screened Outlets
An open overflow pipe becomes a breeding ground for mosquitoes if left unprotected. Commercial kits include fine mesh screens that block insects while allowing full water flow.
How Mozzie Stoppa Screens Add Capacity
Products like the TATO111 and TATO123 kits feature “Mozzie Stoppa” screens that add approximately five inches of usable water height. This design allows the water level to rise higher before the overflow mechanism activates.
Use Duhiki Systems for Heavy Rain Flow
The Duhiki overflow system solves clogging issues during storms with a dual-path design. Water exits through the screen during low flow but bypasses it entirely when pressure lifts a flap valve.
- Low flow: Water filters through the screen to keep pests out.
- High flow: Pressure opens a flap valve for unrestricted 4-inch drainage.
- Benefit: Prevents bottlenecks when flow rates overwhelm standard screened outlets.
Compare 3-Inch and 4-Inch Overflow Kits
Choosing between kit sizes depends on your specific roof catchment area rather than tank volume. Both options include mosquito screens and connect to standard Schedule 40 PVC pipe.
Evaluate Price and Flow Rate Differences
The 3-inch kit costs $24.95 and suits small homes or sheds with limited roof area. The 4-inch kit costs $29.95 and handles over three times the flow rate for large commercial or barn setups.
| Feature | 3-Inch Kit (TATO111) | 4-Inch Kit (TATO123) |
|---|---|---|
| Max Roof Area | ~1,000 sq. ft. | 3,000+ sq. ft. |
| Pipe Type | 3″ Sch 40 PVC | 4″ Sch 40 PVC |
| Usable Height Gain | ~5 inches | ~5 inches |
| Best Application | Small residential homes | Large roofs and barns |
Monitor Levels in Multi-Tank Systems
Advanced systems may benefit from the RainFlo RSC Sensor Kit to monitor water levels remotely. This device connects to controllers that trigger alerts when tanks near capacity, helping you manage overflow events proactively.
Test and Maintain Your Overflow System
Never assume your installation is leak-proof without testing it first. Fill the tank slowly with a garden hose and watch the gasket line for any signs of weeping.
Inspect Seals and Drainage Paths Annually
Schedule seasonal maintenance to clear leaves and debris from screens. Verify that the outlet pipe directs water at least three feet away from the tank base to prevent erosion.
- Check seals: Look for cracks or warping on exposed gaskets.
- Clean filters: Upstream leaf guards reduce clogging at the overflow point by 70%.
- Verify slope: Ensure drainage paths slope away from the foundation to avoid structural damage.
Frequently Asked Questions About Rainwater Tank Overflow Options
What size overflow pipe do I need for my roof?
Match the overflow diameter to your inlet pipe size based on roof area. Use a 3-inch pipe for roofs under 1,000 sq. ft. and a 4-inch pipe for roofs over 3,000 sq. ft.
How do I stop mosquitoes from breeding in the overflow?
Install a screened outlet like the Mozzie Stoppa kit to block insects. These screens allow water to flow while preventing mosquitoes from entering the tank to lay eggs.
Can I use silicone instead of a gasket on plastic tanks?
Gaskets are standard for plastic tanks, but silicone works best on corrugated metal. Silicone conforms to uneven surfaces where mechanical gaskets might fail to seal properly.
Why is my overflow leaking after installation?
Rough edges on the drilled hole are the most common cause of leaks. Ensure you sand all burrs smooth and avoid over-tightening screws, which distorts the gasket.
How does the Duhiki overflow system prevent clogging?
It uses a flap valve that stays closed during light rain to filter water through a screen. During heavy storms, water pressure lifts the flap to bypass the screen entirely for maximum flow.
Key Takeaways for Selecting Rainwater Tank Overflow Options
Properly sized rainwater tank overflow options protect your investment from storm damage and foundation erosion. Always match your pipe diameter to your roof catchment area and use the correct sealing method for your tank material.
Regular maintenance of screens and seals ensures your system handles both light showers and heavy downpours efficiently. Start by measuring your roof area today to determine if you need a 3-inch or 4-inch upgrade.