
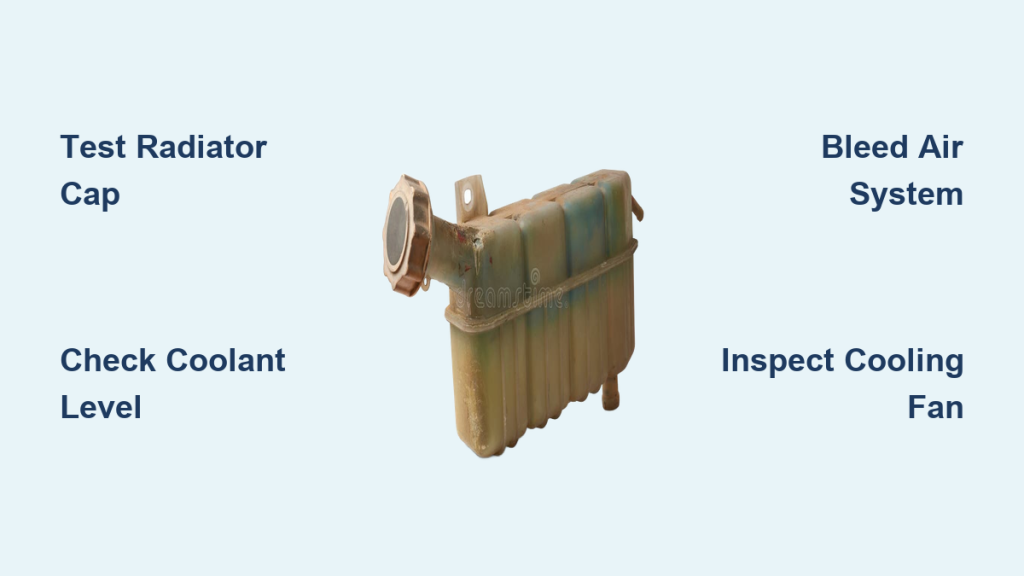
You are driving when steam suddenly billows from under the hood. You pull over to see coolant bubbling violently in the overflow tank even though the engine feels cool. This condition is known as overflow tank boiling, and it signals a critical failure in your vehicle’s cooling system.
This guide explains why your coolant boils at normal temperatures and how to fix it safely. You will learn to diagnose pressure loss, test your radiator cap, and identify hidden dangers like head gasket leaks before they destroy your engine.
Diagnose the Specific Boiling Pattern
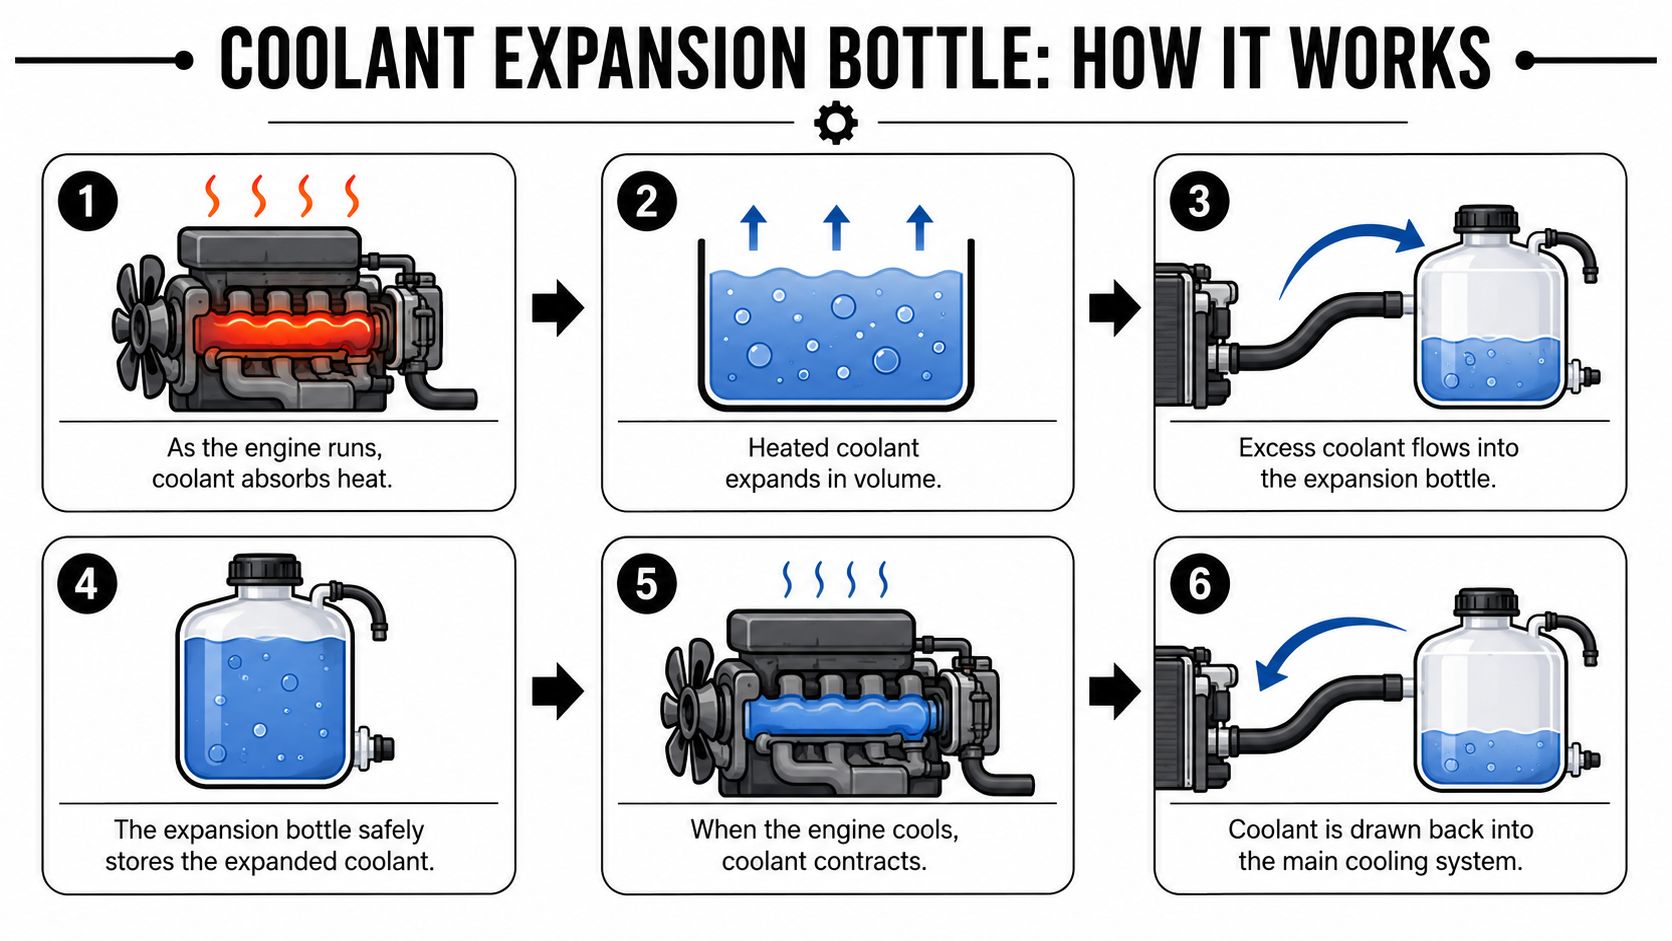
Observing exactly when and how the boiling occurs provides the first major clue. The pattern distinguishes between simple maintenance issues and catastrophic mechanical failures.
Cold Engine with Hot Coolant
If the overflow tank is boiling but the engine block feels cool, you face a specific set of problems. This mismatch often tricks drivers into thinking the engine is safe when it is not.
* A faulty temperature sensor sends false low readings to the dashboard.
* The radiator cap fails to hold pressure, letting coolant boil at 212°F.
* An air lock traps steam pockets near the reservoir.
* Radiant heat from nearby exhaust components causes localized boiling.
Immediate Boil After Shutdown
Boiling that starts right after turning off the engine points to heat soak or circulation loss. Residual heat radiates into the coolant if the fan fails to run post-shutdown. A failed water pump or stuck thermostat also prevents heat dissipation even after driving stops.
Overflow Without Active Bubbling
Coolant simply spilling over without violent bubbles may indicate an overfilled system. Normal expansion pushes out excess fluid in this scenario. It can also signal a slow leak allowing air ingress or an incorrect cap pressure rating.
Test the Radiator Cap First

The radiator or reservoir cap maintains the entire system pressure. A faulty cap is the most common cause of overflow tank boiling and the easiest component to fix.
Why the Cap Matters
The cooling system operates under pressure, typically around 15 PSI. This pressure raises the boiling point of your coolant from 212°F to approximately 265°F. If the cap seal is cracked or worn, the system loses pressure. The coolant then boils at atmospheric temperature, even if the engine is not truly overheating.
How to Test the Cap
- Ensure the engine is completely cool before touching any parts.
- Remove the cap and inspect the rubber seal for cracks or corrosion.
- Check the spring mechanism for stiffness or breakage.
- Use a radiator cap pressure tester attached to the reservoir neck.
- Pump to the rated pressure and hold for 30 seconds.
Any drop in pressure indicates failure. Always replace with an OEM-specified cap to ensure precise pressure retention. Aftermarket versions often fail to meet exact specifications.
Check Coolant Level and Flow

Insufficient fluid reduces the system’s ability to absorb heat. Even a small leak can cause the remaining coolant to cycle too quickly through hot zones, leading to boiling.
Signs of Low Coolant
- Reservoir level is below the “MIN” line when cold.
- A sweet smell is present under the hood.
- White residue appears on hoses or fittings.
Top off with manufacturer-recommended coolant immediately. Never mix different types of coolant. Pressure-test the system afterward to find the source of the leak.
Verify Circulation Components
No flow equals instant overheating. Check the thermostat and water pump. A thermostat stuck closed prevents hot coolant from reaching the radiator, causing rapid pressure buildup. Feel the upper radiator hose after warm-up. If it is cold while the engine overheats, the thermostat is likely stuck.
A failed water pump stops circulation entirely. Listen for whining noises or check for coolant trails at the weep hole. Inspect the pump pulley for any wobble. Repair requires draining coolant and removing the drive belt.
Inspect Drive Belt and Tensioner
The serpentine belt drives the water pump in most vehicles. If this belt slips or breaks, circulation stops immediately.
What to Check on the Belt
- Look for cracks, glazing, or missing ribs on the belt surface.
- Inspect the tensioner spring for wear or pulley seizing.
- Listen for squealing noises during startup or acceleration.
Even slight slippage reduces pump speed, lowering flow rate and increasing heat retention. A broken belt can also disable power steering and the alternator. Replace the belt and tensioner as a set for maximum reliability. Follow the routing diagram carefully during installation.
Bleed Air from the System
Trapped air creates pockets where coolant cannot flow. These zones overheat quickly, causing steam pockets and false boiling, especially in the overflow tank. This often happens after coolant replacement or radiator repair.
How to Bleed the System
- Park the vehicle on a slight incline with the front higher.
- Remove the reservoir cap carefully.
- Start the engine and let it warm up with the heater on max.
- Squeeze the upper radiator hose repeatedly to push air out.
- Add coolant as the level drops to maintain volume.
- Replace the cap only when the level is stable and no bubbles remain.
Some vehicles require vacuum filling or special bleed screws. Consult your service manual for specific instructions. Avoid topping off and driving immediately, as expanding air forces coolant out and creates a cycle of low levels.
Evaluate Cooling Fan Operation
At low speeds or in traffic, airflow depends on the electric cooling fan. If it fails, the radiator cannot dissipate heat even if everything else works.
Test Fan Activation
Run the engine until the temperature gauge reaches the midpoint. Listen for the fan to kick in, usually around 200–220°F. If there is no sound, check the fuse and relay by swapping them with identical ones. Test the fan motor for power using a test light.
Common failures include a burnt-out motor, faulty fan control module, or wiring damage from heat. Some modern cars run fans based on A/C demand or ECU logic. Use a scan tool to force fan activation for accurate testing.
Rule Out Head Gasket Failure
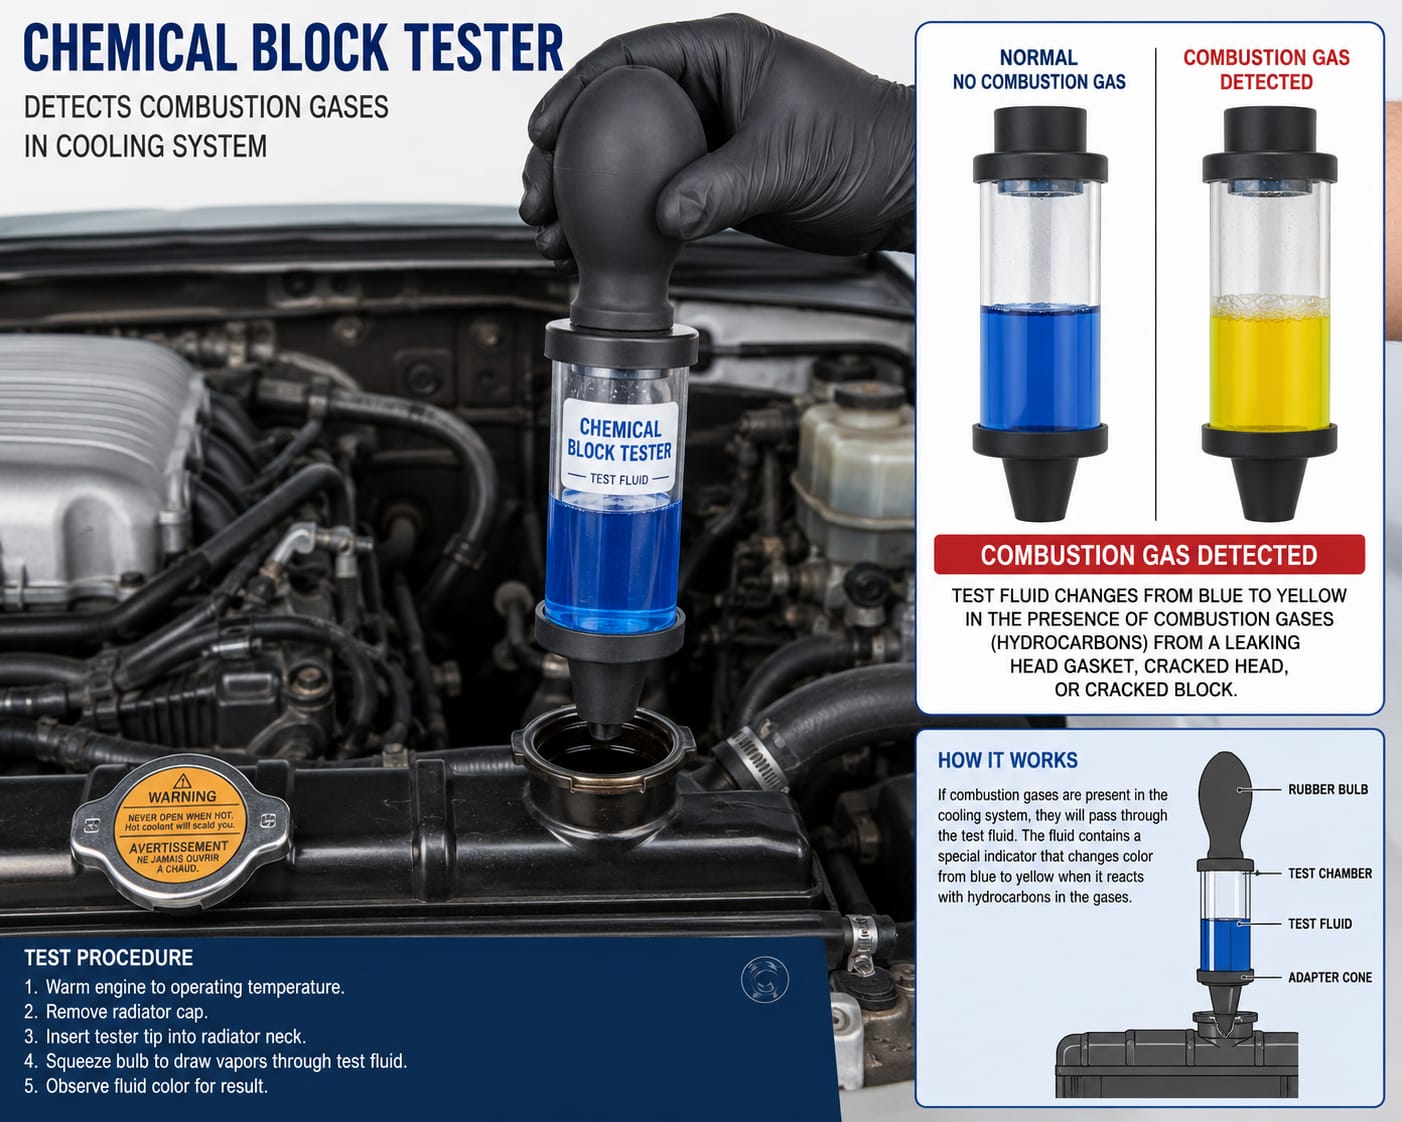
A blown head gasket allows high-pressure exhaust gases to enter the cooling system. This causes continuous bubbling in the overflow tank and violent boiling.
How to Test for Combustion Leaks
- Use a chemical block tester with blue fluid on a cold engine.
- Run the engine and watch for the fluid to turn yellow or green.
- This color change indicates hydrocarbons are present in the coolant.
You may also see milky oil, white smoke from the exhaust, or rapid pressure spikes. Even if the temperature gauge reads normal, combustion heat can boil coolant locally. If combustion tests positive, do not drive the vehicle. Continued operation can crack the engine block.
Assess Coolant Condition and Mixture
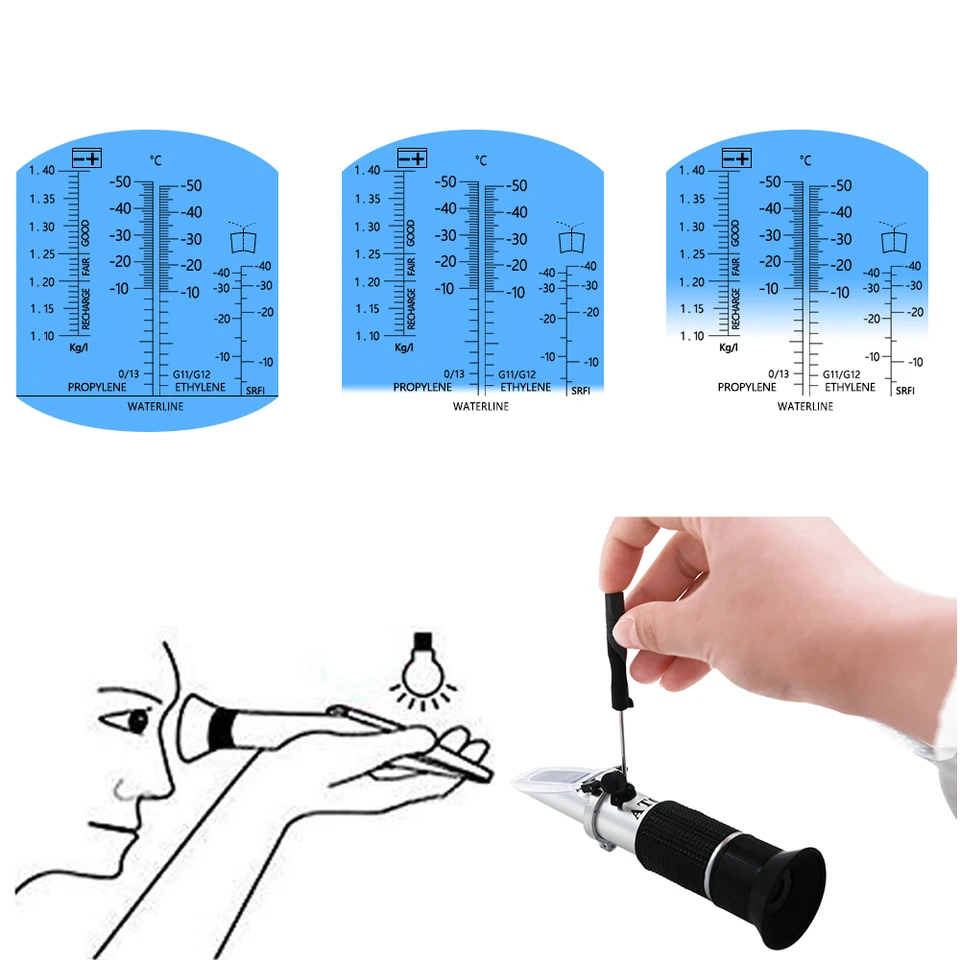
Coolant is a precise blend of ethylene glycol and water, usually in a 50/50 ratio. This mix raises the boiling point and prevents corrosion.
Problems from Poor Mix
- Too much water boils easier and freezes sooner.
- Too much glycol results in poor heat transfer and viscous flow.
- Mixed chemistries can gel or sludge, clogging passages.
Use a refractometer to test the freeze and boil protection range. Look for rust particles, oil contamination, or gel-like sludge. Flush and refill with OEM-specified coolant only. Never mix different coolant types like OAT, HOAT, or G-48.
Scan for Sensor and Electrical Faults
A malfunctioning coolant temperature sensor can report normal temperatures while coolant boils. This makes diagnosis tricky and dangerous.
How to Verify Sensor Accuracy
- Use an OBD2 scan tool to read live ECU data.
- Compare the ECU reading to the dashboard gauge.
- Use an infrared thermometer on the engine block.
If the ECU says 195°F but the block reads 240°F, the sensor is faulty. Replace the sensor if readings drift or lag. Also check coolant fan relay operation and ground connections near the sensor.
Address Heat Soak and Placement Issues
Some overflow tanks are mounted near exhaust manifolds or turbochargers. Radiant heat can cause coolant in the reservoir to boil even if engine temperatures are normal.
Signs of Heat Soak
- Boiling occurs only at idle or after shutdown.
- The reservoir is visibly near a hot component.
- The upper engine shows normal temperature, but the reservoir steams.
Install a heat shield between the exhaust and reservoir to fix this. You can also wrap nearby exhaust components with thermal insulation. Relocating the reservoir is an advanced modification option.
Follow Preventive Maintenance Steps
Most overflow tank boiling incidents are preventable with routine care. Stick to a regular maintenance checklist to avoid expensive repairs.
| Task | Frequency |
|---|---|
| Check coolant level | Monthly |
| Inspect hoses and belts | Every oil change |
| Replace coolant | Every 30,000–100,000 miles |
| Test radiator cap | During coolant service |
| Verify fan operation | Before summer or towing |
Use only manufacturer-approved coolant and OEM parts for caps and thermostats. Before long drives or towing, run the engine until fans cycle. Confirm there are no bubbles, leaks, or overheating signs.
When to Seek Professional Help
Not all issues are DIY-friendly. See a mechanic if boiling continues after replacing the cap, thermostat, and belt. Professional help is required if a combustion leak test is positive or if you suspect internal radiator blockage.
Complex electrical faults in the ECU or fan control also need expert diagnosis. Modern vehicles require scan tools and pressure testers for accurate troubleshooting.
Frequently Asked Questions About Overflow Tank Boiling
Why is my overflow tank boiling when the engine feels cold?
This usually indicates a faulty radiator cap that cannot hold pressure, causing coolant to boil at 212°F. It can also mean a bad temperature sensor is giving false readings or an air lock is trapping steam near the reservoir.
Can a bad radiator cap cause coolant to boil over?
Yes, a bad cap is the most common cause. If it cannot maintain the standard 15 PSI pressure, the coolant boiling point drops to normal water levels, causing it to boil and overflow even at normal operating temperatures.
How do I stop my coolant from boiling in the reservoir?
Identify the root cause by testing the radiator cap, checking coolant levels, and verifying fan operation. Bleed any air from the system and ensure the thermostat is opening correctly to allow proper circulation.
Is it normal for coolant to bubble after turning off the engine?
Minor bubbling can occur due to heat soak, but violent or continuous boiling is not normal. It often signals a circulation problem, a failing water pump, or combustion gases entering the system through a blown head gasket.
What happens if I ignore boiling coolant in the overflow tank?
Ignoring this issue risks severe engine damage, including warped cylinder heads or a blown head gasket. The lack of proper cooling can lead to catastrophic engine failure if the temperature exceeds safe limits.
Key Takeaways for Fixing Overflow Tank Boiling
Overflow tank boiling is a clear warning sign that your cooling system has lost pressure or circulation. The most common culprits are a faulty radiator cap, low coolant levels, or a stuck thermostat. Ignoring these symptoms can lead to expensive engine damage like warped heads or gasket failure.
Start your diagnosis by testing the radiator cap and checking for air locks. If simple fixes do not resolve the issue, investigate electrical components like the cooling fan and temperature sensors. Address the problem early to save thousands in repair costs and ensure your vehicle runs safely.



