
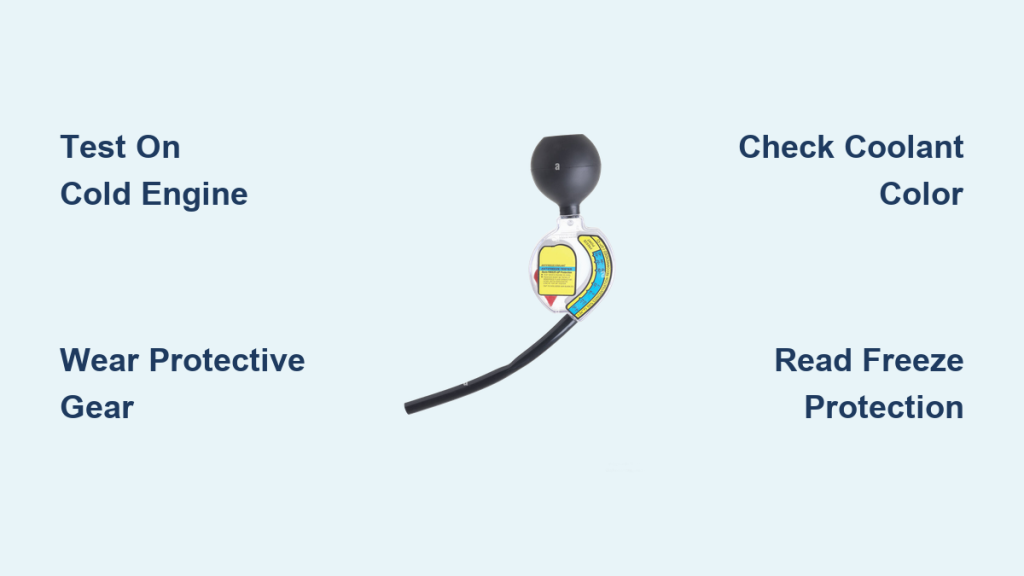
A coolant tester is one of the most affordable tools you can own, yet it prevents thousands of dollars in engine repairs. If your antifreeze loses its protective properties, your engine risks freezing damage in winter, overheating in summer, or internal corrosion that destroys water pumps and heater cores. Learning how to use a coolant tester gives you immediate insight into your cooling system condition without visiting a mechanic. This guide covers every step, from selecting the right tester to interpreting results and knowing when to flush your system.
By mastering coolant testing, you gain early warning of problems that otherwise lead to cracked engine blocks, failed head gaskets, or complete cooling system collapse. Whether you drive a daily commuter or manage a fleet, regular testing keeps vehicles running smoothly year-round.
Choose the Right Coolant Tester for Your Needs

Two main types of coolant testers dominate the market, each with distinct advantages depending on your situation and budget.
Floating Ball Testers
Floating ball testers use 3 to 5 color-coded balls inside a transparent chamber. These balls float based on the specific gravity (density) of your coolant mixture. More balls floating means higher antifreeze concentration and better freeze protection.
You must cross-reference the number of floating balls with the included manufacturer chart to determine the freeze point. For example, 4 balls floating typically indicates protection down to approximately -34°F (-37°C). These testers cost $10–$15 and require no batteries, making them ideal for budget-conscious users who don’t mind manual interpretation.
Gauge-Style Testers
Gauge-style testers feature a built-in dial or digital display showing freeze and boil points directly. No chart lookup is needed. The dual-scale design typically includes blue indicators for freeze protection and red indicators for boil protection.
These testers cost slightly more at $20–$25 but provide faster, more convenient readings. They are preferred in professional settings where quick diagnostics matter. Most gauge-style testers display both Fahrenheit and Celsius scales.
Pro Tip: Ensure your tester is compatible with ethylene glycol-based coolants used in most modern vehicles. Older alcohol-only testers give inaccurate readings on current formulations.
Prepare Safely Before Testing
Safety must come first when testing coolant. Skipping proper precautions risks severe burns, coolant poisoning, or inaccurate test results.
Never Test on a Hot Engine
The cooling system remains pressurized when the engine is hot. Opening the reservoir cap can release scalding steam and boiling coolant, causing serious injury. Always wait several hours after driving, or perform the test first thing in the morning before starting the vehicle.
Confirm the engine is cool by touching the upper radiator hose with the back of your hand. If it feels warm or hot, wait longer.
Wear Protective Gear
Ethylene glycol is toxic if absorbed through skin or splashed into eyes. Always wear nitrile gloves and safety glasses when handling coolant. Work in a well-ventilated area to avoid inhaling vapors, especially in enclosed spaces like garages.
Warning: Even small coolant spills must be cleaned immediately with absorbent material. Antifreeze smells sweet and attracts pets, but it is highly toxic to animals. Dispose of contaminated rags at a hazardous waste facility.
Gather Required Tools and Equipment
Before testing, collect all necessary items to complete the job efficiently and safely.
| Tool | Purpose |
|---|---|
| Coolant tester | Extract and analyze sample |
| Flashlight | Inspect coolant color and clarity |
| Nitrile gloves and safety glasses | Protect against toxic exposure |
| Distilled water | Clean tester after use |
| Clean rag | Dry components post-rinse |
Avoid using tap water for cleaning the tester, as minerals can damage the internal components over time.
Inspect Coolant Visually Before Testing
Always perform a visual inspection before using your tester. This step takes seconds but reveals critical information about your cooling system health.
Check Level and Condition
Remove the coolant reservoir cap only when the engine is completely cold. Check that the coolant level sits between the “min” and “max” lines, preferably near “max.”
Examine the coolant color. Green indicates traditional IAT coolant common in older vehicles. Orange or red suggests OAT coolant (such as Dex-Cool used in many GM vehicles). Yellow or blue typically means HOAT coolant, common in Ford and Chrysler vehicles.
Red Flags That Mean Stop Testing
| Sign | Likely Cause |
|---|---|
| Milky or oily appearance | Head gasket failure (oil mixing with coolant) |
| Rust particles or sludge | Internal corrosion; acidic breakdown |
| Cloudy or gel-like texture | Coolant mixing; chemical incompatibility |
If you observe any of these warning signs, do not proceed with testing. Seek professional diagnosis instead, as these conditions indicate serious engine problems.
Extract a Coolant Sample Correctly
Drawing a proper sample ensures accurate test results. Follow these steps carefully.
- Ensure the engine is completely cool.
- Unscrew the coolant reservoir cap slowly to release any residual pressure.
- Insert the tester intake tube into the fluid, keeping it away from the bottom to avoid drawing debris.
- Squeeze and release the rubber bulb slowly to draw coolant into the chamber.
- Fill to the marked line indicated on the tester. Do not overfill.
- Replace the reservoir cap immediately to prevent contamination.
For floating ball testers: Draw coolant slowly to minimize air bubble formation, as bubbles can skew your reading.
Read Your Coolant Tester Results

Reading your tester correctly depends on which type you own. Both methods are straightforward once you understand the process.
Using a Floating Ball Tester
Hold the tester vertically according to manufacturer instructions. Gently tap the side to dislodge any trapped air bubbles that might affect the reading.
Count how many colored balls float to the top. All balls floating indicates high antifreeze concentration and strong freeze protection. Few or no balls floating means low concentration and poor freeze protection, near 32°F (0°C).
Match the number of floating balls to the manufacturer chart included with your tester. For example, 3 balls might indicate -25°F freeze protection.
Using a Gauge-Style Tester
Hold the tester vertically with the scale facing you. Read the needle or arrow position directly.
The blue scale shows freeze protection. Aim for readings of -34°F or lower for adequate winter protection. The red scale shows boil protection, which should exceed 250°F under normal conditions.
Ideal Range: -34°F to -45°F freeze protection, 265–268°F boil protection.
Understand What Your Readings Mean
Interpreting your results correctly determines what action, if any, you need to take next.
| Result | Meaning | Recommended Action |
|---|---|---|
| Freeze point ≤ -34°F | Adequate for most climates | Recheck in 6 months |
| Freeze point > 0°F | No real freeze protection | Add antifreeze or flush system |
| Boil point < 250°F | Risk of overheating | Replace coolant immediately |
| 0°C (32°F) reading | Pure water or severe contamination | Flush and refill with 50/50 mix |
| Milky coolant | Oil intrusion (head gasket) | Professional inspection required |
| Rusty fluid | Corrosion damage | Full system flush required |
A reading at or near 32°F (0°C) may also occur if fuel or oil has contaminated the coolant, altering its density.
Clean and Store the Tester Properly
Proper maintenance extends your tester’s life and ensures accurate future readings.
Return the Sample Safely
Squeeze the rubber bulb to return the coolant sample back into the reservoir. Never pour used coolant down any drain, as ethylene glycol is toxic and illegal to dispose of improperly in most areas. Take used coolant to certified recycling centers found at AutoZone, O’Reilly, and similar auto parts stores.
Clean and Store Correctly
Rinse the tester thoroughly with hot distilled water immediately after use. Do not use solvents or abrasive cleaners, as these can damage internal components. Dry completely with a clean cloth, then store in a cool, dry place away from direct sunlight.
Replace the tester if the tube becomes cracked, the bulb loses suction ability, or internal parts become stained or degraded.
Maintain Proper Coolant Mixture Ratios
The correct antifreeze-to-water ratio is crucial for optimal protection. Most vehicles perform best with a 50/50 mixture.
Why 50/50 Works Best
| Benefit | Explanation |
|---|---|
| Freeze protection | Down to -34°F (-37°C) |
| Boil protection | Up to 265°F (129°C) |
| Corrosion control | Additives work at optimal concentration |
| Heat transfer | Water conducts heat better than pure antifreeze |
Avoid These Common Mistakes
Using less than 40% antifreeze provides poor freeze protection and increases corrosion risk. Exceeding 60% antifreeze reduces cooling efficiency and can cause overheating. Never use tap water, as minerals cause scale deposits and accelerate corrosion.
Pro Tip: Use premixed 50/50 coolant for convenience and guaranteed accuracy, or mix concentrate with distilled water yourself.
Know When to Flush and Replace Coolant
Even with good test results, coolant eventually needs replacement as additives deplete over time.
Signs It’s Time for a Change
- Test shows inadequate freeze or boil protection
- Coolant appears rusty, cloudy, or has a sludgy texture
- Vehicle exceeds manufacturer service intervals
- Engine overheats frequently or temperature fluctuates
Recommended Replacement Intervals
| Coolant Type | Change Every |
|---|---|
| IAT (Green) | 2 years / 30,000 miles |
| OAT (Orange/Red) | 5 years / 150,000 miles |
| HOAT (Yellow/Blue) | 5–7 years / 100,000–150,000 miles |
| Extended-Life | Up to 10 years (verify with OEM) |
Even if testing indicates good protection, follow the manufacturer schedule because additives deplete silently over time.
Frequently Asked Questions About Coolant Testing
How often should I check my coolant?
Test your coolant every 3 to 6 months, or before winter and summer extreme temperatures arrive. Vehicles in harsh climates benefit from more frequent testing.
Can I use tap water to mix coolant?
No. Always use distilled water when mixing coolant concentrate. Tap water contains calcium and magnesium minerals that cause scale deposits and accelerate internal corrosion.
What if my tester shows 0°F freeze protection?
This indicates little to no antifreeze is present. Flush the system and refill with a proper 50/50 mixture of antifreeze and distilled water.
Can I mix different colored coolants?
Never mix incompatible coolant types. Combining different formulations (such as IAT with OAT) causes gel formation, additive precipitation, and system clogs. Always verify your vehicle’s required coolant type before adding any product.
Why does my coolant look rusty?
Rusted coolant indicates internal corrosion from acidic breakdown. This requires immediate system flushing and coolant replacement to prevent further damage.
Is pre-mixed coolant worth the extra cost?
Yes. Premixed 50/50 coolant eliminates measuring errors and ensures correct proportions every time, providing consistent protection without guesswork.
Key Takeaways for Proper Coolant Testing
A $15 coolant tester can save you thousands in engine repairs by providing early warning of cooling system problems. Always test on a cold engine with proper safety gear, and inspect coolant visually before drawing a sample.
Read both freeze and boil protection scales on your tester, and hold the device vertically while tapping gently to remove air bubbles. Return coolant to the system rather than disposing of it, and clean your tester with distilled water after each use.
Maintain a 50/50 antifreeze-to-distilled-water ratio, use the correct coolant type for your vehicle, and follow manufacturer replacement intervals even when tests appear acceptable. Combine regular testing with visual inspections and scheduled maintenance to keep your engine running smoothly through every season. Test smart, flush when needed, and your cooling system will provide years of reliable service.



