
Your engine temperature climbs into the red zone every time you stop at a light. The AC blows warm air instead of cold. And you hear nothing from the fan area when the engine heats up. If this sounds familiar, your radiator fan may not be activating properly, putting your engine at serious risk.
The good news: you can often diagnose and fix this yourself without replacing parts or paying for a tow. While there is no single reset button, a series of electrical checks, component tests, and forced activation steps can restore normal operation. In most cases, the problem is not the fan itself but a blown fuse, faulty relay, or sensor issue stopping the signal.
This guide walks you through exactly how to reset your radiator fan step by step. You will learn how to force the fan on, test each component, clear false signals, and prevent future overheating. Whether you are dealing with a silent fan, intermittent operation, or post-shutdown failure, these troubleshooting steps work on most modern vehicles.
Check Coolant Level First
Low coolant is a leading cause of fan failure. Without enough fluid, the temperature sensor cannot read accurately, so the ECU never triggers the fan.
Why Coolant Matters
Air pockets in the system insulate the sensor, making the engine appear cooler than it actually is. Even if the fan works, it will not activate without the correct signal. Low coolant also increases overheating risk.
Steps to Verify
- Wait until the engine is completely cold.
- Locate the coolant expansion tank, usually a translucent plastic reservoir.
- Confirm the level sits between the MIN and MAX marks.
- Top up with the manufacturer-recommended coolant mix if low.
Pro Tip: After refilling, run the engine with the heater on full blast to bleed air from the system. Monitor for leaks underneath the vehicle.
Inspect the Radiator Fan Fuse
A blown fuse cuts power to the fan motor. It is one of the fastest and cheapest fixes available.
Locate the Correct Fuse
- Open the engine bay fuse box, typically near the battery.
- Refer to your owner’s manual or the diagram on the fuse box cover.
- Find the fuse labeled “Radiator Fan,” “Cooling Fan,” or “FAN.” It is often rated at 40A to 50A.
Test and Replace
- Remove the fuse using the puller tool or tweezers.
- Visually inspect the metal strip inside:
– Intact means the fuse is good.
– Broken or blackened means the fuse is blown. - Use a multimeter in continuity mode to confirm.
- Replace with an identical amperage fuse. Never use a higher rating.
Warning: If the new fuse blows immediately, stop. This indicates a short circuit or failing motor. Do not keep replacing fuses.
Swap the Cooling Fan Relay
The relay acts as a switch that sends power to the fan when the ECU commands it. A stuck or failed relay prevents activation.
Find the Relay
- Check the same engine bay fuse box.
- Look for a relay labeled “Fan,” “Radiator,” or “Cooling.”
- It is usually the same size and shape as nearby relays such as the horn or AC relay.
Test by Swapping
- Turn off the ignition.
- Remove the suspect relay.
- Replace it with a known-working relay of the same type, like the horn relay.
- Start the engine, let it warm up, or turn on the AC to force fan activation.
Result:
– Fan turns on means the original relay was faulty.
– Still no fan means the problem lies elsewhere.
Expert Note: Relays fail due to heat and vibration over time. Replace with OEM-grade parts for longer service life.
Force Fan Activation with Jumper Wires
This test bypasses all sensors and controls to directly power the fan motor. It is a critical step in diagnosing whether the fan can be reset or needs replacement.
Safety First
- Keep the engine off and cool.
- The battery negative terminal can remain connected, but exercise caution.
- Keep hands, tools, and clothing clear of the fan blades.
Jumper Test Steps
- Locate the fan motor’s electrical connector (pigtail harness).
- Disconnect it from the motor.
- Use two jumper wires:
– Connect one wire from the battery positive (+) terminal to the fan’s positive lead.
– Connect the second wire from battery negative (–) to the fan’s ground lead. - Observe the result:
| Result | Meaning |
|---|---|
| Fan spins smoothly at full speed | Motor is good. Issue is in control circuit. |
| Fan does not spin | Motor is dead or seized. Needs replacement. |
| Fan spins slowly or makes noise | Motor bearings failing. Replace fan assembly. |
Pro Tip: If the fan runs during this test, the system can be reset by fixing upstream components. There is no need to replace the fan itself.
Reset ECU with Battery Disconnect
Sometimes the Engine Control Unit gets stuck in a faulty state, preventing fan activation. A battery reset clears temporary errors and resets sensor logic.
How to Reset ECU
- Turn off the ignition and remove the key.
- Open the hood and locate the battery.
- Use a wrench to disconnect the negative (–) terminal.
- Wait 10 to 15 minutes to fully drain residual power.
- Reconnect the terminal and tighten it securely.
- Start the engine and let it idle to operating temperature.
What This Fixes
- Clears false temperature readings.
- Resets relay control logic.
- Reinitializes fan activation thresholds.
Note: Some vehicles may need a short drive to relearn settings. The fan should now respond normally to heat or AC demand.
Test the Coolant Temperature Sensor
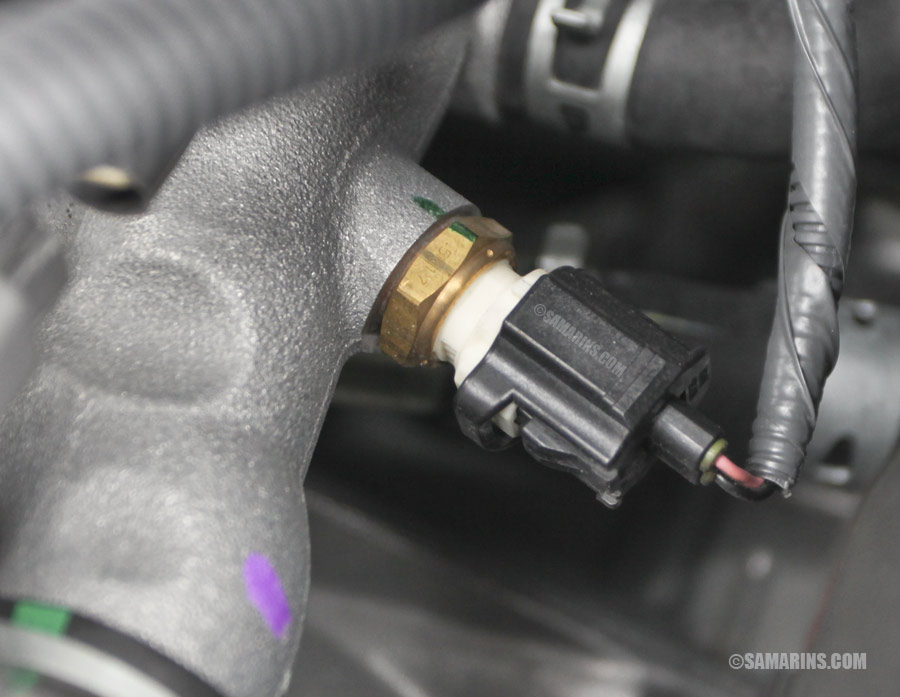
A faulty ECT sensor sends incorrect data to the ECU, like telling the computer the engine is cold when it is actually hot.
Locate and Test
- Find the ECT sensor, usually near the thermostat housing or coolant outlet.
- Unplug the electrical connector.
- Use a multimeter to measure resistance across the sensor terminals.
- Compare readings to your vehicle’s repair manual specs at various temperatures.
Common Failure Signs:
– Infinite resistance (open circuit) means the sensor is dead.
– Zero resistance (shorted) means a false cold reading.
– Out-of-spec values mean inaccurate fan timing.
Replace if Faulty
- Buy a direct-fit replacement sensor.
- Drain coolant slightly below sensor level.
- Unscrew the old sensor, install the new one with sealant, and reconnect.
After replacement, perform an ECU reset using the battery disconnect method to clear old data.
Inspect Wiring and Connectors
Corrosion, loose pins, or broken wires can interrupt the fan circuit even when all components are functional.
Key Areas to Check
- Fan motor connector: Look for melted plastic, green corrosion, or bent pins.
- Relay socket: Check for burnt terminals or loose contacts.
- Wiring harness: Trace from the fan to the fuse box. Look for frayed, chewed, or heat-damaged wires.
How to Test Continuity
- Set your multimeter to continuity mode.
- Probe both ends of a suspected wire.
- A beep means the circuit is intact.
- No beep means there is a break in the wire.
Fix: Repair broken wires with solder and heat-shrink tubing rather than electrical tape. Replace damaged pigtails if necessary.
Monitor Fan Behavior with AC On
The radiator fan should activate immediately when the AC compressor engages, even if the engine is cold. This serves as a built-in system override.
Test Procedure
- Start the engine when cool.
- Turn the AC to maximum cooling and full fan speed.
- Listen for the radiator fan to turn on within 5 to 10 seconds.
Results:
– Fan turns on means the control system is functional. The problem may be temperature-related, such as a sensor or thermostat issue.
– No fan means a power supply issue (fuse, relay, wiring) or motor failure.
Note: If the fan works with the AC but not when the engine is hot, suspect the ECT sensor or its circuit.
Final Reset and Verification Steps
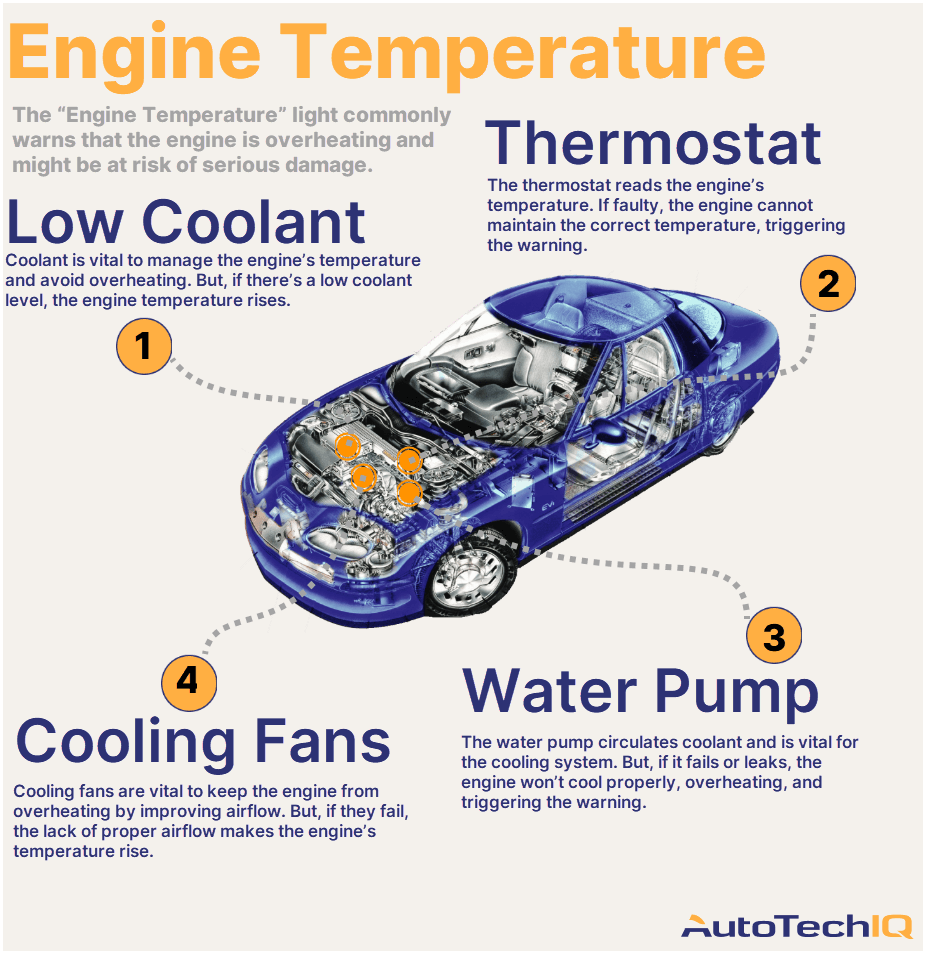
After repairs or resets, verify the fan operates under real conditions.
Road Test Procedure
- Drive the vehicle until the engine reaches normal operating temperature.
- Idle in park for 3 to 5 minutes.
- Watch the temperature gauge and listen for fan activation.
Expected Behavior:
– Fan turns on when coolant reaches approximately 200 to 220°F (varies by model).
– Fan turns off when temperature drops.
– The fan may cycle on and off while idling.
No Activation? Recheck:
– Fuse and relay seating.
– ECU reset completion.
– Coolant level.
– Sensor connections.
When to Replace the Fan Assembly
If the fan fails the jumper test or shows physical damage, replacement is necessary.
Signs You Need a New Fan
- Motor does not spin with direct power.
- Loud grinding or wobbling sounds.
- Cracked or bent blades.
- Burnt wiring at the motor.
Replacement Tips
- Buy an OEM or high-quality aftermarket unit.
- Match the part number to your VIN.
- Some models require bumper or radiator removal. Consult repair guides.
- Always disconnect the battery before starting work.
Cost Guide:
– Part: $100 to $300
– Labor: $100 to $200
– Total: $200 to $500 (varies by model)
Prevent Future Fan Failures
Keep your cooling system reliable with these habits:
Maintenance Checklist
- Check coolant level monthly.
- Inspect the fan area for debris like leaves or plastic every 3 months.
- Listen for early warning noises such as grinding or rattling.
- Replace coolant every 5 years or as scheduled.
- Use dielectric grease on electrical connectors to prevent corrosion.
Pro Tip: In hot climates or heavy traffic areas, consider upgrading to a dual-fan kit for better cooling performance.
Frequently Asked Questions About Resetting a Radiator Fan
Is there an actual reset button for a radiator fan?
No, there is no dedicated reset button. “Resetting” a radiator fan means troubleshooting and fixing the underlying issue, such as replacing a blown fuse, swapping a faulty relay, or clearing ECU errors with a battery disconnect.
Can a bad coolant sensor stop the radiator fan from working?
Yes. The Engine Coolant Temperature sensor sends temperature data to the ECU. If it fails or sends incorrect readings, the ECU may never command the fan to turn on, even when the engine is overheating.
How do I force my radiator fan to turn on?
You can force the fan on by disconnecting the fan motor harness and using jumper wires to connect the fan directly to the battery. This bypasses all sensors and controls to test the motor itself.
Why does my car overheat only when stopped?
When stopped or moving slowly, natural airflow through the radiator drops significantly. Without the electric fan running, the engine cannot dissipate heat effectively, causing temperatures to spike at idle.
How long does it take to reset the ECU by disconnecting the battery?
Disconnecting the negative battery terminal for 10 to 15 minutes is typically enough to drain residual power and reset the ECU. Reconnect the terminal and start the engine to let it relearn.
What causes a radiator fan to stop working suddenly?
Common causes include a blown fuse, a failed relay, a faulty coolant temperature sensor, damaged wiring, or a seized fan motor. Electrical components fail more often than mechanical parts.
Key Takeaways for Resetting Your Radiator Fan Successfully
There is no magic reset button for a radiator fan, but systematic troubleshooting can restore function in most cases. Start with the simplest checks: coolant level, fuses, and relays. These cost little to fix and solve the majority of fan issues.
If those components check out, move to sensor testing and ECU reset procedures. The jumper wire test is your definitive diagnostic tool, confirming whether the fan motor itself works. A working motor means the problem lies upstream in the control circuit.
Address problems early. A few minutes of troubleshooting today can prevent a blown head gasket or seized engine tomorrow. If the diagnosis points to internal wiring damage or ECU failure, seek professional help to avoid further complications.



