
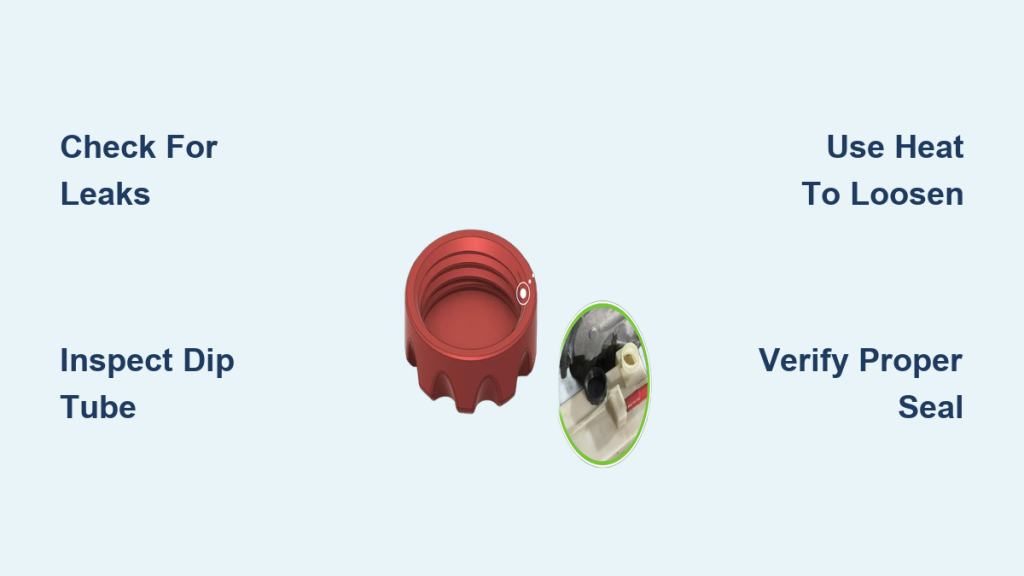
A failing coolant reservoir cap can lead to overheating, coolant leaks, and air in the cooling system, yet replacing it is often a quick fix that saves you from costly engine damage. The coolant reservoir cap maintains pressure in your engine’s cooling system, raises the boiling point of coolant, and allows proper expansion and contraction during temperature cycles. This guide walks you through every step, from safely removing a stuck or broken cap to installing a new one and verifying system performance.
You’ll learn proven techniques used on Ford, Chevrolet, and Honda models, including how to handle common complications like separated caps, missing dip tubes, and debris in the reservoir. Whether your cap turns easily or refuses to budge, this guide delivers actionable solutions using basic tools and smart diagnostics.
Identify Cap Failure Signs
Coolant Leaks and Overheating Clues
If your engine overheats despite full coolant levels, a faulty reservoir cap may be the culprit. Watch for these common symptoms:
- Puddles of coolant near the radiator or under the hood
- White crust or residue around the reservoir neck
- Radiator fails to draw coolant back after shutdown
- Frequent need to top off coolant without visible external leaks
These issues often stem from a compromised seal or broken internal components. A degraded rubber gasket can allow pressure loss, while a missing or damaged dip tube prevents coolant return, both mimicking larger cooling system failures.
Visual Inspection Tips
Remove the cap only when the engine is cold and check for these visible problems:
- Cracks in the plastic housing
- Warped sealing surfaces
- Separation between upper and lower cap sections
- Missing spring or washer inside the cap
On Ford models like the 2016 Focus or EcoBoost Mustang, caps frequently break into two pieces due to aged internal seals bonding the plastic layers together over time.
Essential Safety Steps
Always Work on a Cold Engine
Never open the coolant reservoir when the engine is hot. The system operates under pressure, and releasing it suddenly can spray scalding coolant or steam, causing serious burns. Wait at least one to two hours after shutdown, or longer in hot climates. Confirm the engine is cool by touching the hood or radiator, and use caution.
Protect Yourself and Your Vehicle
Wear safety glasses and gloves to shield against sharp plastic fragments and chemical exposure. Keep tools organized in a well-lit workspace to avoid dropped parts or missteps. Never drive with a missing or improperly sealed cap, as this risks rapid overheating and engine damage.
Required Tools for Cap Removal

Standard Tools for Intact Caps
For undamaged caps that turn normally, you only need basic items:
- Gloves and safety glasses
- Clean rag to wipe the area before removal
Most caps unscrew by hand with no special tools required, including on vehicles like the 2007-2014 Chevrolet Silverado 2500.
Advanced Tools for Stuck or Broken Caps
When the cap won’t turn or breaks apart, gather these tools before starting:
- Needle-nose pliers for gripping inner ridges or broken edges
- Snap-ring pliers (low-profile) to lift broken base from underneath
- Flat-head screwdriver plus hammer to tap cap counter-clockwise
- Hair dryer or heat gun on low heat to soften fused rubber-plastic bond
- Penetrating oil like WD-40 to lubricate seized interface
- Drill with 1/8-inch bit to create anchor holes for pliers grip
- Magnet to retrieve fallen metal spring
- Garden hose to flush out debris after removal
Choose methods based on cap condition, and always start with the least invasive options first.
Remove Intact Coolant Cap
Simple Twist-Off Procedure
Confirm the engine is completely cold, then locate the coolant reservoir, which is usually a translucent tank near the radiator with MIN/MAX markings. Rotate the cap counter-clockwise until it releases, then lift straight up and inspect for damage.
On some models, the cap has a locking tab. Press down slightly before turning. Set the old cap aside and examine internal components, including the spring, washer, and dip tube if integrated.
If removal is smooth and no cracks appear, replacement may be preventive rather than urgent.
Fix Stuck or Broken Caps
Pliers and Lubrication Method
When the cap resists turning, insert needle-nose pliers into internal grooves or broken edges. Apply penetrating oil lightly around the cap base, being careful not to let it enter the reservoir. Blow air gently into the gap to spread the lubricant, then apply steady incremental counter-clockwise force.
Progress may be slow. Repeat as needed. Success often comes after several minutes of patient effort.
Heat to Loosen Fused Seals
Degraded rubber can bond tightly to the reservoir bore over time. Use a hair dryer on low heat for 30 to 60 seconds, focusing heat on the cap-rim junction. Attempt removal immediately after heating while the plastic is still warm.
Avoid high heat, as this can warp plastic reservoirs. This method works well on Honda and Ford models where caps fuse from long-term pressure exposure.
Tap to Break Initial Seal
If the cap is seized but intact, place a flat-head screwdriver against a cap groove. Gently tap counter-clockwise with a hammer. Each tap can weaken the bond, so repeat until rotation begins.
This shock technique is effective for caps that haven’t fully degraded but are stuck from long-term pressure.
Drill for Better Grip
For caps that spin freely or are broken, drill two small holes (1/8 inch) near the center of the cap, opposite each other. Insert needle-nose pliers into the holes, then turn slowly counter-clockwise to unscrew.
Drill only the cap to avoid contacting the reservoir neck and causing cracks. This method provides strong leverage and is widely used on Ford models with brittle caps.
Extract Broken Base with Snap-Ring Pliers
This technique is common on Ford Focus and Mustang models. When the top breaks off, expose the lower ring and insert low-clearance snap-ring pliers underneath the base. Angle upward and pull to lift the cap out.
After removal, check for fallen internal spring, missing dip tube, and plastic shards in the tank. Use a magnet to retrieve metal springs and flush the reservoir with water.
Clean and Inspect Reservoir
Remove Debris Safely
Broken caps leave fragments behind that can cause serious problems. Shine a flashlight into the reservoir and look for plastic shards, loose dip tube, and corrosion or sludge.
Use tweezers or pliers to extract large pieces. Flush with running water or a garden hose to clear fine debris. Never start the engine with debris in the reservoir, as this can clog the dip tube or damage the water pump.
Check Critical Internal Components
Verify the dip tube is present and intact, as this is essential for coolant return, especially on Honda and Ford models. Check that the internal bore is smooth, since this is the primary sealing surface and scratches here require reservoir replacement. Inspect threads are undamaged, as stripped threads mean the new cap won’t seal properly.
Minor scratches on the outer lip are acceptable if the bore is clean.
Install New Coolant Reservoir Cap
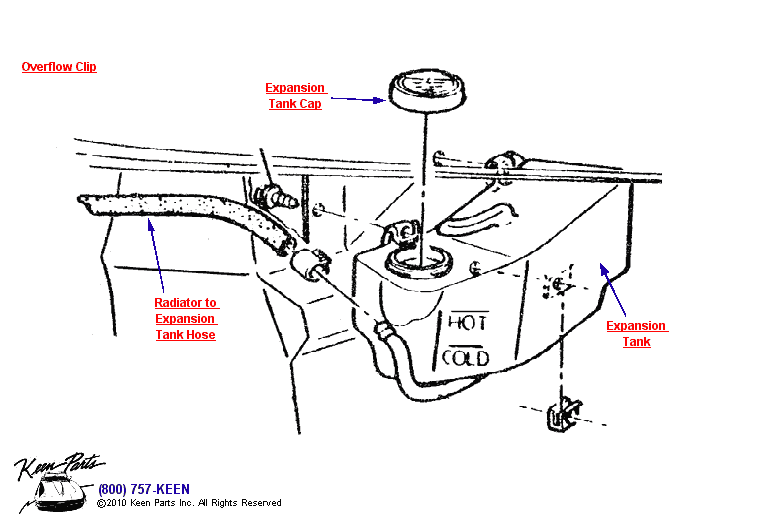
Step-by-Step Installation
Wipe the reservoir neck with a clean dry cloth. Align the new cap with the reservoir opening, press down, and turn clockwise until it bottoms out. Tighten until firm resistance is felt, but do not over-tighten.
OEM Ford caps seat flush and should be removable with moderate hand force after installation. Ensure the cap sits evenly and cannot be turned further.
Choose the Right Replacement
Consider these options when selecting a replacement. OEM caps offer perfect fit and durable materials but cost more. TRQ aftermarket caps are affordable and widely available but may lack OEM-quality seals. Full assembly kits replace the cap, dip tube, elbow, and hose, which is best for recurring issues.
For models like the Honda Civic or Ford Focus, consider a complete cap assembly if previous failures occurred. Avoid low-quality aftermarket plastic tubes, as they degrade faster.
Verify System After Replacement
Check Coolant Level and Leaks
Confirm coolant is between MIN and MAX lines. Start the engine and let it warm to operating temperature. Watch for leaks around the new cap, coolant bubbling or spewing, and temperature gauge climbing abnormally.
Monitor Coolant Return
After shutdown, the radiator should draw coolant back from the reservoir as the system cools. If the reservoir stays full and the radiator level drops, suspect a missing or clogged dip tube, air pockets in the system, or improper cap seating.
One user resolved chronic overheating simply by reinstalling a forgotten dip tube, proving that full inspection matters.
Diagnose Fan Behavior
It is normal for the radiator fan to run briefly after turning off the engine. But if it runs continuously, check for residual heat or cooling system issues. Reinspect the cap seal, coolant level, and dip tube. Persistent fan operation often signals unresolved overheating.
Replace Full Cap Assembly When Needed
When to Upgrade Beyond the Cap
If you’ve had repeated failures or see multiple worn parts, replace the entire cap assembly including the dip tube, elbow connector, black plastic hose, and washer/spacer. This takes less than five minutes and prevents future issues.
Installation Tips
Insert the dip tube fully into the reservoir. Secure hose clamps but do not overtighten. There is no need to remove the radiator cap unless servicing the radiator.
Replacing the full assembly fixed a “full reservoir, empty radiator” problem in under two minutes for one user.
Model-Specific Cap Tips

Ford Focus and Mustang (EcoBoost)
Caps on these models are prone to breaking in two, so use snap-ring pliers or the drilling method. Sealing occurs at the internal bore, not the outer lip, so a scratched lip is acceptable. Use OEM or high-quality aftermarket parts to avoid repeat failures.
Chevrolet Silverado 2500 (2007-2014)
These vehicles have a simple twist-off design with no tools needed if the cap is intact. TRQ aftermarket caps perform reliably. Check for leaks after installation, which is common on older reservoirs.
Honda Models
The dip tube is critical for coolant return, and without it, coolant won’t return properly. Aftermarket plastic tubes may be lower quality, so verify durability before purchasing. Inspect the cap seal annually due to high failure rates on these models.
Prevent Future Cap Problems
Replace Every 3-5 Years
Even if no symptoms appear, rubber seals degrade over time, springs lose tension reducing pressure control, and plastic becomes brittle increasing breakage risk. Treat cap replacement like a filter change for preventive maintenance.
Keep a Spare On Hand
For vehicles with known cap issues like Ford EcoBoost or Honda Accord, store a spare OEM cap in your glovebox. A $15 part can save you from a $1,000 tow.
Clean Reservoir Regularly
Every two to three years, drain coolant if scheduled for a flush, remove the cap, and flush the reservoir with water. Inspect for sediment or buildup. A clean system extends cap life and improves cooling efficiency.
Troubleshoot Post-Replacement Issues
Engine Overheats After New Cap
If the engine overheats, check for a missing dip tube, air in the system, or debris in the reservoir. Reinstall or replace the dip tube, bleed the cooling system per vehicle manual, and flush and recheck flow.
Coolant Won’t Return to Radiator
Confirm the dip tube is fully seated. Check for kinked or cracked hoses. Bleed air from the system, as some vehicles require specific procedures like elevated front end or bleed screw.
Cap Hard to Remove After Installation
A hard-to-remove cap is likely over-tightened or has debris in the threads. Clean threads with a soft brush and reinstall with proper hand-tightening. No tools are needed for correct installation.
Coolant Leaking Around New Cap
Leaking may indicate a damaged reservoir bore requiring tank replacement, wrong cap type requiring verification of compatibility, or over-tightened or misaligned installation requiring reseating.
Frequently Asked Questions About Coolant Reservoir Cap Replacement
How do I know if my coolant reservoir cap is bad?
Signs of a bad cap include coolant leaks around the reservoir neck, visible cracks or warping in the cap, engine overheating despite adequate coolant levels, and difficulty turning or seizing of the cap. If the cap separates into pieces when you try to remove it, that’s a clear indicator of failure.
Can I drive with a broken coolant reservoir cap?
No, you should never drive with a broken or missing cap. This can lead to rapid coolant loss, overheating, and serious engine damage. If the cap is damaged, replace it immediately before driving the vehicle.
How much does it cost to replace a coolant reservoir cap?
Replacement caps cost $15-$30 for aftermarket options or $30-$50 for OEM parts. The entire cap assembly with dip tube runs $40-$80. Labor costs if done professionally typically add $50-$100.
Why does my cap keep breaking?
Repeated cap failures may indicate a damaged reservoir bore, incorrect cap type for your vehicle, or excessive pressure in the cooling system. Consider replacing the entire cap assembly including the dip tube if failures continue.
Do I need to drain coolant to replace the reservoir cap?
No, you do not need to drain coolant to replace the cap itself. However, if you’re replacing the entire assembly or performing other cooling system work, draining may be necessary. The cap removal is done with the system at atmospheric pressure when cold.
Key Takeaways for Fixing Your Coolant Reservoir Cap
Replacing a coolant reservoir cap is usually simple, but a broken or stuck cap demands patience and the right tools. Always work on a cold engine to prevent burns, inspect the dip tube for damage or absence, and use quality replacements from OEM or trusted aftermarket brands.
Whether you’re fixing a leak or preventing overheating, this small part plays a big role in engine health. With the techniques in this guide, you can handle any cap scenario from routine swap to emergency repair. Keep a spare cap on hand for vehicles with known issues, and inspect your cooling system annually to catch problems early.



