
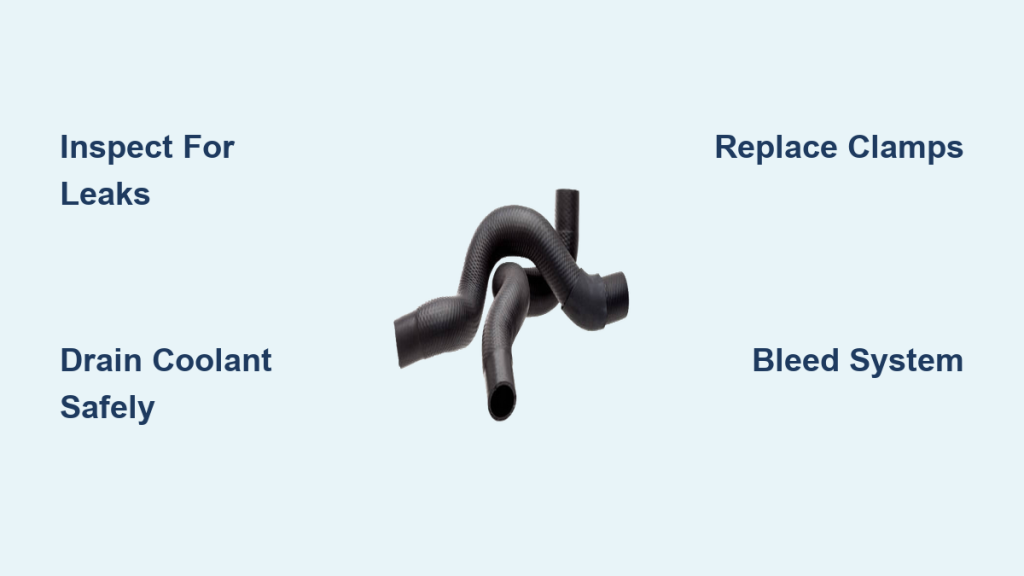
A failing radiator hose can spell disaster for your engine. When coolant leaks or flow is disrupted, overheating follows fast. If you’re seeing puddles under your car, smelling sweet steam, or watching the temperature gauge climb, a damaged radiator hose may be the culprit. The good news is that replacing it is a manageable DIY job that can save you hundreds in labor costs.
In this guide, you’ll learn how to safely diagnose, remove, and replace a radiator hose with precision. You’ll also discover warning signs to catch early, tools you’ll need, and pro tips to avoid common mistakes. Whether you’re facing a cracked upper hose or a bulging lower one, this step-by-step walkthrough ensures your cooling system runs strong.
Diagnose Radiator Hose Failure
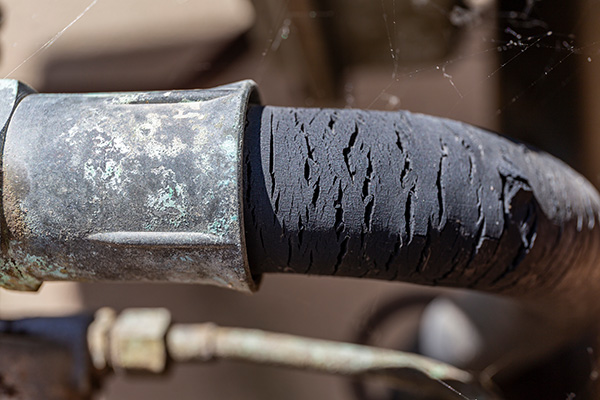
Spotting a failing radiator hose before it bursts can prevent engine damage. Early detection starts with visual and physical inspection.
Check for Coolant Leaks and Smells
Look for wet spots near the engine, especially around hose connections. Green, orange, or pink fluid pooling under your vehicle signals a coolant leak. A sweet, syrup-like odor from the engine bay, especially after driving, is a telltale sign of evaporating coolant. These are urgent red flags that demand immediate attention.
Inspect for Cracks, Bulges, and Soft Spots
With the engine cold, squeeze each hose. Healthy hoses feel firm but slightly pliable. Watch out for any that are:
– Brittle or cracked, especially near clamps
– Soft or spongy, indicating internal breakdown
– Bulging, which suggests weakened walls under pressure
Also, look for oil contamination. If oil has leaked onto the hose, it degrades rubber fast and requires immediate replacement.
Monitor Engine Temperature
A faulty hose can restrict coolant flow, leading to overheating. If your temperature gauge spikes during normal driving or fluctuates erratically, suspect a collapsed or blocked hose. Never ignore this warning. Continued driving risks warped cylinder heads or blown gaskets.
Prepare Tools and Safety Measures
Before touching any components, gather the right tools and follow critical safety steps.
Gather Required Tools and Parts
Use this checklist to ensure you’re ready:
– New radiator hose (vehicle-specific fit)
– New hose clamps (worm drive or spring, as required)
– Coolant (correct type per owner’s manual)
– Hose clamp pliers or screwdriver
– Wrench or socket set (for drain plug)
– Catch pan (minimum 2-quart capacity)
– Gloves and safety glasses
– Rags or towels
Never reuse old clamps. They lose tension and corrode, risking leaks.
Follow Essential Safety Steps
- Wait for a cold engine. Never open the radiator cap or drain coolant when hot. Steam and scalding fluid can cause serious burns.
- Work in a well-ventilated area.
- Park on level ground and set the parking brake.
- Dispose of old coolant properly. It’s toxic to pets and the environment. Take it to a recycling center or auto shop.
Drain the Cooling System Safely
To replace the hose, you must first drain the coolant. This prevents spills and protects components.
Locate and Open the Drain Plug
Place a catch pan beneath the radiator. Find the drain plug, usually at the bottom corner of the radiator. On some models, it’s on the side. Use a wrench or socket to open it slowly and let all coolant drain completely.
Pro Tip: If no drain plug exists, you may need to remove the lower hose to drain, but only after loosening clamps and preparing for fluid release.
Depressurize the System
Remove the radiator cap (only when cold) to allow air in and speed up draining. This also prevents vacuum lock.
Once drained, tighten the drain plug securely. Use moderate torque. Overtightening can strip threads.
Remove the Damaged Radiator Hose

Now it’s time to take out the old hose. Work carefully to avoid damaging fittings.
Loosen and Slide Off Clamps
Identify whether your clamps are worm drive (screw-type) or spring clamps. Use the correct tool:
– Screwdriver for worm drive clamps
– Hose clamp pliers for spring clamps
Loosen each clamp and slide it away from the connection point toward the middle of the hose.
Detach the Hose from Fittings
Gently twist and pull the hose off the radiator and engine fittings. If it’s stuck:
– Rotate it back and forth to break the seal
– Use light prying with a flathead screwdriver (avoid gouging metal)
Warning: Don’t force it. Damaging the metal nipple on the radiator or engine block leads to costly repairs.
Residual coolant will drip, so keep the pan handy.
Inspect Connection Points
Once removed, examine:
– Metal fittings for corrosion or pitting
– Old hose interior for cracks, softness, or oil residue
If fittings are corroded, clean them gently with a wire brush. Replace damaged parts before installing the new hose.
Install the New Radiator Hose
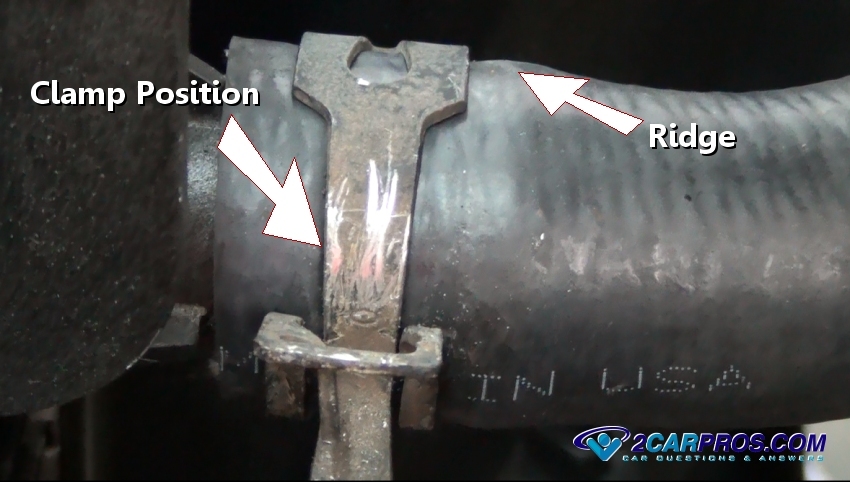
Proper installation ensures a leak-free, long-lasting repair.
Choose the Correct Replacement Hose
Use a direct-fit hose for your make, model, and engine. Universal hoses may not route correctly and can rub against belts or fans. Silicone hoses offer better heat and crack resistance but may require specific clamps.
Position Clamps Before Mounting
Slide the new clamps onto the hose before attaching it. This is a common oversight. Don’t forget!
Align the hose with the fittings, ensuring no kinks or twists. Push it on firmly until fully seated over the metal nipples.
Secure with New Clamps
Slide each clamp into position so it covers the reinforced ridge of the hose where it flares over the fitting. Tighten:
– Worm drive clamps until snug. Do not overtighten, as this can cut into the rubber.
– Spring clamps should snap into place with even pressure.
Expert Note: Over-tightening is a leading cause of hose failure. Clamp only until leaks are prevented, no more.
Refill and Bleed the Cooling System
Air trapped in the system causes overheating. Proper refilling and bleeding are crucial.
Add the Correct Coolant Type
Refer to your owner’s manual or reservoir label. Using the wrong coolant can cause sludge or corrosion. Pour coolant into the radiator first, then fill the overflow reservoir to the “cold” line.
Bleed Air from the System
Start the engine with the radiator cap off (if safe for your model). Let it idle:
– Watch for air bubbles rising in the radiator neck
– As coolant heats and expands, the level drops. Top off as needed.
– Continue until flow is steady and no more bubbles appear.
Some vehicles have a bleeder valve. Consult your manual if overheating persists.
Once complete, securely replace the radiator cap.
Test for Leaks and Performance
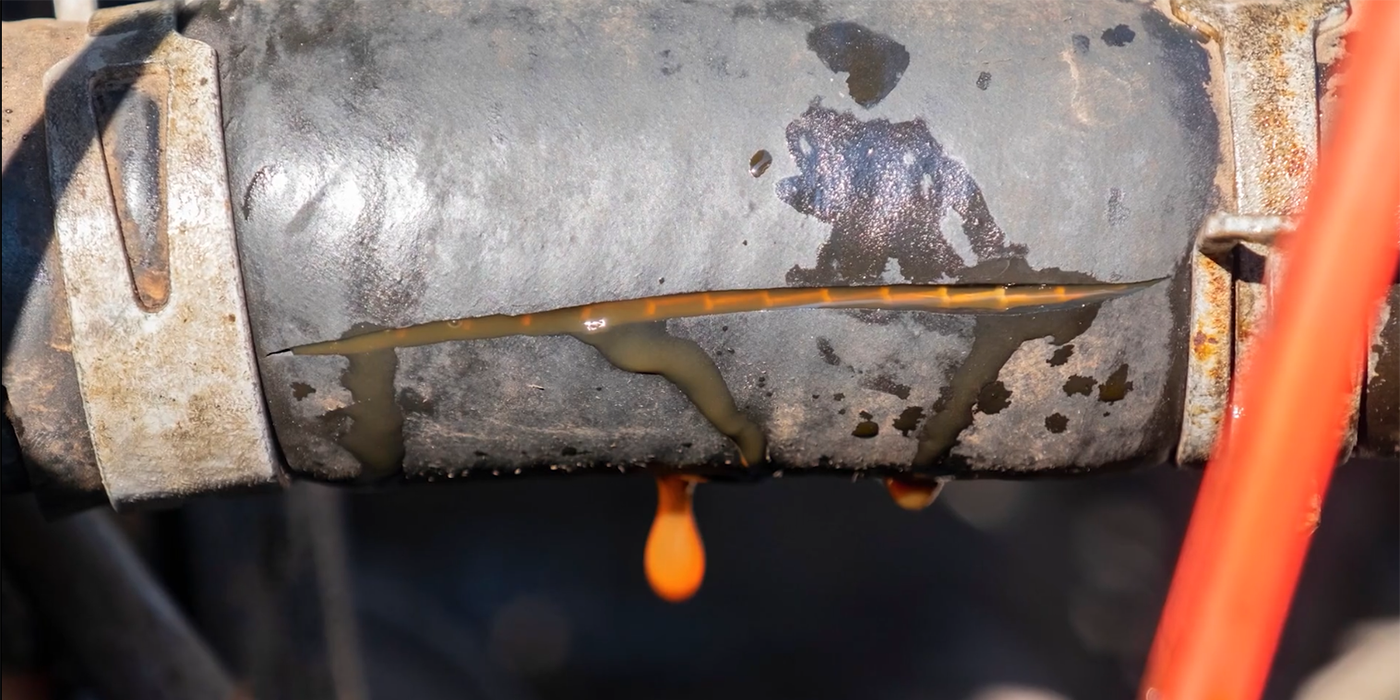
Final verification ensures your repair holds under real conditions.
Check for Leaks with Engine Running
With the engine idling, inspect:
– Both ends of the new hose
– Clamp areas for seepage
– Drain plug and other nearby connections
Even a slow drip means trouble. Shut off the engine and re-tighten if needed.
Monitor Temperature and Drive Test
Let the engine reach normal operating temperature (190°F to 225°F). The gauge should stabilize with no spikes.
Take a short test drive:
– Accelerate gently
– Watch the temperature gauge
– Listen for gurgling (a sign of trapped air)
After driving, let the engine cool slightly and recheck coolant level in the reservoir. Top off if low.
Prevent Future Hose Failures
A successful repair isn’t the end. It’s a chance to extend your cooling system’s life.
Replace Hoses Every 4 to 7 Years
Even if they look fine, rubber degrades over time. Proactively replace hoses every 4 to 7 years, especially in hot climates or under heavy driving loads.
Inspect During Routine Maintenance
Check hoses every time you get an oil change. Look for:
– Minor cracks
– Soft spots
– Contact with moving parts
Catch issues early, before they leave you stranded.
Use High-Quality Parts
Invest in premium rubber or silicone hoses and OEM-spec clamps. Cheap hoses fail sooner and risk engine damage. Silicone resists heat cycling better and lasts longer.
When to Seek Professional Help
Some vehicles make DIY repairs difficult.
Permanent or Integrated Hose Assemblies
Newer models often use molded coolant pipes or integrated manifolds that require special tools or engine disassembly. If your hose isn’t a simple rubber tube, consult a service manual or a professional.
Persistent Overheating After Repair
If the engine still overheats:
– Air may be trapped in a hard-to-reach area
– Thermostat may be stuck
– Water pump may be failing
These issues need advanced diagnostics.
Frequently Asked Questions About Radiator Hose Repair
Can I drive with a leaking radiator hose?
No. Immediate repair is required. Driving risks rapid overheating, engine seizure, and catastrophic internal damage.
Can I reuse old hose clamps?
No. Old clamps lose tension and corrode. Always install new clamps to ensure a leak-free seal.
What if the hose is a permanent fixture?
Some modern vehicles have complex hose assemblies requiring special removal tools or professional service. Consult the service manual before attempting removal.
How do I identify the correct coolant?
Refer to the vehicle’s owner’s manual or the label on the coolant reservoir. Mixing incompatible coolants can cause gelation or corrosion.
What if the engine overheats after replacement?
This often indicates air pockets in the system. Repeat the bleeding process to remove trapped air. If the problem persists, check for other issues like a faulty thermostat or water pump.
How long does it take to repair a radiator hose?
As a DIY task, the repair can be completed in 1 to 3 hours, with many experienced individuals finishing in under an hour. Professional labor costs will vary by region and shop rates.
Key Takeaways for Repairing Your Radiator Hose

Replacing a radiator hose is a straightforward, cost-effective repair that protects your engine from catastrophic failure. A typical replacement hose costs $10 and up, making this one of the most affordable engine-protecting maintenance tasks you can perform.
By following this guide, you’ve not only fixed the immediate problem but also gained the knowledge to maintain your cooling system like a pro. Inspect hoses every 30,000 miles, replace them every 4 to 7 years, and always use new clamps with the correct coolant type.
Stay vigilant, use quality parts, and never drive with a known leak. Your engine will thank you for years to come.



