

Relocating a radiator can transform your room layout, improve heat distribution, or support a renovation project. Whether you need to shift a unit a few inches along the wall or move it to an entirely new spot, learning how to move radiator pipes correctly saves time, money, and frustration. Mistakes during this process can lead to leaks, system imbalance, or costly water damage.
This guide breaks down every stage of the job, from initial planning and tool selection to safe disconnection, reinstallation, and long-term maintenance. You’ll discover when a DIY approach works, when a professional plumber is essential, and how to keep your central heating system running efficiently after the move.
Plan the Radiator Relocation Before Starting
Identify Your Pipe Type First
Knowing your pipe material shapes the entire project. Rigid copper or steel pipes require soldering skills and more invasive work to reroute. Flexible plastic pipework is easier to extend or reposition but needs proper capping and professional reconnection. If your pipes rise directly from a concrete floor, expect significant labor and consider hiring a specialist.
Measure the New Location Precisely
Accurate measurements prevent expensive do-overs. Confirm the radiator fits the new wall space without blocking windows, doors, or furniture. Check that the distance between valve centers matches your existing or planned pipe configuration. Even small gaps can force you to add pipe extensions, increasing complexity.
Choose Between Extending or Replacing Pipes
Extending current pipes is faster and cheaper than running entirely new lines. For moves under 12 inches, extension kits with push-fit connectors work well. Larger relocations usually demand new pipework, which a qualified plumber should handle to ensure proper routing, insulation, and pressure testing.
Record the Lockshield Valve Setting
The lockshield valve controls water flow and maintains system balance. Before disconnecting anything, count the exact number of turns needed to close it clockwise. You’ll reopen it by the same count later. Skipping this step causes uneven heating across your home.
Gather Tools and Materials in Advance
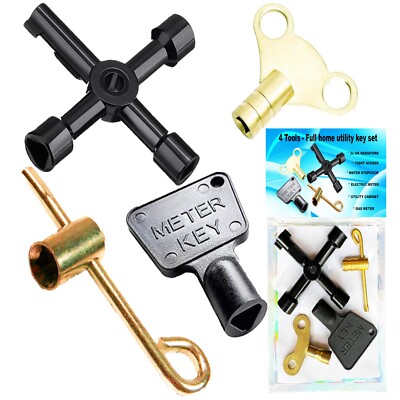
Tools You Will Need
- Two plumber’s wrenches for holding valves and loosening nuts
- An adjustable spanner for various fittings
- A radiator key for bleeding air from the system
- Containers and towels to catch draining water
- A dolly or trolley for transporting heavy cast iron units
- Cloths or rags to protect valve finishes during work
Materials to Have Ready
- PTFE (plumber’s) tape for sealing threaded connections
- Push-fit stop ends for capping flexible pipes
- Replacement valves and fittings in case old ones break
- Pipe insulation if routing lines through cold areas
Having everything on hand prevents mid-job interruptions and reduces water damage risk.
Shut Off and Depressurize the Heating System
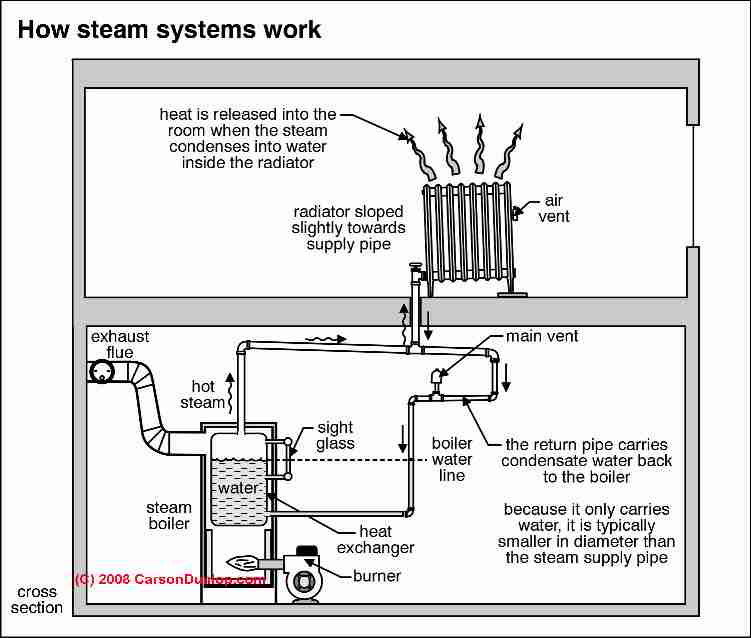
Turn Off Heating and Allow Cooling
Switch off your central heating or combi-boiler completely. Wait 10 to 15 minutes for the radiator to cool down fully. Working on a hot radiator is dangerous, as pressurized scalding water can cause serious burns.
Close the Manual Control Valve
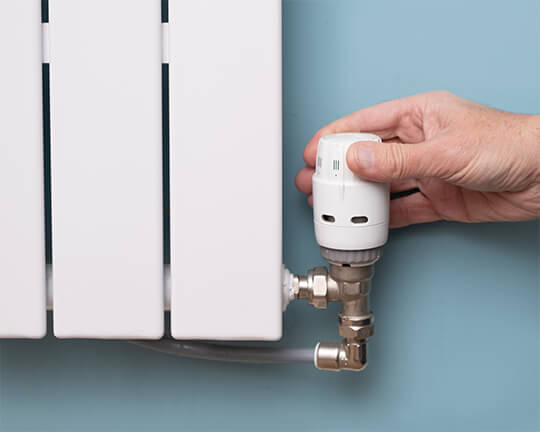
Find the manual valve, usually located on the bottom right where the pipe meets the radiator. Turn it clockwise until it stops. This shuts off hot water entering the unit.
Shut the Lockshield Valve
On the bottom left, remove the plastic cover from the lockshield valve. Use a spanner to turn it clockwise until fully closed. Write down the number of turns required. This number is critical for restoring system balance later.
Bleed to Confirm Depressurization
Place a bowl under the bleed valve at the top of the radiator. Open it slightly with a radiator key. If only a small puff of air escapes, the system is depressurized. If water flows steadily, both valves aren’t fully closed. Double-check before proceeding.
Drain Water and Disconnect the Radiator
Drain the First Valve Safely
Position a bowl under the manual valve and wrap a cloth around the valve body to catch splashes. Use one wrench to hold the valve steady and another to loosen the union nut. Let water drain into the container.
Disconnect the Opposite Valve
Once flow slows, repeat the process on the lockshield side. Hold the valve body and loosen the connecting nut. Allow all remaining water to drain out. Radiators can hold several liters even after initial drainage.
Cap Flexible Pipes Right Away
If your system uses flexible plastic pipework, disconnect it from the radiator and cap both ends immediately with push-fit stop ends. This prevents debris from entering and stops residual drips. Tuck capped pipes neatly into the wall cavity.
Remove the Radiator from Its Brackets
Unscrew the radiator from the wall brackets and lift it off the risers. Cast iron radiators are extremely heavy, often exceeding 50 kg. Always use a dolly and at least one helper. Never attempt to carry a heavy unit alone.
Prepare the Radiator for Reinstallation
Flush Out Residual Sludge
Before moving the radiator, tilt it to drain leftover water through the valve openings. For older units, turn the radiator upside down over a bucket to flush out accumulated sludge. This step prevents blockages and improves heating efficiency once reinstalled.
Apply PTFE Tape to Threaded Connections
Wrap plumber’s tape clockwise around the threads of the radiator valves. Overlap the tape three to four times and press it flat. Avoid over-wrapping, which can actually cause leaks instead of preventing them.
Mount the Radiator in the New Location
Secure wall brackets at the correct height and alignment. Hang the radiator and confirm it’s level. If new pipework is needed, a licensed plumber should install it using soldered joints for copper or fused connections for plastic.
Reconnect the System and Restore Heating
Tighten All Connections Properly
Use two wrenches during this step: one to hold the valve body stationary and another to tighten the union nut. This prevents twisting and potential damage. Repeat on both sides of the radiator.
Restore the Lockshield Valve Setting
Turn the lockshield valve counter-clockwise by the exact number of turns you recorded earlier. This restores hydraulic balance throughout the system. Skipping this step results in some rooms heating unevenly.
Open the Manual Valve and Bleed Air
Slowly open the manual control valve counter-clockwise. Then bleed the radiator by opening the bleed valve until air hisses out. Close it the moment water starts dripping. This removes trapped air and ensures full heat output.
Inspect Every Joint for Leaks
Check all connections, valves, and the bleed point carefully. If you spot any drip, turn off both valves, tighten the connection slightly, and retest. Never leave a leaking joint unattended.
Handle Special Cases and Expert Scenarios
Combi-Boiler Systems Require Pressure Checks
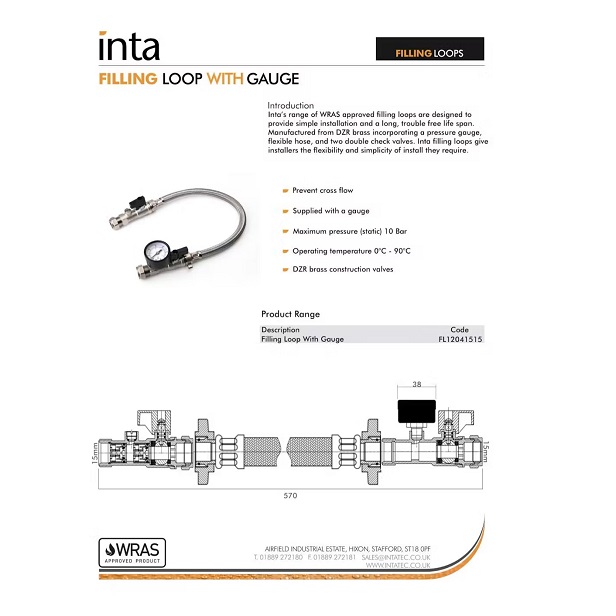
After reinstallation, check the boiler pressure gauge. It should read between 0.5 and 1.5 Bar. If pressure dropped during the work, use the filling loop to re-pressurize the system. Over-pressurizing can damage internal components.
Flexible Plastic Pipes Need Professional Help
While flexible pipes are easier to route, they require specialized crimping tools and pressure testing. DIY mistakes often lead to slow leaks or sudden bursts. Always have a qualified plumber handle new pipe runs.
Concrete Floor Pipes Demand Expert Assessment
Pipes rising from concrete floors are buried deep within the slab. Cutting into concrete risks structural damage, underfloor heating lines, or electrical conduits. Professional assessment is mandatory for safety and code compliance.
Painting Behind Radiators Offers Two Options
- Use a long-reach radiator brush or roller to paint without removing the unit
- Remove the radiator if space is too tight, and wait for paint to dry completely before reinstalling
Moisture trapped behind a freshly painted surface causes rust and sticking over time.
Follow Critical Safety Warnings
Prevent Scalding and Physical Injury
- Never drain a hot radiator. Wait until it’s completely cool to the touch.
- Wear gloves and eye protection. Sludge and metal shards are common hazards.
- Use a dolly for cast iron units. Lifting these alone risks serious back injury.
Avoid System Imbalance
Incorrect lockshield valve settings disrupt water flow across your home. Some radiators stay cold while others overheat. Always record and replicate the exact turn count during reinstallation.
Prevent Water Damage Before It Starts
- Place towels and bowls under every connection point before loosening anything
- Cap open pipes immediately. Even a small drip can lead to mold or floor damage
Know When DIY Becomes Risky
If you’re extending pipes more than a foot, cutting into floors, or unsure about pressure balancing, hire a Gas Safe registered plumber. A professional job costing around £200 beats a water damage repair running into thousands.
Maintain Long-Term Heating Performance
Bleed Radiators Every Heating Season
Air builds up inside radiators over time. Bleed all units once per season to maintain efficiency. Cold tops and warm bottoms signal trapped air needs releasing.
Flush Out Sludge Every Few Years
Every 3 to 5 years, consider a power flush, especially in older systems. Sludge reduces heat output and can damage your boiler’s internal components over time.
Inspect Valves and Joints Regularly
After the first few heating cycles following a move, check connections for drips, corrosion, or stiffness. Replace seized valves before they fail completely.
Monitor Boiler Pressure Consistently
For combi-boiler systems, keep pressure between 0.5 and 1.5 Bar. Frequent pressure drops often indicate a hidden leak somewhere in the system. Address these immediately to prevent damage.
Frequently Asked Questions About Moving Radiator Pipes
Can I move a radiator without draining the whole system?
Yes, you can isolate a single radiator by closing both the manual valve and the lockshield valve. As long as both valves shut off completely, the rest of your heating system stays filled and operational.
How long does it take to move a radiator?
A standard relocation takes 2 to 5 hours for a straightforward job. Complex moves involving new pipework, concrete floors, or significant rerouting may extend beyond a single day.
Do I need a plumber to move radiator pipes?
For small adjustments under 12 inches, experienced DIYers can handle the work. For larger relocations, new pipe installation, or concrete floor situations, hiring a qualified plumber is strongly recommended.
What happens if I forget the lockshield valve turn count?
Without the correct setting, your heating system becomes unbalanced. Some rooms overheat while others stay cold. You’ll need a heating engineer to re-balance the entire system professionally.
Can I reuse the same valves after moving the radiator?
Yes, existing valves usually work fine after reinstallation. However, older valves may seize or leak when manipulated. Having replacement valves ready is wise for aging systems.
Is it safe to move a radiator connected to a combi-boiler?
Yes, combi-boiler systems follow the same basic procedure. Just monitor boiler pressure before and after the work, keeping readings between 0.5 and 1.5 Bar throughout the process.
Key Takeaways for Successfully Moving Radiator Pipes
Moving radiator pipes becomes manageable when you prepare thoroughly and follow each step carefully. Start by identifying your pipe type, measuring the new location precisely, and recording the lockshield valve setting before disconnecting anything. Gather all tools and materials ahead of time to avoid mid-job delays.
Always shut off the heating, allow the system to cool, and depressurize before draining. Cap open pipes immediately and use a dolly for heavy cast iron units. When reconnecting, restore the lockshield valve to its original turn count to maintain system balance.
Your next step is to assess your specific situation honestly. If the move is simple and you’re comfortable with basic plumbing tasks, proceed with confidence using this guide. If the job involves concrete floors, major pipe rerouting, or combi-boiler pressure adjustments, contact a Gas Safe registered plumber before starting. Your home’s comfort and safety depend on making the right call.



