
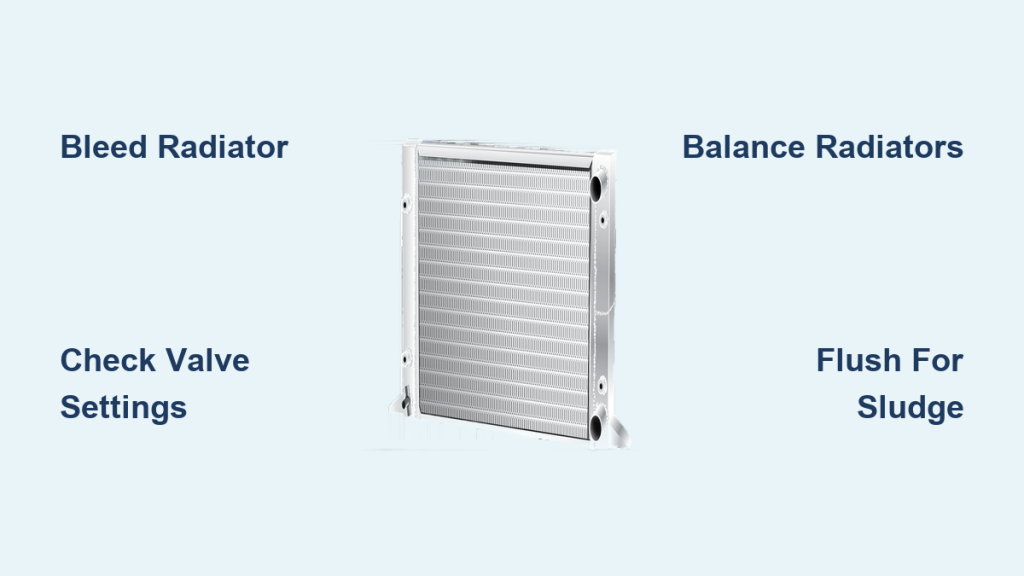
One radiator stubbornly cold while the rest of the house warms up, or worse, every radiator in the home failing to heat at all? A radiator not heating is one of the most common central heating complaints, especially during colder months when reliable warmth matters most. The encouraging reality is that most radiator problems have straightforward solutions, from releasing trapped air to adjusting valve settings or flushing out debris.
This guide walks you through exactly how to fix a radiator not heating, covering both single-unit failures and whole-system breakdowns. You will learn how to identify the root cause, apply the right fix, and recognize when professional help is the safer choice.
Determine Whether One or All Radiators Are Affected
Only One Radiator Stays Cold
When a single radiator fails to heat while others work normally, the problem is localized to that unit. The boiler and main system are functioning, but something is preventing hot water from reaching or circulating through that specific radiator. Common causes include trapped air, a closed or seized valve, or internal sludge buildup. Focus troubleshooting efforts on that radiator first.
All Radiators Fail to Heat
When every radiator in the home remains cold, the issue is system-wide. The fault likely lies with the boiler, system pressure, circulation pump, diverter valve, or a control failure. Begin by checking boiler pressure and power supply, then move on to the diverter valve and pump function.
Only Upstairs Radiators Are Cold
If only upstairs radiators fail to heat, the culprit is usually the feed and expansion tank in the loft, common in older open-vent systems. A blocked ball valve or empty tank prevents water from replenishing the upper circuits. Inspect water levels and clear any obstructions in the tank.
Bleed a Radiator to Release Trapped Air

Cold Top and Warm Bottom Signals Trapped Air
Trapped air is the most frequent cause of a radiator not heating fully. Air rises and blocks hot water from reaching the top section, leaving the upper half cold while the bottom stays warm. A gurgling or hissing noise during operation is another telltale sign.
Step-by-Step Bleeding Process
- Switch off the heating and wait for the radiator to cool completely.
- Locate the bleed valve, typically found at the top corner of the radiator.
- Insert a radiator key or flat-head screwdriver and turn counterclockwise.
- Listen for a hissing sound, which indicates escaping air.
- Close the valve clockwise as soon as water begins to drip out.
- Check boiler pressure afterward, since bleeding can drop pressure below safe levels.
Pro Tip: Place a cloth or small container under the bleed valve to catch drips and prevent rust stains on walls or flooring.
Resolve Valve Problems on a Cold Radiator
Inspect the Thermostatic Radiator Valve
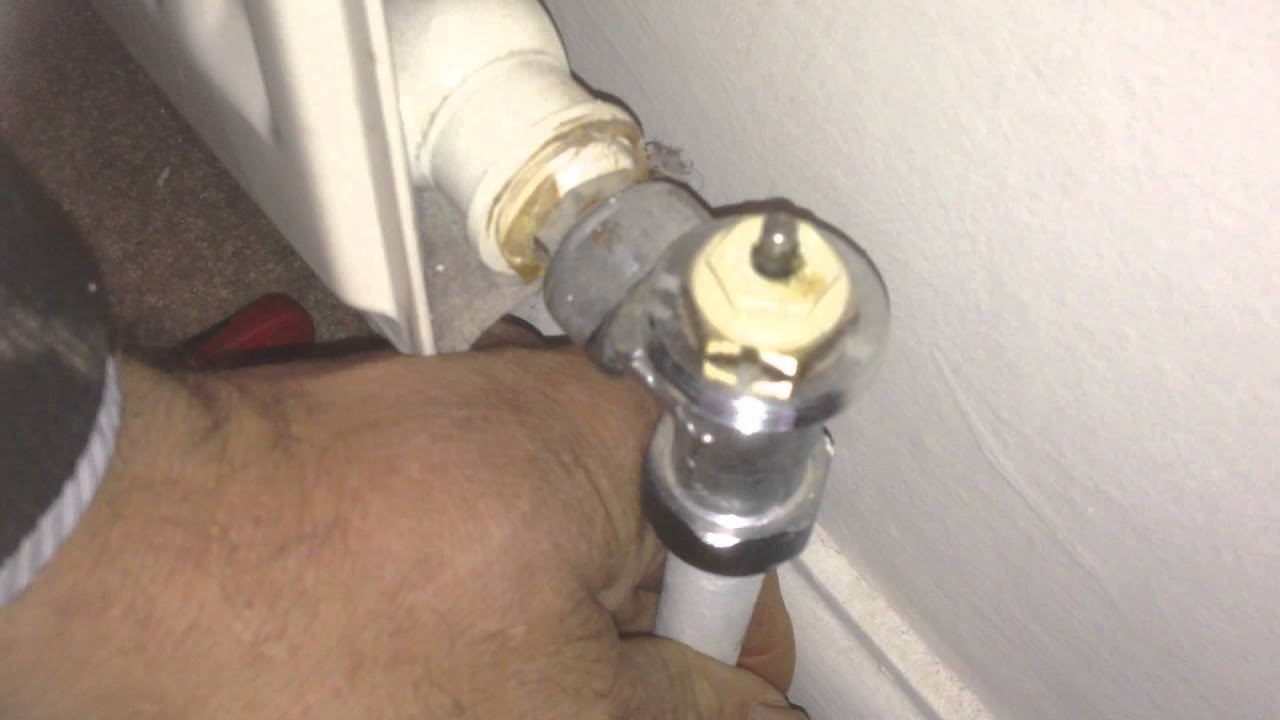
A stuck or closed thermostatic radiator valve (TRV) can completely shut off water flow to the radiator. Verify the TRV is not set to frost protection or zero. Turn it to maximum heat and listen for a click, which indicates the valve is opening. If there is no response, remove the TRV head and inspect the metal pin beneath it.
Free a Seized TRV Pin
A seized pin is a frequent cause of cold radiators, especially after periods of inactivity.
- Remove the TRV head by unscrewing the knurled nut or releasing the clip.
- Examine the pin in the center. It should protrude slightly and move up and down.
- Press the pin gently. If it does not spring back, it is stuck.
- Apply penetrating oil such as WD-40 around the base and wiggle the pin with pliers.
- Work the pin loose with gentle pressure until it moves freely.
Warning: Never force the pin aggressively, as this can damage the valve seal and create leaks. If the pin remains stuck, replace the TRV head entirely. Replacement heads are inexpensive and straightforward to install.
Balance Radiators for Even Heat Distribution
Why Distant Radiators Stay Cool
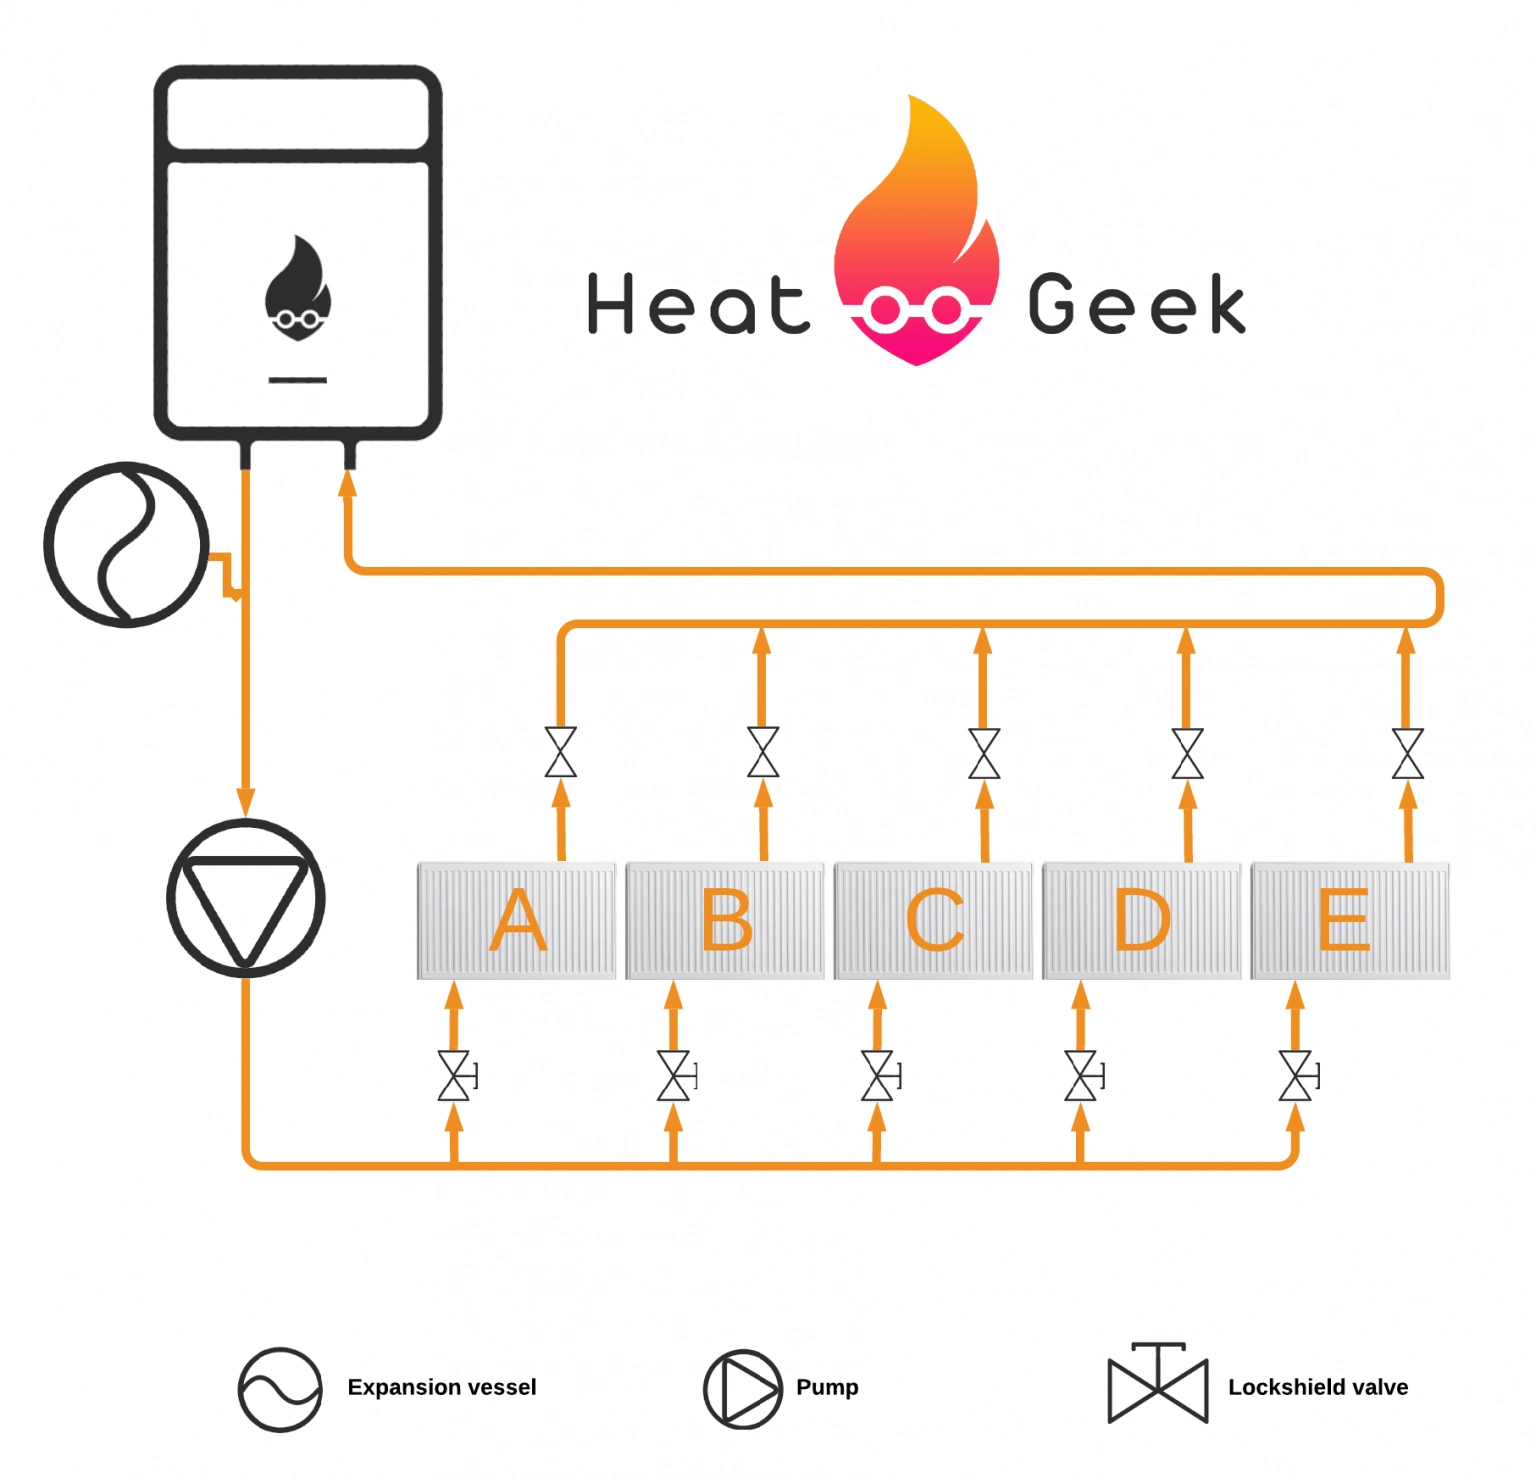
If the radiator farthest from the boiler consistently stays cooler than the rest, the system is likely unbalanced. Radiators closest to the boiler receive hot water first, leaving insufficient flow for distant units.
How to Rebalance the System
- Turn off the heating and allow radiators to cool.
- Close all lockshield valves, which are the capped valves on one side of each radiator.
- Begin with the radiator farthest from the boiler and open its lockshield valve half to one full turn.
- Work back toward the boiler, opening valves less on closer radiators (for example, a quarter turn).
- Run the heating and compare radiator surface temperatures.
- Fine-tune valve openings using a non-contact thermometer until heat distribution is even.
Flush a Radiator to Remove Sludge
Warm Top and Cold Bottom Indicates Sludge
When the bottom half of a radiator stays cold, sludge (a mixture of rust and debris) has settled and blocked water flow. This is especially common in older heating systems.
How to Flush a Single Radiator
- Turn off the system and close both valves on the radiator.
- Drain the radiator if needed, then remove it from the wall.
- Take the radiator outside and flush it with a garden hose through both connections.
- Continue flushing until the water runs completely clear.
- Reinstall the radiator, bleed it, and check system pressure.
When multiple radiators show this symptom, a full system power flush performed by a professional is the most effective solution.
Repair Leaks at Radiator Valves
Stopping a Valve Union Leak
Leaks frequently occur at the valve union, where the valve connects to the radiator tail.
- Close both the TRV and lockshield valves.
- Open the bleed valve to drain water from the radiator.
- Unscrew the union nut connecting the valve to the radiator tail.
- Wrap PTFE (plumber’s) tape around the tail threads, applying 10 to 15 wraps.
- Reconnect and tighten the union nut.
- Reopen the valves and check for leaks.
Note: If the radiator body itself has a hole due to corrosion, the unit cannot be repaired and must be replaced.
Diagnose System-Wide Heating Failures

Check Boiler Pressure First
Low boiler pressure is the leading cause of total heating failure. When the system is cold, ideal pressure sits between 1.0 and 1.5 bar. If the gauge reads below 1.0 bar, use the filling loop to top up the system. Open the loop slowly and watch the gauge rise. Stop when the needle reaches approximately 1.2 bar. Avoid overfilling. Reset the boiler afterward if it has entered fault mode.
Frequent pressure drops suggest a hidden leak somewhere in the system that requires professional investigation.
Address Diverter Valve Problems
Hot Water Works but Radiators Stay Cold
When hot water flows from taps but radiators remain cold, the diverter valve is likely stuck in the hot water position. This motorized component directs hot water to either the domestic hot water circuit or the heating circuit. A stuck valve sends all flow to the taps, leaving radiators with nothing.
Solution: Diverter valve repair or replacement requires a Gas Safe registered engineer, since the work involves both mechanical and electrical components.
Troubleshoot a Faulty Circulation Pump
Signs of a Failing Pump
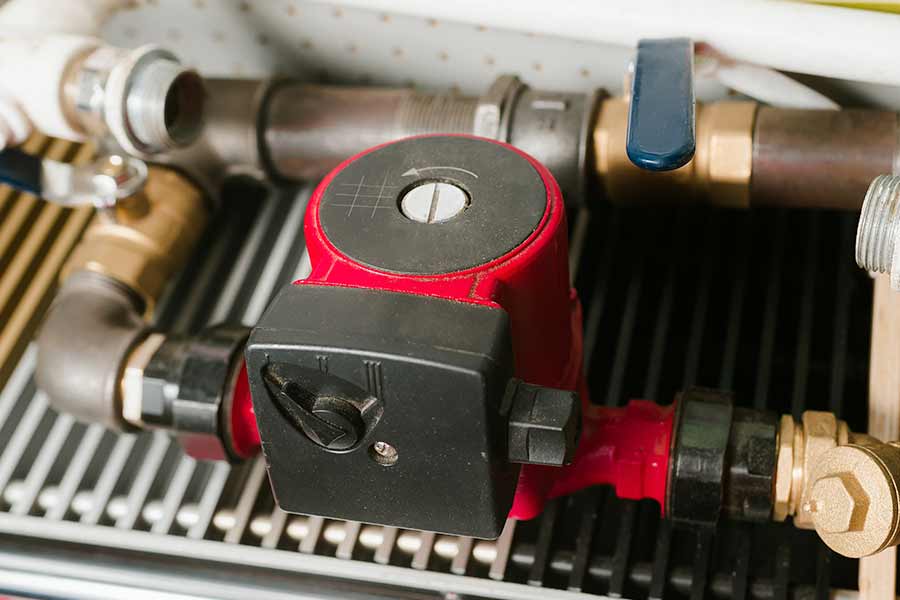
A failed circulation pump cannot push water to lower or distant radiators, often leaving downstairs units cold. Warning signs include grinding or whining noises from the pump and a pump body that feels excessively hot to the touch.
Freeing a Seized Pump
- Switch off power to the boiler.
- Locate the pump, usually mounted on or near the boiler.
- Remove the central screw cap on the pump face.
- Insert a flat-head screwdriver and turn the internal shaft gently.
- Restore power and test the system.
If the pump fails to restart or continues making mechanical noise, replacement is necessary. This task requires a qualified heating technician.
Inspect the Feed and Expansion Tank
Why Upstairs Radiators Lose Heat
In older open-vent systems, the feed and expansion tank in the loft supplies water to the heating circuit. When this tank runs dry, upstairs radiators lose their heat supply.
How to Restore Tank Water Levels
- Access the loft and inspect the cistern.
- Check that the water level sits between half and three-quarters full.
- Inspect the ball valve to confirm it is not jammed or blocked.
- Lift the ball valve arm manually to verify water flows in.
- Clean or replace the valve if it is faulty.
- Refill the tank manually if needed and monitor for recurring drops.
The tank may empty due to evaporation, small leaks, or a malfunctioning ball valve. Identifying the cause prevents repeated failures.
Verify Thermostat and Timer Settings
Quick Control Checklist
Before assuming a mechanical fault, confirm the basics.
- Confirm the timer is set to the correct day and time, with active heating programs.
- Set the room thermostat higher than the current ambient temperature.
- Replace batteries in wireless thermostats if signal is weak or display is dim.
- Listen for zone valve clicks when heat is demanded, confirming they are opening.
A misconfigured timer or a dead thermostat battery can mimic a mechanical breakdown.
Troubleshoot a Newly Installed Radiator
Common Installation Errors
Even brand-new radiators can fail to heat due to installation mistakes.
- Confirm both TRV and lockshield valves are fully open.
- Bleed the radiator thoroughly to remove air introduced during installation.
- Verify flow and return pipes are connected to the correct sides.
- Rebalance the system if the new radiator is the farthest unit from the boiler.
Double-checking all valves and bleeding thoroughly resolves most new-radiator issues.
Final Checklist When the Radiator Still Won’t Heat
Run Through These Confirmations
- Boiler pressure sits between 1.0 and 1.5 bar.
- The TRV pin moves freely when tested.
- Both valves are fully open.
- The radiator has been bled recently.
- No visible leaks exist anywhere in the system.
- Other radiators are heating normally.
If the radiator remains cold after all these checks, suspect an internal blockage or severe sludge accumulation. A professional power flush or radiator replacement may be required.
When to Call a Heating Engineer
Leave These Issues to Professionals
- The boiler will not ignite or displays error codes.
- The diverter valve or circulation pump needs replacement.
- Frequent pressure loss indicates a hidden leak.
- A power flush is required for widespread sludge.
- Any gas-related work is involved, which always requires a Gas Safe registered engineer.
Safety First: Never open boiler panels or tamper with gas components unless properly trained and qualified.
Prevent Future Radiator Problems
Simple Maintenance Habits
- Bleed all radiators annually before the heating season begins.
- Flush individual radiators whenever cold spots appear.
- Check boiler pressure monthly during active heating months.
- Install a magnetic filter to capture circulating sludge.
- Add chemical inhibitors to prevent internal corrosion.
Consistent maintenance dramatically reduces the likelihood of cold radiators and extends system lifespan.
Frequently Asked Questions About Fixing a Radiator Not Heating
Why is only one radiator in my house not heating?
A single cold radiator usually points to a localized issue such as trapped air, a closed or seized valve, or sludge buildup inside the unit. Start by bleeding the radiator and checking both the TRV and lockshield valve. If those steps fail, inspect the TRV pin for seizing or consider flushing the radiator to remove debris.
How do I know if my radiator needs bleeding?
The most common sign is a cold top section with a warm bottom, often accompanied by gurgling or hissing noises during operation. If the radiator heats unevenly or makes bubbling sounds, trapped air is the likely culprit and bleeding should resolve the issue.
Can a cold radiator increase my heating bills?
Yes. A radiator that fails to heat properly forces the boiler to work harder and run longer to compensate, increasing energy consumption. Cold spots also indicate inefficiency that drives up fuel usage, so addressing the problem quickly saves money.
Is it safe to fix a radiator myself?
Most radiator fixes, including bleeding, valve adjustments, and balancing, are safe for homeowners to perform. However, any work involving the boiler internals, gas supply, or electrical components should be handled by a qualified Gas Safe engineer to ensure safety and compliance.
How often should radiators be bled?
Radiators should be bled at least once a year, ideally at the start of the heating season in autumn. Homes with frequent air pockets or older systems may benefit from bleeding every few months during heavy use.
What causes sludge buildup in radiators?
Sludge is a combination of rust, magnetite, and debris that accumulates naturally over time, especially in older systems without corrosion inhibitors. It settles at the bottom of radiators and blocks water flow, creating cold spots and reducing efficiency.
Key Takeaways for Restoring Heat to Your Radiators
Fixing a radiator not heating becomes much simpler once you identify whether the problem is localized or system-wide. For single-radiator issues, start with bleeding, valve inspection, and TRV pin checks. For whole-system failures, focus on boiler pressure, the circulation pump, and the diverter valve. Most problems resolve with basic tools and a short amount of time, though complex boiler faults require professional expertise.
The most valuable next step is performing a quick system audit before the heating season begins. Bleed all radiators, verify boiler pressure, and confirm thermostat settings are correct. A few minutes of preventive maintenance now can prevent hours of frustration when you need reliable warmth the most.



