

If your CPU temperatures keep climbing or your cooling fans sound louder than they used to, dust buildup on your AIO radiator is likely the cause. All-in-One liquid coolers deliver excellent thermal performance, but their tightly spaced radiator fins trap dust faster than traditional air coolers. Over time, this buildup blocks airflow, forces fans to spin harder, and reduces the cooler’s ability to dissipate heat from your processor.
Cleaning your AIO radiator the right way keeps your system running cool and quiet without risking damage to sensitive components. This guide walks you through two proven methods: a quick non-invasive clean for routine upkeep and a full deep clean for heavily clogged units. You’ll learn which tools to use, how to avoid common mistakes, and how to verify that your cooling performance has improved once you’re done.
Non-Invasive Radiator Cleaning for Routine Maintenance

For regular upkeep, you can clean your AIO radiator without removing the CPU waterblock. This approach preserves your existing thermal paste and minimizes handling of delicate components.
Access the Radiator Without Removing the Waterblock
Unscrew the radiator and fan assembly from its mounting location in the case. Gently lean the unit outward as far as the flexible tubing allows, giving you access to both sides of the radiator while the waterblock stays attached to the motherboard.
This method works best when performed every 6 to 12 months, before dust becomes deeply compacted. It reduces mechanical stress on the CPU socket and eliminates the need to reapply thermal paste.
Remove Dust With Compressed Air
Hold the radiator vertically and direct short bursts of compressed air from the fan side toward the opposite side. This pushes dust out instead of forcing it deeper into the fin stack.
Flip the radiator and repeat on the other side. For stubborn debris lodged between fins, use a soft brush like a clean toothbrush to gently loosen particles while blowing air across the surface.
Keep canned air upright during use. Tilting or shaking the can releases liquid propellant that can damage electronics.
Full Disassembly Deep Clean for Heavy Dust Buildup
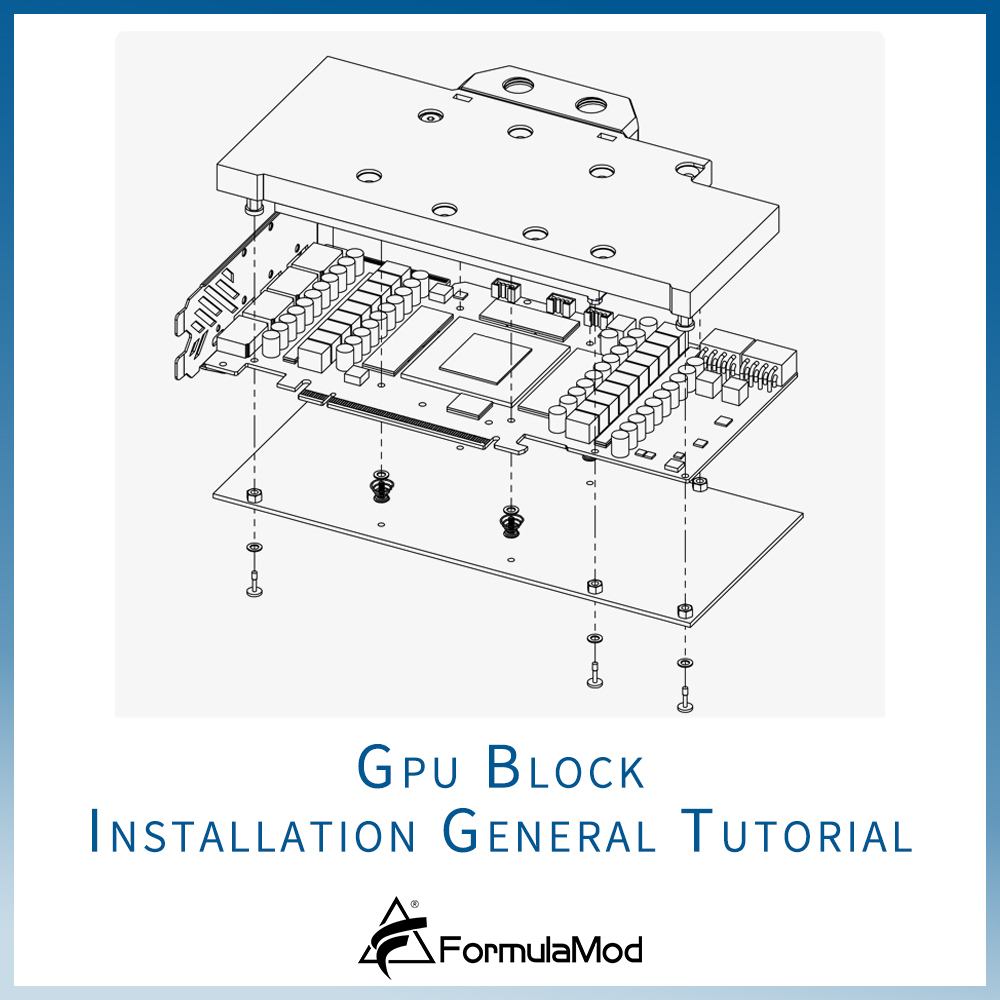
When dust is thick, performance has dropped noticeably, or you need to replace thermal paste, a complete teardown becomes necessary.
Power Down and Disconnect All Cables
Turn off your PC completely and unplug it from the wall outlet. This step prevents electrical damage and keeps you safe while handling internal components.
Disconnect every cable connected to the cooler, including pump power, fan headers, and any RGB or USB connectors. Label each cable if needed so you can reconnect everything correctly later.
Remove the Waterblock and Radiator
Use a Philips screwdriver to remove the four thumbscrews securing the CPU block. Lift the block straight off the processor without twisting.
Immediately wipe old thermal paste from both the CPU surface and the cold plate using alcohol wipes or a microfiber cloth dampened with isopropyl alcohol.
Next, remove the screws holding the radiator to the case. Carefully extract the entire unit, including tubes and block, and place it on a clean, flat surface.
Detach Fans for Complete Access
Unscrew the long screws that pass through each fan frame into the radiator fins. Remove all fans from the radiator.
Separating these components lets you clean areas that are impossible to reach when assembled, especially the rear side of the radiator fins and the fan motor hubs.
Clean AIO Fans Without Causing Damage
Fans collect dust just like radiators, but improper cleaning techniques can destroy bearings or motors.
Prevent Fan Damage During Compressed Air Use
Always hold the fan blade in place with your finger or a non-conductive tool when applying compressed air. Free-spinning fans can generate back-EMF, which stresses motor windings and shortens fan lifespan.
Apply short, controlled bursts to both sides of the fan, covering the blades, frame, and motor housing.
Wipe Blades With Isopropyl Alcohol
Dampen a microfiber cloth with 70% or higher isopropyl alcohol. Wipe each blade and the central hub to remove oily residue and sticky grime.
Avoid getting liquid into the motor casing. Never rinse fans under water or submerge them in any cleaning solution.
Let fans dry completely before reattaching them to the radiator.
Radiator Fin Cleaning Protocol
The radiator is the heart of your AIO’s cooling capability, so thorough but gentle cleaning matters most here.
Blow Dust From Front to Back
Position the radiator vertically. Point compressed air from the side where fans were mounted and blow toward the exhaust side.
This mimics normal airflow direction and helps eject trapped particles. Work across the entire surface row by row until dust stops emerging.
Brush Stubborn Buildup Gently
If dust remains stuck after blowing air, use a soft-bristled brush like a clean paintbrush to lightly comb through the fins while continuing to apply air.
Apply minimal pressure throughout this process. Bent fins permanently reduce surface area and airflow, lowering cooling efficiency.
Remove Grime With a Damp Cloth
For sticky residue or discolored patches, lightly dampen a microfiber cloth with isopropyl alcohol.
Wipe the fin surfaces gently without soaking the cloth. Excess moisture can seep into seals and contaminate the internal coolant loop.
Never submerge the radiator or use running water on it under any circumstances.
Reassemble and Reinstall Your AIO Cooler Properly
A clean radiator only helps if you reinstall everything correctly with fresh thermal paste.
Ensure All Parts Are Completely Dry
Let the radiator and fans sit for 10 to 15 minutes after cleaning. Confirm no moisture remains anywhere, especially near screw holes or tubing connections.
Moisture near electronics creates short circuit risks the moment you power the system back on.
Reattach Fans With Correct Airflow Direction
Mount fans back onto the radiator using the original screws. Double-check airflow direction so air moves through the radiator as intended by your case layout.
Secure all screws evenly to prevent warping the radiator frame.
Apply Fresh Thermal Paste to the CPU
Place a pea-sized drop of high-quality thermal paste in the center of the CPU. Do not spread it manually; pressure from the waterblock will distribute it evenly.
Never reuse old thermal paste. Its conductivity degrades over time and creates thermal resistance that defeats the purpose of cleaning.
Mount and Tighten in a Cross Pattern
Reinstall the radiator in the case and secure it with screws.
Place the waterblock back onto the CPU. Tighten the four mounting screws gradually in a diagonal cross pattern, starting with top-left, then bottom-right, top-right, and bottom-left. This ensures even pressure and prevents cracking the cold plate.
Reconnect Cables and Test Your System
After reassembly, verify everything works before closing your case permanently.
Restore All Cable Connections
Reconnect pump power, fan headers, and any RGB or display cables. Route cables neatly to keep them clear of fan blades.
Make sure tubes aren’t kinked or pinched against case edges or sharp components.
Power On and Monitor Performance
Plug in and power up the system, then watch for these key indicators:
- Leaks at the block and radiator connections
- Fan operation and expected speeds
- Pump noise (a quiet hum is normal; grinding suggests failure)
- CPU temperatures using monitoring software like HWMonitor or Core Temp
If temperatures remain high after cleaning, recheck paste application, mounting pressure, and pump health.
Maintenance Schedule for Long-Term Performance
Regular upkeep prevents performance drops and extends your cooler’s operational life.
Clean Every 6 to 12 Months in Normal Conditions
In typical home environments, cleaning your AIO radiator every six months to a year keeps dust under control without disturbing the waterblock.
The non-invasive method works perfectly for this schedule and avoids unnecessary handling of the CPU.
Clean More Often in Dusty Environments
If you have pets, smoke indoors, or live in a high-dust area, shorten your cleaning interval to every 3 to 6 months.
Pet hair and airborne particles clog radiator fins faster because the fin spacing is tighter than on traditional air coolers.
Recognize Warning Signs That Demand Immediate Cleaning
Watch for these red flags that signal your AIO needs attention right away:
- CPU temperatures rising under load
- Fans running louder or at higher RPM than usual
- Visible dust layers on radiator fins or fan blades
- Thermal throttling during gaming or rendering tasks
Address these early to prevent long-term heat damage to your processor.
Common Mistakes to Avoid During AIO Cleaning
Even small errors can compromise cooling performance or damage expensive hardware.
Never Use Water or Soak Components
Never rinse the radiator, pump, or fans with water. Moisture can enter seals, contaminate coolant, or cause corrosion inside the loop.
Even damp cloths should be only slightly moist, never dripping wet.
Don’t Bend Fins With Aggressive Tools
Avoid using sharp objects, metal brushes, or excessive force on radiator fins.
Stick to soft brushes and light pressure. Bent fins reduce heat exchange efficiency permanently and cannot be restored.
Don’t Let Fans Spin Uncontrolled
Free-spinning fans under compressed air can damage internal bearings and generate voltage spikes. Always hold the blade still during cleaning.
Don’t Skip Thermal Paste Replacement
If you remove the waterblock, always apply fresh thermal paste before remounting.
Old paste dries out, forms cracks, and creates thermal resistance that causes higher CPU temperatures even with a perfectly clean radiator.
Essential Tools for Cleaning an AIO Radiator
Gather the right supplies before you start for a safe and effective cleaning session.
Core Cleaning Kit
- Compressed air (canned or low-pressure compressor)
- Isopropyl alcohol (70% concentration or higher)
- Microfiber cloth (lint-free)
- Soft brush (clean paintbrush or soft toothbrush)
- Philips screwdriver (typically #2)
- Alcohol wipes for quick paste cleanup
- Thermal paste if removing the waterblock
Keep a small bowl of warm water nearby to rinse the brush, but make sure the brush dries fully before you use it on electronics.
Troubleshooting Post-Cleaning Issues
Even after a thorough cleaning, problems can surface that require quick diagnosis.
High Temperatures After Cleaning
Several issues can cause this frustrating outcome:
- Poor thermal paste application
- Uneven waterblock seating on the CPU
- Pump failure despite a clean radiator
- Air bubbles trapped in the loop (rare in sealed AIOs)
Re-seat the block and reapply paste if needed. Monitor pump status through software if your cooler supports it.
No Power to Fans or Pump
Check all connections at the motherboard and radiator. Make sure fan and pump cables are firmly seated in their headers.
Verify that BIOS settings haven’t reset your fan curves to defaults.
Unusual Pump Noises
A silent pump may indicate complete failure. Grinding or whining sounds suggest bearing wear inside the pump assembly.
Gurgling can indicate air in the loop, which often develops in older units (2+ years) due to microscopic coolant loss through permeation.
If noise persists after cleaning, the unit may need replacement.
Comparing AIO vs Air Cooler Maintenance
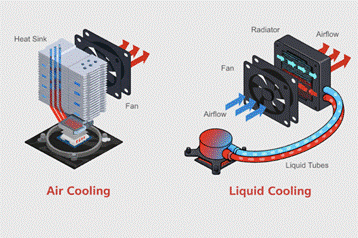
Understanding the differences helps set realistic expectations for ongoing care.
AIO Cleaning Challenges
- Tighter fin spacing traps more dust
- Tubes and connectors require careful handling
- Waterblock removal demands thermal paste reapplication
- Small risk of leaks if the unit is disturbed
However, modern AIOs are robust and well-sealed when handled with proper care.
Air Cooler Simplicity
- Open fin stacks allow easier dust escape during cleaning
- No liquid components to worry about
- Same thermal paste rules apply if you remove the heatsink
Large air coolers can obstruct RAM or VRM heatsinks, making physical access harder in some builds.
Final Verification Checklist Before Closing Your Case
Run through this list before sealing everything up:
- All fans spinning normally
- Pump humming quietly without grinding
- No visible leaks at any connection point
- Cables secured and clear of moving parts
- CPU temperatures stable at idle and under load
- Case interior cleaned of dislodged dust
A successful clean should restore or improve your cooling performance. If temperatures don’t drop, investigate pump health or consider whether your cooler needs replacement.
Frequently Asked Questions About Cleaning AIO Radiators
How often should you clean an AIO radiator?
In typical home environments, clean your AIO radiator every 6 to 12 months. In dusty rooms with pets or smokers, shorten the interval to every 3 to 6 months. Regular light cleaning prevents the need for invasive deep cleans.
Can you use water to clean an AIO radiator?
No, never use water directly on an AIO radiator, pump, or fans. Water can enter seals, contaminate the internal coolant, and cause corrosion or short circuits. Use compressed air, soft brushes, and lightly dampened microfiber cloths with isopropyl alcohol instead.
Do you need to replace thermal paste when cleaning an AIO?
You only need to replace thermal paste if you remove the waterblock from the CPU. For routine non-invasive cleaning where the waterblock stays attached, the existing thermal paste remains undisturbed and effective.
What are the signs that your AIO radiator needs cleaning?
Key warning signs include rising CPU temperatures under load, fans running louder or at higher RPM, visible dust mats on radiator fins, and thermal throttling during intensive tasks like gaming or rendering.
Is it safe to use compressed air on AIO fans?
Yes, but you must hold the fan blade stationary while applying air. Free-spinning fans under compressed air can generate back-EMF that damages motor windings and shortens fan lifespan. Keep canned air upright to avoid releasing liquid propellant.
Can a dirty AIO radiator damage your CPU?
Yes, prolonged thermal throttling from a clogged radiator can shorten CPU lifespan over time. Dust buildup restricts airflow, raises operating temperatures, and forces the processor to reduce performance to protect itself. Regular cleaning prevents this damage.
Key Takeaways for Cleaning Your AIO Radiator Safely
Regular AIO radiator cleaning is straightforward but essential for keeping your system cool, quiet, and reliable. The non-invasive method using compressed air works perfectly for routine 6 to 12 month maintenance, while full disassembly with fresh thermal paste addresses heavy dust buildup or thermal paste degradation.
Always prioritize gentle handling of fragile radiator fins, prevent fans from free-spinning during cleaning, and avoid water exposure entirely. Gather your compressed air, isopropyl alcohol, microfiber cloth, and soft brush before starting, and keep thermal paste on hand if you plan to remove the waterblock.
Stick to a consistent maintenance schedule, respond quickly to temperature spikes or noise changes, and verify your results through software monitoring after every clean. Your CPU will reward your efforts with years of stable, high-performance operation.



