

If your engine temperature gauge climbs higher than usual, or your heater blows cold air on a freezing morning, degraded coolant is often the culprit. Old radiator fluid loses its ability to regulate temperature, fights corrosion poorly, and can leave damaging deposits inside your engine. Many drivers ignore this fluid until something breaks, but a timely coolant swap prevents costly repairs like cracked head gaskets or heater core replacements.
Learning how to change radiator fluid yourself saves roughly $120 per service compared to taking your car to a shop. With basic tools, the right coolant, and about an hour of work, you can drain, flush, and refill your cooling system like a pro. This guide walks you through every step, from safety prep and choosing coolant to bleeding air pockets and replacing key components.
Critical Safety Steps Before Changing Radiator Fluid
Let the Engine Cool Completely
Hot coolant sits under pressure and can exceed 200°F. Opening a warm radiator cap releases scalding steam that causes severe burns. Wait at least 1 to 2 hours after driving. Hover your hand near the radiator cap and only proceed when no heat radiates outward.
Disconnect the Negative Battery Terminal
Removing the negative cable prevents accidental engine starts or electrical shorts while you work near hoses and metal components. Loosen the bolt, slide the cable off, and tuck it safely to the side.
Protect Yourself and the Environment
Wear safety gloves and goggles throughout the job. Coolant contains ethylene glycol, a sweet-tasting toxin that attracts pets and proves fatal in small amounts. Soak up spills immediately with rags. Never pour used fluid down drains or onto pavement. Collect it in sealed containers and drop it off at a recycling center or auto parts store that accepts waste coolant.
Secure the Vehicle Properly
Park on a level concrete or asphalt surface. Engage the parking brake and place wheel chocks at the wheels. If you need under-car access, lift the front with a hydraulic jack and support it with jack stands. Never rely on a jack alone.
Tools and Supplies Needed for a Coolant Change
Basic Hand Tools
Gather these essentials before starting:
• Wrench or socket set
• Flathead or adjustable screwdriver
• Pliers for spring clamps
• Large drain pan with 5+ gallon capacity
• Clean funnel
• Turkey baster for sampling old fluid
• Garden hose for flushing
• Soft nylon brush and clean rags
Specialized Tool for Modern Vehicles
Cars built after 2000 trap air in the heater core and engine block. An air-powered cooling system refiller, like the AirLift II, costs about $100 and pulls a vacuum before filling. This single tool eliminates stubborn air pockets that cause overheating and weak cabin heat.
Required Materials
Stock up on these before you begin:
• Manufacturer-specified coolant (concentrated or pre-mixed)
• Distilled water only, never tap water
• New radiator cap (around $12)
• New thermostat (around $12)
• Replacement drain petcock if yours is plastic and brittle
• New hose clamps and gaskets as needed
• Optional radiator flush chemical
Choosing the Correct Coolant Type for Your Vehicle
Match the Manufacturer Specification
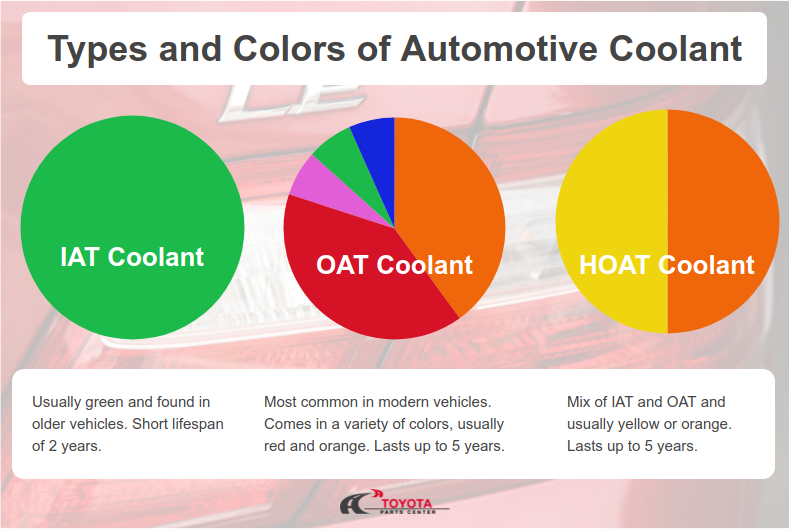
Using the wrong coolant damages seals, gaskets, and aluminum components. Check your owner’s manual for the exact type. The three main categories include:
• IAT (Inorganic Additive Technology): Green fluid for older vehicles
• OAT (Organic Acid Technology): Orange or red fluid, common in GM vehicles using Dex-Cool
• HOAT (Hybrid OAT): Yellow, pink, or turquoise fluid found in Ford, Chrysler, and many Asian models
Avoid “universal” coolants unless your manual explicitly approves them. Dealer-specific fluids cost about $6 more per gallon but prevent premature wear on modern alloys.
Mix Concentrate with Distilled Water
Tap water contains minerals that leave scale and reduce heat transfer. Mix concentrated antifreeze 50/50 with distilled water in a clean bucket, stirring thoroughly. Pre-mixed coolant eliminates this step and pours directly into the system.
Recognize Warning Signs in Old Coolant
Inspect the existing fluid before draining. Healthy coolant appears clear and vibrant. Warning indicators include:
• Rusty or brown color signaling corrosion
• Chocolate milk appearance indicating oil contamination, often a head gasket failure
• Floating sludge or crud showing serious contamination
• Sweet smell pointing to a coolant leak
If you spot chocolate milk, stop driving and seek professional diagnosis immediately.
Draining Old Coolant Safely and Completely
Locate the Drain Petcock
Find the plastic or metal valve at the bottom corner of the radiator, usually on the driver’s side. Slide your drain pan underneath before opening anything.
Open the Valve Carefully
Turn the petcock counterclockwise. Designs vary: some screw out, others twist a quarter turn or pull down. Plastic petcocks become brittle with age and snap easily. Keep a $5 replacement on hand just in case.
Remove the Lower Radiator Hose
After the radiator empties, loosen the clamp on the lower radiator hose with pliers. Pull the hose off quickly and direct the remaining fluid into your drain pan. This step releases coolant trapped inside the engine block and heater core.
Drain the Engine Block
Many engines feature one or two block drain plugs on the sides. Remove them with the correct socket, allow fluid to drain completely, then reinstall them tightly. Consult a repair manual for your specific engine layout.
Flushing the Cooling System for Best Results

Simple Water Flush for Clean Systems
When coolant looks only slightly dirty, a basic flush works well:
- Reconnect all hoses and close every drain point.
- Fill the radiator with distilled water.
- Start the engine and run it for 10 to 15 minutes with the heater on maximum.
- Let the engine cool, then drain the water.
- Repeat until the drained water runs completely clear.
Deep Flush for Sludge and Sediment
Brown, gunky coolant requires more aggressive cleaning:
- After the final water drain, disconnect the lower radiator hose again.
- Insert a garden hose into the radiator filler neck.
- Blast water through the system until clean water flows from the open hose.
- Reconnect everything and move to the refill stage.
Refilling the Radiator Without Air Pockets
Standard Refill Method for Older Vehicles
Follow these steps for pre-2000 cars and simple cooling systems:
- Keep the vehicle level or slightly nose-up to help air escape.
- Pour the 50/50 coolant mix into the radiator until it sits about 1 inch below the neck.
- Start the engine with the radiator cap off and the heater set to maximum.
- Let it idle for 10 to 15 minutes. As the thermostat opens, the level drops.
- Top off the coolant continuously until the level stabilizes and bubbles stop rising.
- Replace the cap tightly once the system holds steady.
Vacuum Refill Method for Modern Vehicles
Standard bleeding often fails on post-2000 models with complex passages. Use an air-powered refiller for reliable results:
- Attach the refiller tool to the radiator neck or overflow reservoir.
- Route the exhaust hose into an empty bucket.
- Connect compressed air and open the valve to pull vacuum until the gauge needle reaches the edge of the red zone.
- Insert the fill tube into fresh coolant.
- Open the valve and let the vacuum suck fluid into the system automatically.
- Repeat as needed until the system fills without bubbles.
Replacing the Thermostat and Radiator Cap
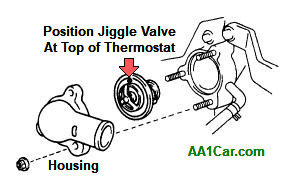
Install a New Thermostat
A failed thermostat ranks as the second most common cause of overheating. Take advantage of the drained system to swap yours:
- Drain coolant below the thermostat housing level.
- Disconnect the upper radiator hose and catch any drips.
- Unbolt the housing, typically 2 to 4 bolts. Tap gently with a rubber mallet if stuck.
- Scrape off the old gasket material with a razor blade. Avoid gouging the metal surface.
- Install the new thermostat in the exact same orientation as the old one, usually with the spring side facing the engine.
- Fit a new gasket, reassemble the housing, and tighten bolts evenly.
Swap the Radiator Cap
A weak cap fails to hold system pressure, which lowers the boiling point and triggers overheating. Match the pressure rating printed on your old cap. Replace both the radiator cap and the overflow tank cap if your vehicle uses two.
Inspect Hoses and Clamps
While everything is apart, examine the radiator and heater hoses. Replace any showing cracks, bulges, soft spots, or dried coolant residue. Upgrade old worm-drive clamps to stainless steel versions for better long-term sealing.
Final Inspection and Test Drive
Check Every Connection for Leaks
With the engine off, inspect the drain petcock, lower radiator hose, thermostat housing, and radiator seams. Start the engine and watch for drips or seepage. Fix any leaks immediately before they worsen.
Test Drive and Recheck the Level
Drive normally for several days. Then park on level ground, let the engine cool completely, and check the coolant reservoir. Top off to the MAX or HOT line if the level dropped. A significant decrease indicates a leak that needs prompt attention.
Troubleshooting Common Coolant Change Problems
No Heat After the Refill
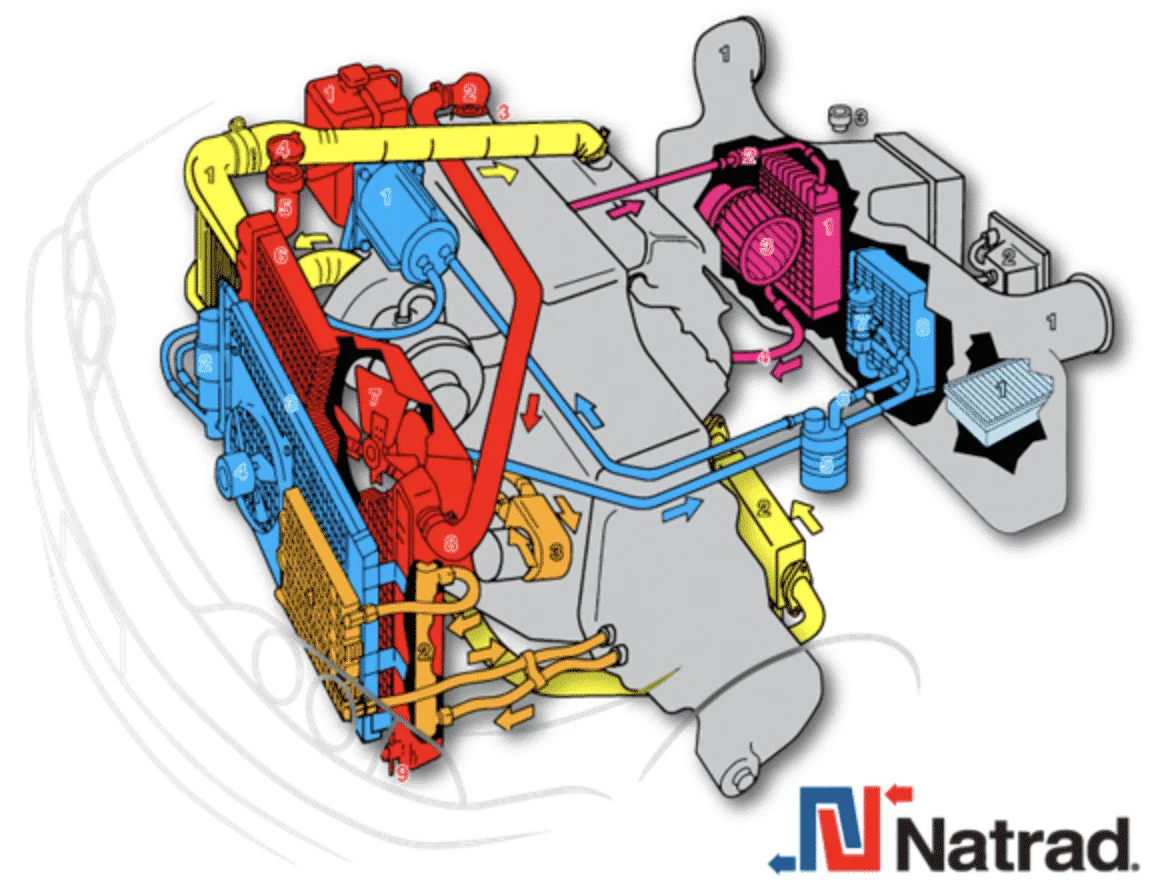
Air trapped in the heater core is the usual suspect. Try the vacuum refill method if you skipped it. As a quick fix, squeeze the upper and lower radiator hoses with the engine running and the cap off to push trapped air out. Confirm the thermostat is installed with the spring side facing the engine.
Engine Overheats After the Change
Several issues can cause this:
• Air pocket still trapped in the system, requiring a vacuum refill
• Faulty radiator cap that fails to hold pressure
• Bad thermostat stuck in the closed position
• Incorrect mix ratio with too much antifreeze reducing heat transfer
Mixing Different Coolant Types
Combining incompatible coolants, such as OAT and IAT, creates gel that clogs internal passages and damages the water pump. If you have mixed types or see heavy sludge, schedule a professional flush rather than risk engine damage.
Coolant and Air Conditioning
Coolant does not affect your AC system, which uses refrigerant instead. However, your cabin heater depends entirely on hot coolant flowing through the heater core. Poor flow or air pockets leave you shivering in winter with no heat inside the cabin.
Frequently Asked Questions About Changing Radiator Fluid
How Often Should You Change Radiator Fluid?
Most manufacturers recommend changing coolant every 24,000 to 36,000 miles or every 2 to 3 years. Some extended-life formulations last up to 60,000 miles. Replace it sooner if the fluid looks dirty, rusty, or contaminated.
Can I Use Tap Water Instead of Distilled Water?
No. Tap water contains minerals that leave scale deposits on internal surfaces, reducing heat transfer and promoting corrosion. Always mix coolant with distilled water for best results.
Is Antifreeze the Same as Coolant?
The terms get used interchangeably, but they refer to slightly different things. Coolant is the fluid that transfers heat, while antifreeze is the additive (ethylene or propylene glycol) mixed with water to prevent freezing and boiling. The final mixture in your radiator is commonly called either coolant or antifreeze.
Will My Car Run Better After a Coolant Flush?
Yes. Removing sludge, corrosion, and degraded fluid restores the cooling system’s efficiency. The engine operates within its optimal temperature range, which improves performance and fuel economy while reducing wear on internal components.
What Happens If the Drain Petcock Breaks?
Plastic petcocks become brittle over time and may snap when turned. Stop forcing it, purchase a replacement at any auto parts store, and swap it in. If the radiator tank itself cracks, you may need a full radiator replacement or professional repair.
Do I Need to Replace the Thermostat When Changing Coolant?
Replacement is not mandatory, but it makes sense during a coolant service since the system is already drained. A new thermostat costs around $12 and prevents future overheating failures. Inspect the old one for proper opening and closing before deciding.
Key Takeaways for a Successful Radiator Fluid Change
Changing radiator fluid every 2 to 3 years protects your engine from corrosion, overheating, and expensive component failures. Drain the system completely by opening the petcock, removing the lower hose, and clearing the block drains. Flush with distilled water whenever the old coolant shows signs of contamination.
Choose the manufacturer-specified coolant type and mix it 50/50 with distilled water. For modern vehicles, invest in an air-powered vacuum refiller to eliminate stubborn air pockets that cause weak cabin heat and overheating. While the system is drained, replace the thermostat, radiator cap, and any worn hoses to maximize reliability.
Your next step is simple: gather your tools, pick up the correct coolant, and set aside an hour this weekend. Your engine will run cooler, your heater will blow hot, and your wallet will thank you for skipping the shop fee.



