
A faulty radiator valve can leave rooms cold, drive up energy bills, and even trigger boiler issues. If your radiator stays lukewarm no matter how high you turn the dial, or you spot moisture around the valve base, replacement is likely overdue. Fortunately, learning how to change a radiator valve is a realistic weekend project for anyone comfortable with basic tools.
This guide covers every step for pressurized combi boiler systems common in UK homes. You will learn how to drain safely, remove the old valve, install the new one with proper sealing, refill without airlocks, and add the chemical protection your system needs. We also explain when to call a professional and how upgrading to a thermostatic valve can cut heating costs by up to 15%.
Shut Down the Heating System Safely
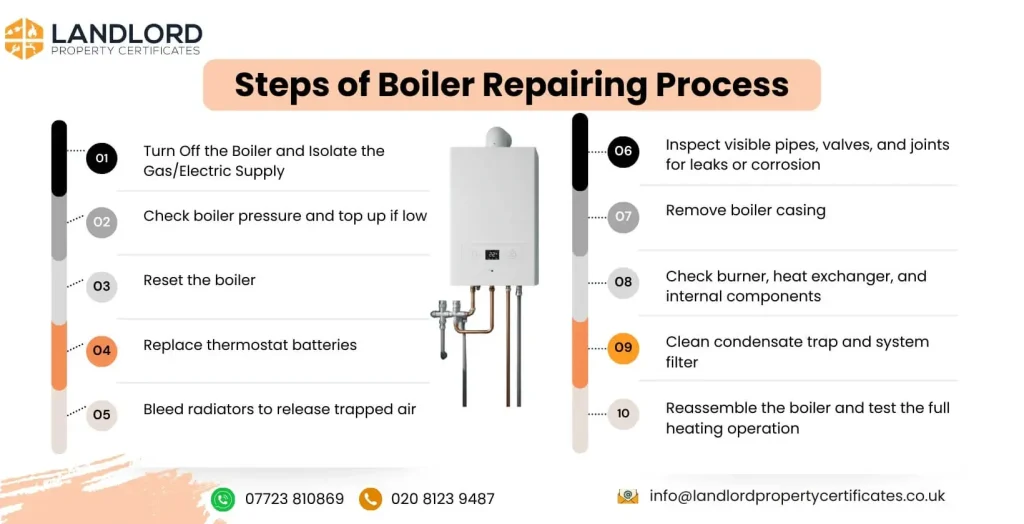
Before touching any pipe, isolate the boiler and let everything cool. Hot pressurized water can scald skin and spray across the room the moment a fitting loosens.
Switch Off the Boiler and Power
Turn off the boiler at the mains and lower the thermostat to its lowest setting. Disable any smart timers or heating programs to prevent the system from firing mid-job. A sudden activation during work can release scalding water.
Allow the Radiator to Cool Fully
Wait a minimum of 30 minutes after shutdown for the radiator and connecting pipes to cool. Touch the metal surface before starting; only proceed when it is completely cold to the touch. Heated water increases internal pressure, making disassembly far more dangerous.
Protect Flooring From Sludge Stains
Lay thick towels or plastic sheeting directly beneath the radiator. Old heating systems contain black iron sludge that permanently stains carpet and fabric. Position a bucket within reach to catch drips during disconnection.
Isolate the Radiator Valves
Closing both valves stops water flow into the radiator, but draining remains essential on pressurized systems. Skipping the lockshield calibration step here causes uneven heating later.
Close the Control Valve Fully
For manual valves, rotate the knob clockwise until it stops. If you have a thermostatic valve, turn the dial to 0 or the snowflake symbol for frost protection. This shuts off flow from the thermostat side of the system.
Shut the Lockshield Valve and Count the Turns
Remove the plastic cap from the opposite valve. Use a spanner to turn the spindle clockwise until snug, without forcing it. Count the exact number of turns required to close it, such as two and a half turns. You must replicate this count when reopening to preserve system balance.
Pro Tip: Write the turn count on masking tape and stick it to the wall nearby. Forgetting this number is the most common cause of post-job heating imbalances.
Drain the System Before Removing the Valve
On combi boilers, draining is mandatory before loosening any fitting. Residual pressure will spray water across the room if you skip this step.
Locate and Open the Drain Cock
Find the drain valve, usually located near the boiler or at the lowest point of the pipework. Attach a garden hose with a jubilee clip and route the other end to an outside drain or floor gully.
Break the System Vacuum
Walk to the highest radiator in the house, often upstairs, and open its bleed valve with a radiator key. Air entering at the top allows water to drain smoothly from below, speeding up the process considerably.
Confirm Zero Pressure Before Proceeding
Open the drain cock and let water flow for 10 to 15 minutes. Watch the boiler pressure gauge and wait until it reads zero bar before touching any joints. This confirms no residual pressure remains in the system.
Remove the Old Valve Without Damaging Pipes
Work slowly during removal. Sludge will drip, and damaged olives or stripped threads can cause leaks in the new valve installation.
Support the Radiator During Work
If removing a valve connected directly to the radiator tail, ensure the radiator is stable and properly supported. Unsupported weight can crack joints or bend pipework during disconnection.
Loosen Valve Nuts With Two Spanners
Place one adjustable spanner on the valve body to hold it stationary. Use the second spanner on the compression nut connecting the valve to the pipe or radiator tail. Turn anti-clockwise to loosen and catch the first drips with a cloth. Repeat for both ends of the valve.
Handle Olives and Tails Carefully
The metal olive (compression ring) often stays on the pipe after removal. If undamaged and free from corrosion, reuse it. If replacing the tail (the threaded piece screwed into the radiator), unscrew it with a radiator key and clean the threads thoroughly before fitting the new part.
Install the New Valve With a Leak-Free Seal

Proper sealing and correct alignment prevent post-installation leaks. Match the valve type and size to your system; most UK homes use 15mm fittings.
Verify Flow Direction Before Fitting
Check the valve body for a directional arrow. The arrow must point toward the radiator. Installing the valve backward restricts flow, reduces heating efficiency, and can cause knocking noises.
Apply PTFE Tape Correctly
Wrap 6 to 8 turns of PTFE tape clockwise around the male thread. Over-wrapping risks tape breaking off inside the system and clogging components. Under-wrapping causes slow leaks that worsen over time.
Use Jointing Compound on the Olive
For extra sealing security on older or slightly worn fittings, apply a small amount of jointing compound to the olive before tightening. This fills micro-gaps and improves long-term reliability.
Hand-Tighten First, Then Finish With Spanners
Screw the cap nut on by hand until snug. Then use two spanners: one to hold the valve body, one to tighten the nut. Do not over-tighten, as this can crack the valve body or strip the threads.
Fit the TRV Head Last
If installing a thermostatic valve, attach the TRV head only after the body is fully secured. This prevents accidental damage to the sensitive temperature mechanism during installation.
Refill the System and Restore Correct Pressure
Refilling incorrectly is the leading cause of post-job boiler errors. Airlocks and low pressure prevent the boiler from firing at all.
Close All Bleed and Drain Valves
Ensure the drain cock is fully closed and every radiator bleed valve is tight. Open the boiler’s filling loop only when the system is ready to refill.
Refill to 1.0 to 1.5 Bar
Open the water inlet valve, usually located beneath the boiler. Watch the pressure gauge rise steadily and stop when it reaches 1.0 to 1.5 bar. Never exceed 2.0 bar when the system is cold.
Reopen the Lockshield Valve to Original Setting
Use the recorded turn count to reopen the lockshield valve to its original position. This maintains hydraulic balance across the entire heating system and prevents uneven room temperatures.
Bleed Air From the Radiator
Open the bleed valve on the radiator you worked on until water spurts out in a steady stream. Close it tightly once water appears. Trapped air causes cold spots, gurgling noises, and reduced efficiency.
Top Up Pressure After Bleeding
Bleeding releases air and lowers system pressure. If the gauge drops below 1.0 bar, repressurize the system to 1.5 bar before running the boiler.
Check for Leaks and Test the System
Even a small drip can cause significant damage over time. Test thoroughly before considering the job complete.
Inspect All New Joints Carefully
Look closely at both valve connections while the system is under pressure. If dampness appears, dry the area and recheck after five minutes. A growing wet spot confirms an active leak.
Fix Any Leaks Immediately
If a joint leaks, turn off the system and drain slightly to relieve pressure. Disassemble the joint, inspect the olive for damage, reapply PTFE tape with 6 to 8 wraps, and retighten gently without over-torquing.
Run the Heating System Fully
Turn the boiler back on and set the new valve to 3 if it is a TRV. Let the system heat for 20 to 30 minutes. Confirm the radiator warms evenly across its full surface and the boiler runs without displaying error codes.
Add Inhibitor to Prevent Corrosion
This step is non-negotiable. Draining removes the protective chemicals that prevent rust, and skipping inhibitor replacement leads to rapid internal corrosion.
Inject Inhibitor Right After Refilling
Use a full bottle of central heating inhibitor immediately after the system is refilled. The best injection points include through a magnetic filter if installed, via a radiator filling kit at the bleed port, or into a vertical feed point on any radiator.
Prevent Costly Sludge Buildup
Inhibitor stops rust and sludge formation inside pipes and the boiler. Skipping this £10 step can lead to blocked pipework, noisy pumps, and premature boiler failure costing hundreds in repairs.
Upgrade to a Thermostatic Radiator Valve

Swapping a manual valve for a TRV boosts efficiency and improves comfort. It is a smart upgrade if your current valves lack automatic temperature control.
Why Choose a TRV
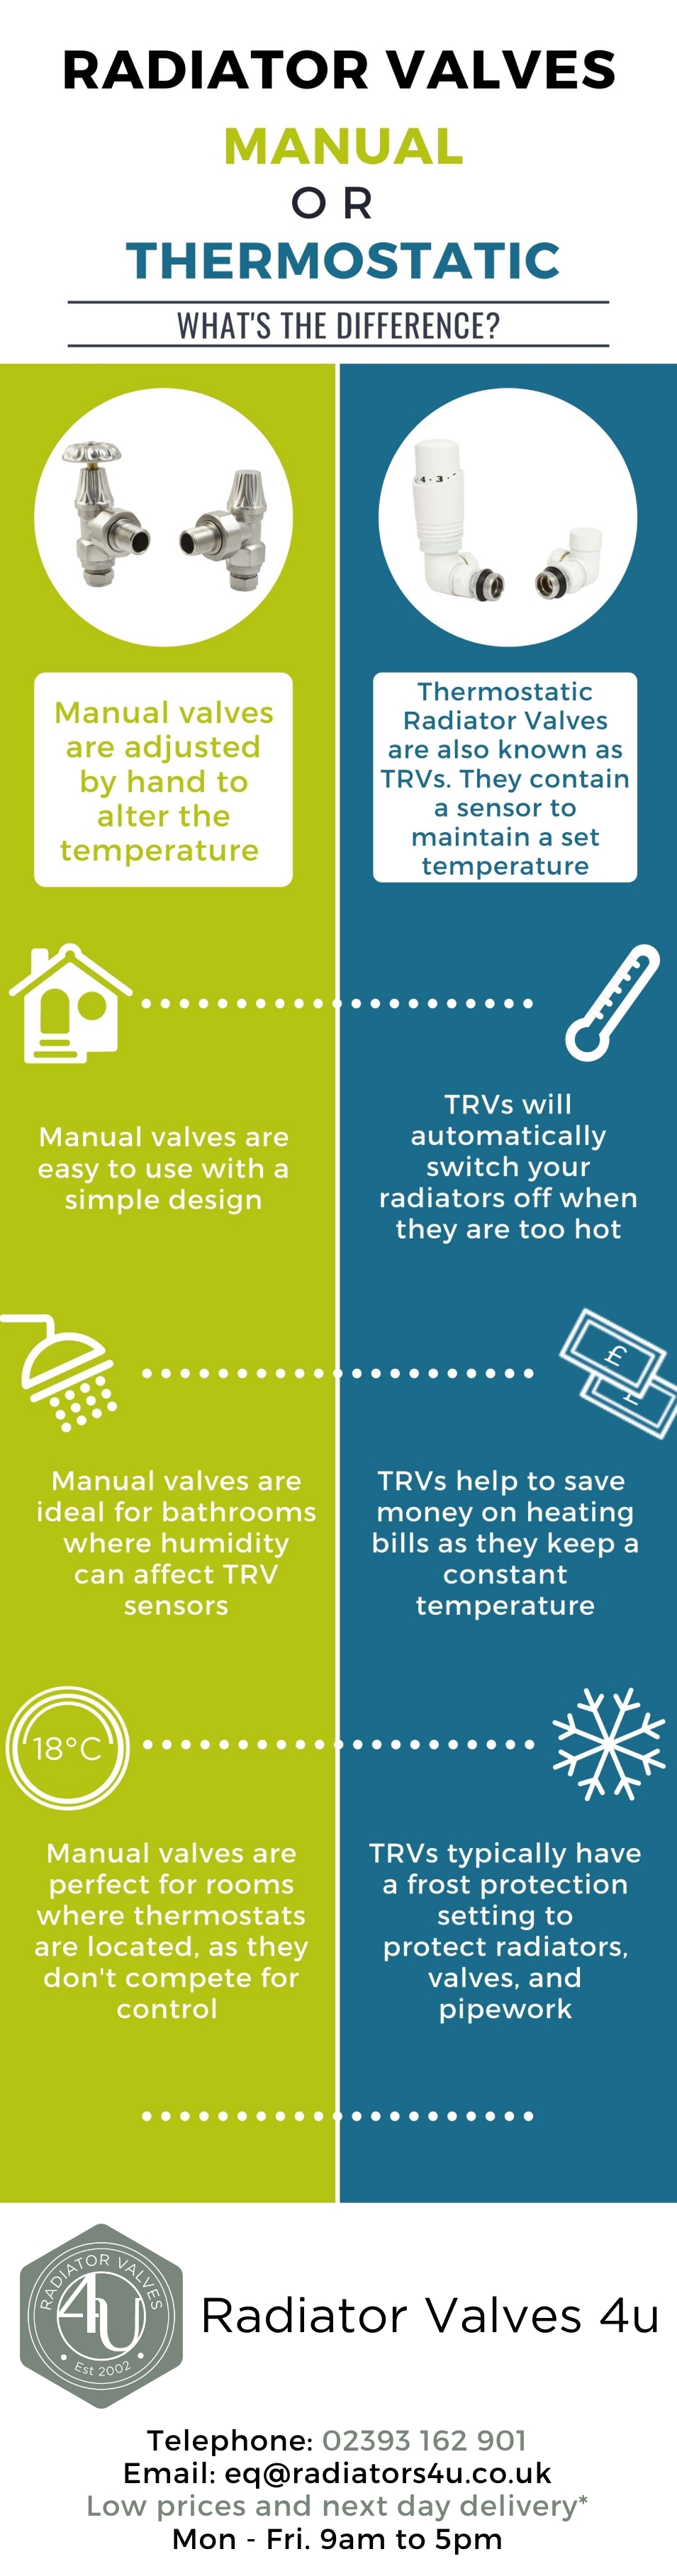
TRVs automatically reduce flow when the room reaches the set temperature. This prevents overheating empty rooms and cuts energy use by 10 to 15%. UK building regulations since 2022 often require TRVs when installing a new boiler.
Set the TRV Dial Correctly
Turn the numbered dial to control heat output:
– 1 equals 12°C for a cool room
– 3 equals 20°C for normal living space
– 5 equals 27°C for warm areas like bathrooms
– 0 or the snowflake symbol means off or frost protection
Avoid covering the TRV with curtains or furniture, as this blocks the sensor from reading room temperature accurately.
Avoid Common DIY Mistakes
Even experienced homeowners make errors during this job. These pitfalls cause leaks, poor performance, and costly professional call-outs.
Do Not Skip the Lockshield Turn Count
Forgetting to count the turns leads to uneven heating throughout the home. One radiator may run scalding hot while another stays cold.
Never Over-Tighten Fittings
Excessive force does not improve seals. It damages valves, cracks bodies, and strips threads. Snug plus a quarter-turn with spanners is sufficient.
Do Not Ignore System Chemistry
No inhibitor means rapid corrosion and sludge buildup. This £10 chemical treatment prevents £1,000 in system damage over time.
Avoid Working on Conventional Systems Alone
Houses with a feed and expansion tank in the loft require different draining procedures. If you are unsure about your system type, hire a Gas Safe registered engineer.
Know When to Call a Professional
Some situations demand expert help. Recognizing your limits prevents flooding, boiler damage, and safety hazards.
Complex Pipe Configurations
If your valves connect via push-fit elbows or use non-standard sizes outside the 15mm norm, reassembly risks leaks. Professionals carry repair kits and adapters for unusual setups.
Persistent Airlocks or Boiler Error Codes
If the boiler refuses to fire or displays a fault code such as E130, an internal airlock may need professional venting. Continuing to run the boiler in this state can damage the pump or heat exchanger.
Full System Imbalance
If multiple radiators heat unevenly after the work, the system may need professional rebalancing. This involves pressure testing and flow adjustment that requires specialized equipment.
Frequently Asked Questions About Changing a Radiator Valve
Do I need to drain the whole system to change one valve?
On pressurized combi boiler systems, yes. Draining is mandatory before loosening any fitting to prevent pressurized water from spraying across the room. The only exception is using a pipe-freezing kit, which is an advanced technique that costs around £20 and requires experience.
How long does it take to change a radiator valve?
For a standard combi system, the job takes 1 to 2 hours including draining, replacement, refilling, and testing. Allow extra time if you are fitting a TRV for the first time or working on an unfamiliar system layout.
Can I replace a manual valve with a thermostatic one?
Yes, as long as the pipe size matches (typically 15mm). TRVs offer automatic temperature control and can cut energy bills by 10 to 15%. Ensure the arrow on the valve body points toward the radiator before installation.
What pressure should my boiler show after refilling?
When cold, the pressure gauge should read between 1.0 and 1.5 bar. Never exceed 2.0 bar when the system is cold. After bleeding radiators, pressure will drop, so top up to 1.5 bar before running the heating.
Why is my radiator still cold after changing the valve?
Common causes include trapped air (bleed the radiator again), low boiler pressure (top up to 1.5 bar), or an incorrectly set lockshield valve (reopen to the original turn count). If the issue persists, the system may need professional rebalancing.
Do I need to add inhibitor after draining the system?
Yes, this is a critical step. Draining removes the protective chemicals that prevent rust and corrosion. Add a full bottle of central heating inhibitor immediately after refilling to protect the boiler, radiators, and pipework from premature failure.
Key Takeaways for a Successful Radiator Valve Replacement
Replacing a radiator valve on a combi boiler system takes 1 to 2 hours and delivers long-term savings on energy bills. Follow each step precisely: shut off the boiler safely, drain the system fully to zero pressure, seal threaded joints with 6 to 8 wraps of PTFE tape, and reopen the lockshield valve using the exact turn count you recorded earlier. Refill to 1.5 bar, bleed trapped air from the radiator, and always add a fresh bottle of inhibitor after draining.
Upgrading to a thermostatic valve gives you automatic room-by-room temperature control and can reduce heating costs by up to 15%. Avoid over-tightening fittings, never skip the chemical inhibitor, and recognize when a job requires a qualified heating engineer, particularly on conventional systems with loft tanks or when facing persistent boiler error codes.
For your next step, gather your tools, shut down the heating, and begin with the safety isolation phase outlined above.



