

You turn the key, the engine fires up, and within minutes the temperature gauge climbs. Your car is overheating, but you just replaced the thermostat and water pump. What is going wrong? The real culprit might be coolant not flowing through the system. This silent failure can mimic other issues, leaving even experienced DIYers frustrated. Without proper circulation, heat builds up, the engine overheats, and damage follows fast.
The problem is not always a broken part. More often than not, air locks, improper bleeding, or a faulty new water pump stop coolant from moving. This guide walks you through proven troubleshooting, real-world fixes, and a step-by-step bleed procedure that works every time.
Decode Common Flow Failure Signs
Watch for These Key Symptoms
If your engine overheats quickly or the heater blows cold, coolant may not be moving. The most telling signs include:
- Upper hose hot, lower hose cold indicates flow blockage after the thermostat
- No coolant movement in radiator when cap is removed and engine is warm
- Cold radiator with hot engine means heat is not transferring due to stagnation
- Overflow tank bubbling without expansion is often mistaken for head gasket but usually indicates trapped air
- Coolant level drops with no visible leak because air pockets cause false low readings
These are not minor glitches. They point to a system that is pressurized but not circulating. Ignoring them risks warped heads, blown gaskets, and engine damage.
Heater Blows Cold? Check Flow First
Even if the engine reaches normal temperature, a cold cabin means coolant is not reaching the heater core. This often happens when air locks block flow or the system is not bled properly after service.
- Turn the heater to max heat and low fan during bleeding
- Warm air should return once air clears and flow resumes
- No heat after 15 minutes suggests a blockage or pump issue
This simple test doubles as a fix. Running the heater opens the control valve, creating an extra path for air to escape.
Find the Root Cause Fast
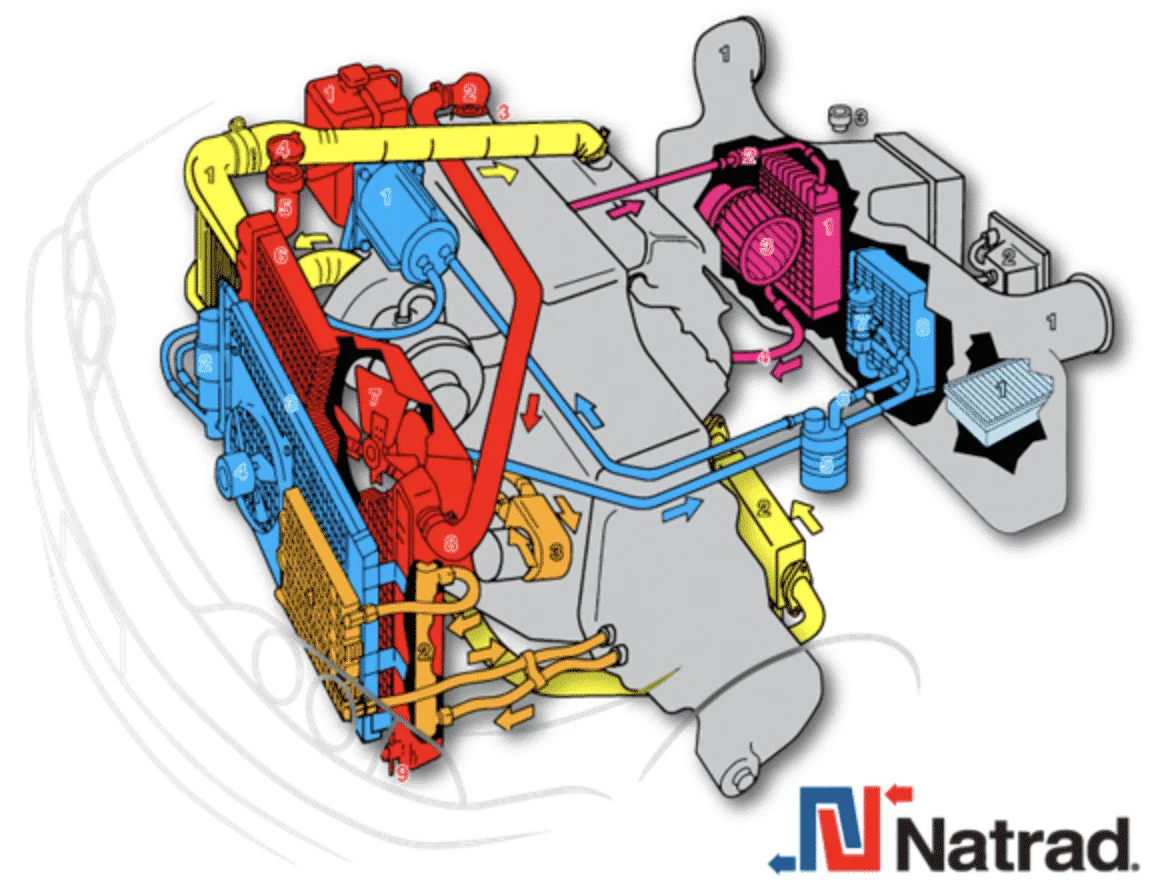
Air Locks Block Flow After Repairs
Air entrapment is the number one reason for coolant not flowing after replacing the thermostat, water pump, or radiator. Air rises to high points around the thermostat, heater core, or cylinder head, creating pockets that stop circulation.
- Air compresses under pressure instead of moving fluid
- Thermostat will not open if surrounding coolant is cold from trapped air
- System appears full, but flow is blocked
Fix: Use an elevated fill and engine run to purge air completely.
Water Pump Is Not Moving Fluid
Even a new water pump can fail. The pulley may spin, but the impeller could be cracked, corroded, or slipping on the shaft. This is especially common with budget aftermarket pumps.
- Remove the lower radiator hose with engine off and cool
- Start the engine. You should see a strong gush of coolant
- No flow means the pump is not working even if the belt turns
Do not assume new equals good. Bench test pumps when possible or stick with OEM spec units.
Thermostat Installed Backwards?
A thermostat that is stuck closed or installed backwards blocks flow. Even new ones can be defective.
- Remove the thermostat entirely for testing
- If coolant still does not flow, the problem is not the thermostat
- Always test new thermostats in hot water before installing
The spring-loaded end goes into the engine. Double-check orientation before reinstalling.
Hidden Blockages in the System
Sludge, scale, or old stop-leak products can clog the radiator, heater core, or engine passages.
- Reverse-flush the radiator and block to clear debris
- Look for rust-colored water or chunks during flush
- Replace radiator if fins are clogged internally
Even new radiators can fail if old debris was not flushed out first.
Diagnose Without Guessing
Test Thermostat Operation Now
Start with a cold engine and watch the upper radiator hose.
- Start engine and let it warm up
- After 10 to 15 minutes, upper hose should get hot
- Use an infrared thermometer on the thermostat housing. It should match coolant temp
No heat? Either the thermostat is stuck, air is blocking heat transfer, or the engine is not warming.
Quick check: Remove thermostat. If no flow, the problem is upstream at the pump or air lock.
Verify Water Pump Output
This test confirms if the pump is actually moving coolant.
- Remove radiator cap only when engine is cool
- Start engine and let it warm up
- Look into the radiator. You should see visible coolant movement once warm
No flow? Try this harder test.
- Disconnect lower radiator hose into a bucket
- Rev engine to 2,000 RPM
- You should see strong, steady flow of coolant
If nothing comes out, the pump is not working. Replace it.
Check for Air with a Spill-Free Funnel
A Lisle 24610 Spill-Free Funnel is the best tool for spotting trapped air.
- Install on radiator neck
- Fill above normal level
- Run engine at 2,000 RPM with heater on max
- Watch for bubbles rising in the funnel
As air escapes, coolant level drops. Keep topping off until bubbles stop, usually 10 to 30 minutes.
Fix Coolant Flow in 5 Steps
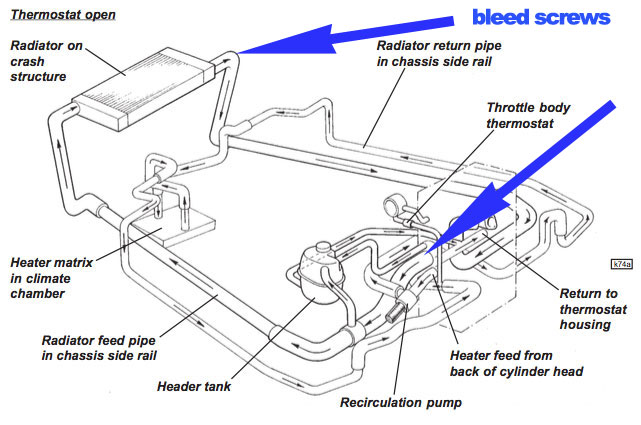
1. Bleed Air Using Elevated Fill
Most no-flow issues vanish with proper bleeding.
- Park on an incline with front wheels on curb or ramps
- Remove radiator cap when engine is cold
- Install spill-free funnel or open reservoir
- Fill with 50/50 coolant mix
- Start engine, set heater to max heat and low fan
- Rev to 2,000 RPM in neutral for 30 seconds, repeat 3 to 4 times
- Squeeze upper and lower hoses to dislodge air
- Add coolant as level drops
- Run until no bubbles appear, hoses are hot, and level stabilizes
- Shut off, cool down, recheck, and cap securely
This method uses gravity and flow dynamics to purge air naturally.
2. Remove Thermostat to Test Flow
Eliminate the thermostat as a variable.
- Take it out and reinstall the housing
- Repeat bleed procedure
- If coolant flows now, the thermostat was the issue
- If not, focus on pump or blockage
This simple test saves time and parts.
3. Inspect Water Pump Internally
If no flow after bleeding and no thermostat:
- Shut down engine and let cool
- Remove water pump
- Check impeller for cracks, looseness on shaft, corrosion, or missing vanes
- Bench test new pump by spinning pulley and checking for resistance
Replace with OEM quality unit if there is any doubt.
4. Flush System to Clear Blockages
Perform a reverse flush.
- Remove upper and lower radiator hoses
- Use garden hose to back-flush through radiator
- Then flush through engine block and heater core lines
- Watch for debris in outflow water
- Reassemble, refill, and bleed again
This clears sludge and old coolant gunk that restrict flow.
5. Pressure Test for Hidden Leaks
Use a cooling system pressure tester at 15 to 18 psi.
- Attach to radiator neck
- Pump to rated pressure
- Hold for 10 to 15 minutes
- Watch gauge for drop
A pressure loss indicates leaking radiator cap, blown head gasket, cracked block or hose, or loose hose clamp. Fix leaks before assuming flow issue is resolved.
Vehicle-Specific Fixes That Work
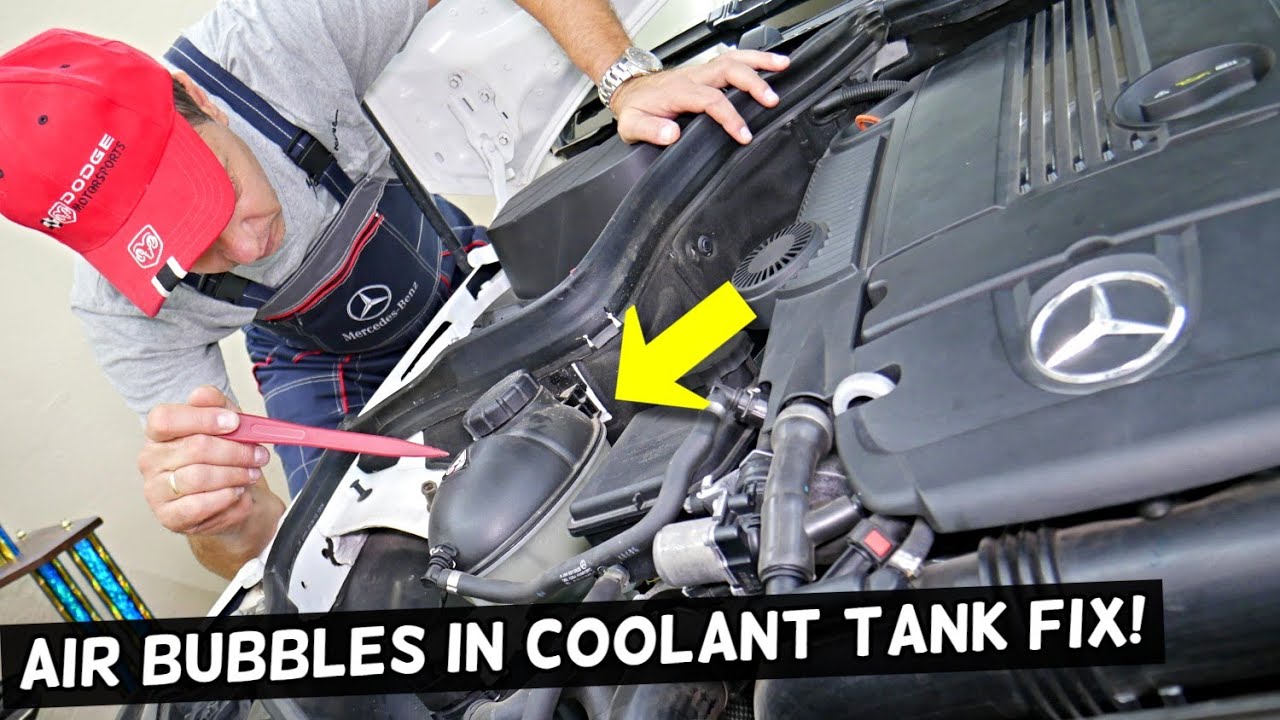
1994 Mercedes-Benz SL320: Bleed the Complex Loop
This model has high air traps in the heater circuit.
- Use spill-free funnel
- Run engine with heater on full
- Locate bleed screw if equipped and open until coolant flows
- Close, top off, and retest
Many European cars need this extra step. Do not skip it.
1995 GMC Sierra 5.7L: Pump or Air?
After replacing hoses, pump, and thermostat:
- Upper hose hot, lower hose cold
- No flow from water pump outlet
Likely cause: Air lock or failed pump.
Fix by elevating front end, using funnel, bleeding with heater on. If no flow, remove pump and inspect impeller. Replace with OEM spec if damaged.
Critical: This V8 holds 12 to 14 quarts. Underfilling guarantees air problems.
2013 Ssangyong Stavic: Slow Draw-In Is Normal
After water pump replacement:
- Only 2 of 4 liters drawn in after 10 minutes
- Bubbles return to overflow
Diagnosis: Classic air lock.
Solution involves running engine with heater on high, gently squeezing hoses, topping off slowly, and waiting 15 to 30 minutes. Coolant will gradually draw down. Patience wins. Do not stop too soon.
Use the Right Tools
Essential Gear for No Mistakes
- Spill-Free Funnel: Lets you overfill and bleed without mess. Shows air bubbles clearly.
- Infrared Thermometer: Confirms flow by checking temp difference between upper and lower hoses.
- Pressure Tester: Finds leaks that mimic flow issues.
- Hose Clamp Pliers: Prevents damage when removing old hoses.
- Flush Kit with Adapters: Speeds up reverse-flushing radiator and block.
Skip the funnel at your peril. It is the single best investment for coolant work.
Prevent Future Flow Failures
Follow These Best Practices
- Always bleed the system after any coolant work
- Run the heater on max during refill. It opens the valve and helps purge air.
- Use correct coolant type. OAT, HOAT, or G-48. Mixing types causes sludge.
- Replace radiator cap every 3 to 5 years. Cheap part, critical function.
- Flush every 30,000 to 50,000 miles to prevent buildup.
- Never open a hot radiator cap. Risk of scalding and vacuum collapse.
A well-maintained system rarely fails. Most problems start with a rushed refill.
Final Checklist: Confirm Flow Works
- Engine off and cool
- Radiator cap off or funnel installed
- Front of car elevated
- Heater set to max heat and low fan
- Coolant type and mix correct
- System filled above neck
- Engine running, revved to 2,000 RPM
- Hoses squeezed to release air
- Coolant added as level drops
- No bubbles for 5 plus minutes
- Lower hose hot to touch
- Gauge steady in normal range
- Rechecked after cooldown
Frequently Asked Questions About Coolant Not Flowing
Why does coolant stop flowing after replacing the water pump?
Air locks are the most common cause. When you replace the water pump, air gets trapped in the system and blocks circulation. Even with a new working pump, air pockets prevent coolant from moving. You must bleed the system properly using an elevated fill method.
How do I know if my water pump is actually working?
Remove the lower radiator hose while the engine runs. You should see a strong gush of coolant. If nothing comes out, the pump is not moving fluid even if the pulley spins. The impeller may be cracked, corroded, or slipping on the shaft.
Can a new thermostat be defective?
Yes. A thermostat can be installed backwards, stuck closed from the factory, or fail to open due to air blocking heat transfer. Always test a new thermostat in hot water before installing. If coolant still does not flow with the thermostat removed, the problem lies elsewhere.
Why is my upper hose hot but lower hose cold?
This classic symptom means coolant is not circulating through the radiator. The thermostat may not be opening, an air lock may be blocking flow, or the water pump may not be working. It indicates flow is stopped somewhere between the thermostat and radiator bottom.
How long does it take to bleed air from the cooling system?
It typically takes 10 to 30 minutes of running the engine at 2,000 RPM with the heater on max. You must continuously add coolant as the level drops from air escaping. Do not stop until no bubbles appear for at least 5 minutes and the lower hose gets hot.
Can I drive with coolant not flowing?
No. Driving with no coolant circulation causes rapid overheating. Within minutes, you risk warped cylinder heads, blown head gaskets, and catastrophic engine damage. Do not drive the vehicle until the flow issue is diagnosed and fixed.
Key Takeaways for Fixing Coolant Not Flowing
Coolant not flowing is not a mystery. It is a process failure. In 9 out of 10 cases, the fix is proper bleeding, not a new part. Use the elevated fill method, a spill-free funnel, and patience. Run the heater on max during the bleed process to open the heater control valve and provide an additional escape path for trapped air. If flow still fails after proper bleeding, test the water pump by disconnecting the lower hose and verifying coolant output. Check for internal blockages by performing a reverse flush. With this guide, you will stop overheating, restore circulation, and protect your engine fast.



