
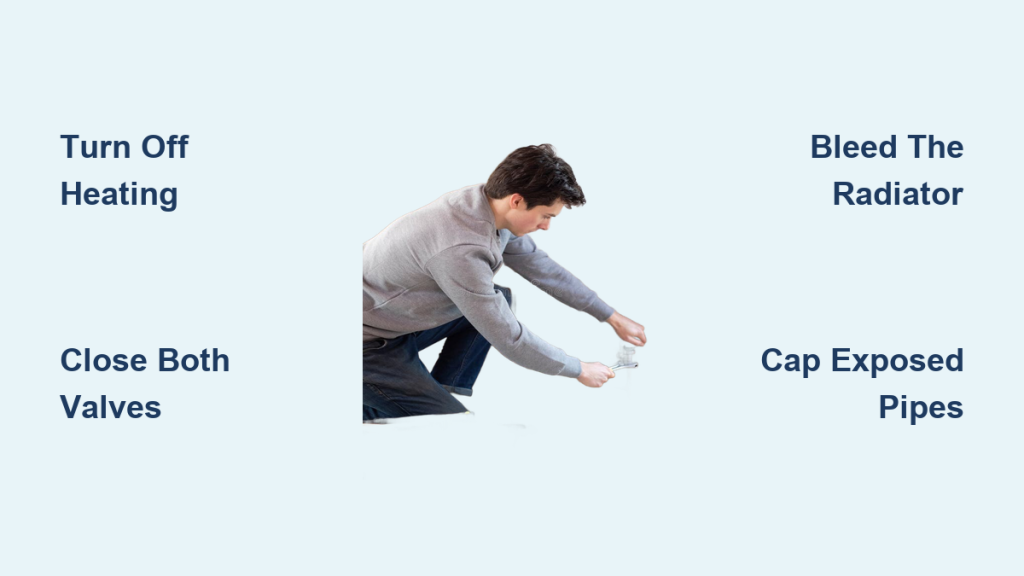
Removing a radiator sounds intimidating, but it’s a manageable DIY project when you follow the right process. Whether you’re repainting a room, replacing an old unit, or upgrading your heating system, knowing how to disconnect a radiator properly saves you money and prevents costly water damage. This guide covers everything from basic valve isolation to permanent pipe capping.
Most homeowners can complete this task in under an hour with basic tools. You’ll learn how to shut off water flow, release pressure safely, lift heavy units without injury, and seal exposed pipes. We’ve also included troubleshooting tips and expert advice for situations where professional help makes more sense.
Gather Your Tools Before Starting
Having the right equipment on hand prevents mid-project scrambles and keeps the process smooth.
Essential Toolkit
- Adjustable spanner or wrench for valve nuts
- Radiator bleed key or flathead screwdriver
- Water pump pliers to hold valves steady
- Drain pan or plastic bowls to catch water
- Old towels or plastic sheeting for floor protection
- Safety gloves and goggles
Optional but Helpful
- Penetrating oil for stubborn valves
- Blanking caps or plugs for sealing pipes
- Rubber bands and plastic bags as temporary caps
- Pipe cutter for permanent removal projects
Lay towels beneath the radiator and place containers directly under both valves before touching anything. This simple step prevents stained carpets and water damage.
Turn Off the Heating and Let It Cool
Working on a hot system risks severe scalds. Always start with a cold radiator.
Switch Off the Boiler
Turn your heating system off completely and wait at least 30 minutes. The radiator should feel cold to the touch before you proceed. Hot water under pressure can spray out suddenly when valves open, causing serious burns.
Why Cooling Matters
Residual heat increases pressure inside the radiator. A cooled unit contains less pressurized water, making disconnection safer and cleaner. Rushing this step is one of the most common DIY mistakes.
Close Both Radiator Valves
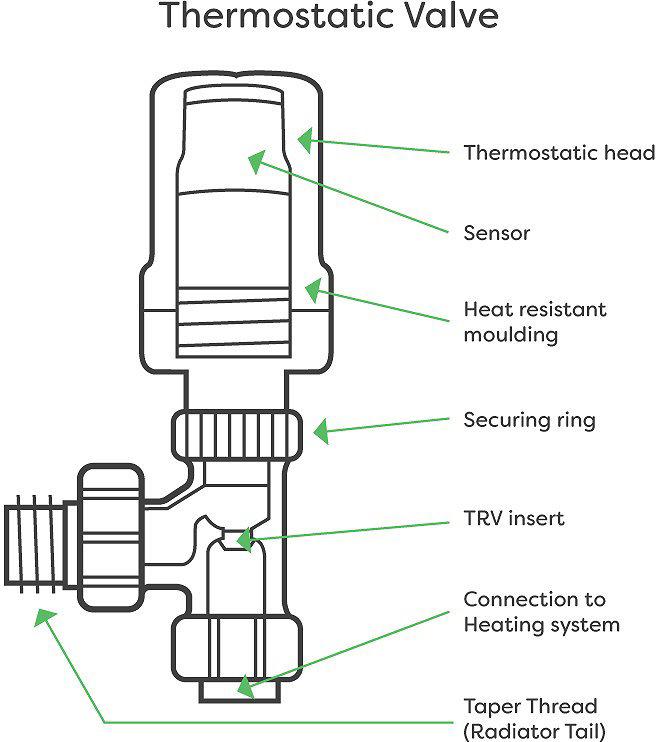
Isolating the radiator from your heating system is the critical first step in learning how to disconnect a radiator without flooding your home.
Identify the Two Valves
Every radiator has two valves at the bottom corners. One is a thermostatic radiator valve (TRV) that controls room temperature. The other is a lockshield valve that balances water flow throughout your system.
Close the TRV
Turn the TRV head clockwise to the “0” position. If it’s a manual valve, simply rotate the handle clockwise until it stops. This stops new water from flowing into the radiator.
Close the Lockshield Valve
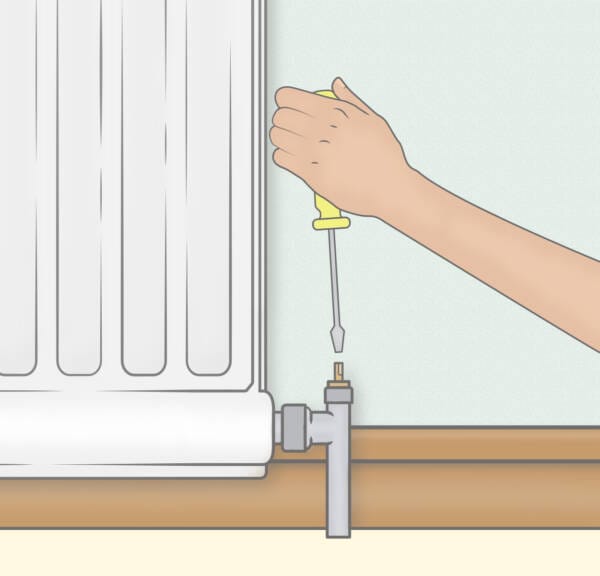
Remove the plastic cap to reveal the metal spindle underneath. Use an adjustable spanner to turn the spindle clockwise until tight.
Pro Tip: Count the exact number of turns it takes to close the lockshield valve. Write this number down. You’ll need it later to restore proper system balance when you reinstall the radiator.
Bleed the Radiator to Release Pressure
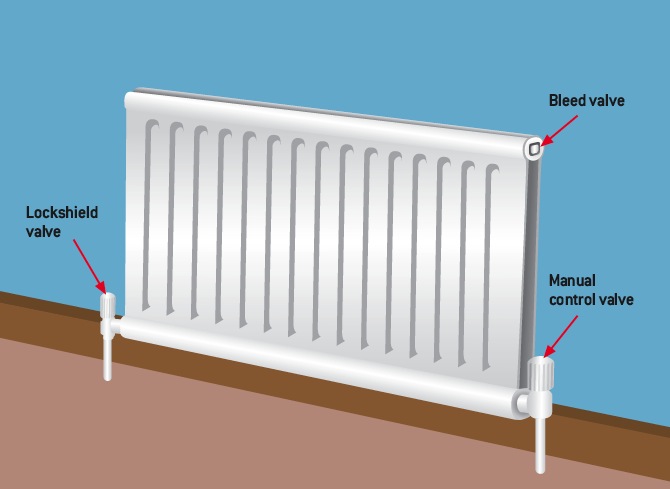
Even with valves closed, trapped air and pressure remain inside the unit. Bleeding releases this safely before disconnection.
Open the Top Bleed Valve
Locate the bleed valve at the top corner of your radiator. Insert your bleed key or flathead screwdriver and turn counter-clockwise.
- Listen for a hissing sound as air escapes
- Hold a cloth or container underneath to catch drips
- Continue until hissing stops and water flows steadily
- Tighten the valve clockwise immediately after
Why This Step Matters
Releasing air creates a vacuum inside the sealed radiator. This vacuum dramatically reduces water spillage when you disconnect the bottom valves. Leaving the bleed valve open risks flooding, so always close it after depressurizing.
Loosen the Valve Nuts Gradually
With pressure released, you’re ready to begin disconnecting the unit from the pipework.
Position Your Spanners Correctly
Place an adjustable spanner on the union nut connecting the radiator to each valve. Use water pump pliers on the valve body to prevent twisting the pipework behind your wall.
Partial Loosening Technique
Turn each nut one full rotation, but don’t remove them completely. You’ll hear a slight “click” as the nut reaches the end of its thread. This partial loosening keeps the radiator stable while breaking the seal.
Visual Cue: The clicking sound indicates the nut is loose but still attached. This controlled approach prevents sudden water bursts or accidental drops.
Lift and Drain the Radiator Safely
Radiators are heavy, especially when full of water. Getting help from a second person protects both you and your flooring.
Unhook from Wall Brackets
Grip the radiator firmly on both sides and lift straight up to clear the brackets. Once free, slowly tilt one end downward over your drain pan.
Drain Trapped Water
Let the dirty, rust-colored water flow from the lowest corner into your container. This sludge is normal in heating systems, but it stains badly, so keep towels handy.
- Angle the radiator so open valve ends stay above water level
- Drain only enough to make the unit manageable for short-term removal
- Empty completely for permanent removal or deep cleaning
Once drained, fully unscrew the nuts and set the radiator aside on old towels or cardboard.
Cap the Exposed Pipes Immediately

Open valves can leak or allow debris into your heating system. Sealing them right away is essential.
Install Blanking Caps
Slide brass blanking caps onto the valve tails and tighten the nuts securely. These caps create a watertight seal that protects your system.
Temporary Solutions
If proper caps aren’t available, wrap plastic bags tightly over the valve ends and secure with rubber bands. Check these improvised seals regularly for drips.
Warning: Never leave pipes open, even briefly. Small leaks can cause major water damage over time, and debris entering your system can damage the boiler.
Handle Permanent Removal Carefully
Taking a radiator out permanently changes your system’s balance and often requires professional expertise.
Re-balance the Remaining System
Removing a unit increases water flow to other radiators, potentially causing uneven heating. Adjust lockshield valves on remaining units to restore balance.
- All radiators should heat evenly
- The farthest radiators should warm first
- Use a thermometer to measure outlet temperatures
Consider Professional Help
Permanent pipe rerouting often falls under Building Regulations in the UK. A Gas Safe registered engineer can certify the work and ensure compliance. This investment prevents legal issues and protects your system’s efficiency.
Vehicle Radiator Disconnection Works Differently
Car radiators involve coolant, electrical components, and engine mounting that require extra precautions.
Prepare the Engine Bay
Park on a flat surface, engage the parking brake, and let the engine cool completely. Disconnect the negative battery terminal to prevent electrical shorts near fan wiring.
Drain the Coolant
Place a pan under the radiator drain plug (petcock) and open it fully. Allow all coolant to drain before proceeding.
- Coolant is toxic to pets and the environment
- Dispose of it at a proper recycling center
- Never pour coolant down household drains
Disconnect Hoses and Wiring
Loosen clamps on upper and lower hoses, then pull them off carefully. Label each hose to ensure correct reinstallation. Unplug fan motors and temperature sensors before removing mounting bolts.
Reinstallation Tip: Refill with manufacturer-recommended coolant only. Run the engine with the heater on maximum to purge air pockets from the system.
Reinstall the Radiator After Decoration

Putting the unit back correctly ensures efficient heating and leak-free operation.
Rehang and Reconnect
- Lift the radiator onto the wall brackets
- Align valve tails with radiator inlets
- Hand-tighten nuts, then use spanners for a snug fit
- Avoid over-tightening, which damages seals
Restore Valve Settings
Reopen the TRV by turning the head to your desired setting. Reopen the lockshield valve using the turn count you recorded earlier. This maintains the original system balance.
Bleed After Refilling
Open one valve slowly to let water enter the radiator. Air will hiss out through the bleed valve at the top. Once water flows steadily from the bleed valve, close it tightly. Then open the second valve fully.
Final Check: Turn on your heating and watch all connections for leaks. The radiator should heat evenly across its entire surface.
Troubleshoot Common Problems
Even careful work sometimes leads to issues. Here’s how to address them quickly.
Leaking Valve Connections
Tighten the union nut slightly and check again. If the leak persists, shut off valves and drain the water. Replace the olive (compression ring) or washer inside the nut.
Cold Spots After Reinstallation
Air trapped inside blocks hot water flow. Bleed the radiator again to release trapped air. If uneven heating continues, your entire system may need rebalancing.
Seized or Stuck Valves
Never force stuck valves, as you risk snapping pipes. Apply penetrating oil to the spindle and wait 15 to 30 minutes. Try turning gently with two spanners: one to hold the valve body, one to turn the nut.
When to Call a Pro: If valves won’t budge after penetrating oil treatment, a plumber has specialized heat guns and extractor tools to remove them safely.
Know When to Hire a Professional
DIY saves money, but some situations demand expert skills.
Typical UK Costs
| Service | Average Cost |
|---|---|
| Radiator removal only | £80 |
| Removal with capping | £100 to £150 |
| Full system flush (6 radiators) | Around £350 |
Hire a Plumber If
- Valves are corroded or completely seized
- You’re removing multiple units at once
- Pipework needs rerouting through walls
- You’re unsure about system balancing
A qualified heating engineer ensures safe, compliant work, especially for permanent changes that affect your entire system.
Follow Essential Safety Practices
Avoid accidents and costly repairs with these critical precautions.
Work Only on Cold Systems
Hot water under pressure causes severe scalds. Always wait until the radiator is cold to touch before starting any work.
Protect Your Home
Lay plastic sheeting or old towels across the work area. Position drain pans directly under valves to catch spills before they reach flooring.
Match Replacement Specifications
If installing a new radiator, measure pipe centers (the distance between valve inlets) and calculate required BTU output for your room size. Mismatched units lead to poor heating or expensive plumbing modifications.
Frequently Asked Questions About Disconnecting a Radiator
Do I need to drain the whole system to remove one radiator?
No. You can isolate a single radiator by closing both valves and bleeding the unit. This method works for temporary removal during decoration without affecting the rest of your heating system.
How much water comes out when disconnecting a radiator?
Expect several liters of dirty, rust-colored water. This is normal and contains sludge that accumulates over time. Have multiple containers and plenty of towels ready.
Can I remove a radiator myself, or should I hire a plumber?
Most homeowners can handle temporary removal for decorating. However, hire a professional for permanent removal, seized valves, or pipe rerouting. Complex jobs require certification and specialized tools.
How long does it take to disconnect a radiator?
The entire process typically takes 30 to 60 minutes for an experienced DIYer. First-timers should allow 90 minutes to work carefully without rushing.
What happens if I don’t cap the pipes after removal?
Uncapped pipes can leak residual water and allow debris into your heating system. This debris can damage your boiler or block other radiators. Always cap pipes immediately after disconnection.
Will removing a radiator affect my heating system’s balance?
Yes, especially for permanent removal. Removing a unit changes water flow dynamics, potentially making other radiators heat unevenly. Rebalance lockshield valves or hire a professional to adjust the system properly.
Key Takeaways for Safely Disconnecting Your Radiator
Learning how to disconnect a radiator empowers you to handle decorating projects, replacements, and maintenance without professional fees. The core process follows five essential steps: isolate the valves, bleed the pressure, loosen the nuts gradually, lift and drain carefully, and cap exposed pipes immediately.
Safety should guide every decision. Work only on cold systems, protect your floors with towels and drain pans, and never force seized valves. Count the turns on your lockshield valve during removal so you can restore proper balance during reinstallation.
For your next step, gather your tools, review the steps above, and set aside a calm afternoon for the project. Start with the valve isolation process and work through each stage methodically. If you encounter seized valves or need permanent pipe modifications, contact a qualified heating engineer to ensure safe, compliant work that protects your home and heating system for years to come.



