
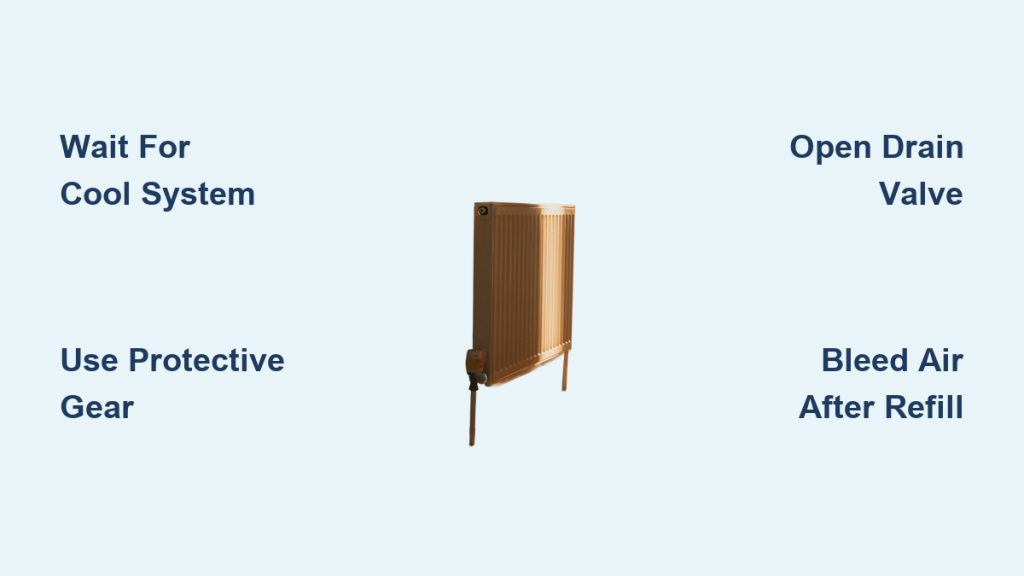
A radiator that won’t heat evenly, gurgles constantly, or leaks from the bottom often needs one simple solution: a proper drain. Whether you’re working on a car engine, an apartment unit, or a whole-house heating system, learning how to drain a radiator correctly protects your equipment and prevents costly repairs. Skipping steps or rushing the job can result in scalding burns, airlocks, or even engine damage.
This guide walks you through every scenario with precise, actionable steps. You’ll discover the right tools for each system, safety protocols that prevent injury, and pro tips that make the process smooth from start to finish.
Prioritize Safety Before Draining Any Radiator
Hot systems under pressure are dangerous. Taking shortcuts here leads to burns, chemical exposure, or environmental harm.
Confirm the System Is Fully Cool
In vehicles, shut off the engine and wait at least one hour. Test by hovering your hand near the radiator cap. If you feel any warmth, wait longer. For home heating, switch off the boiler and let everything cool for several hours. Opening a pressurized, hot system releases scalding steam and boiling coolant.
Wear Proper Protective Gear
Gloves and safety goggles are essential when handling automotive antifreeze, which is toxic to humans and pets. For residential systems, eye protection shields you from sludge and chemical inhibitors that may splash during drainage.
Dispose of Fluids Responsibly
Never pour old coolant down a drain or onto soil. Take it to a certified recycling center. Residential system water containing inhibitors should go into buckets and disposed of properly, away from plants and gardens.
Gather Tools by System Type
Having the right equipment ready prevents interruptions and contamination.
Automotive Radiator Tools
• Drain pan with 2+ gallon capacity
• Radiator flush solution and distilled water
• New antifreeze matching your vehicle’s specifications
• Wrench or socket set for the drain plug
• Garden hose for flushing
Apartment Radiator Tools
• Bucket or large container
• Adjustable spanner
• Screwdriver for the bleed valve
• Towel to catch drips
• Valve key if the bleed valve is non-standard
Whole-House Heating Tools
• Garden hose with Jubilee clip
• Spanner and flat-head screwdriver
• Speedfit draining tap if no drain valve exists
• Central heating inhibitor
• Pliers for lockshield valve caps
Drain and Flush an Automotive Cooling System

Car radiators often need flushing alongside draining to remove rust and sediment.
Remove the Cap Only When Cold
Press down on the cap and turn counterclockwise. If you feel resistance or detect steam, stop immediately. The system is still pressurized and dangerous.
Open the Drain Plug
Position a drain pan under the radiator’s drain plug, typically located at the bottom. Loosen the plug with a wrench and let coolant flow out completely. Hand-tighten the plug once drainage stops.
Pro Tip: Stuck plugs benefit from penetrating oil and a 10-minute wait. Never force them, as stripped threads cause persistent leaks.
Flush Out Built-Up Sediment
Simple drainage won’t remove sludge. For a thorough flush:
- Fill the radiator with distilled water and flush solution.
- Replace the cap and run the engine for 10 minutes with the heater on maximum.
- Turn off the engine and let it cool completely.
- Drain the system again to remove loosened debris.
Repeat if the water appears discolored.
Clean the Engine Block
Disconnect the lower radiator hose and flush water through from the top opening. This step matters most if the engine has overheated previously.
Refill with the Correct Coolant Mix
Use a 50/50 antifreeze and distilled water blend unless your manual specifies otherwise. Tap water introduces minerals that cause buildup. While refilling, open bleeder screws until coolant flows out to prevent air pockets.
Drain a Single Apartment Radiator
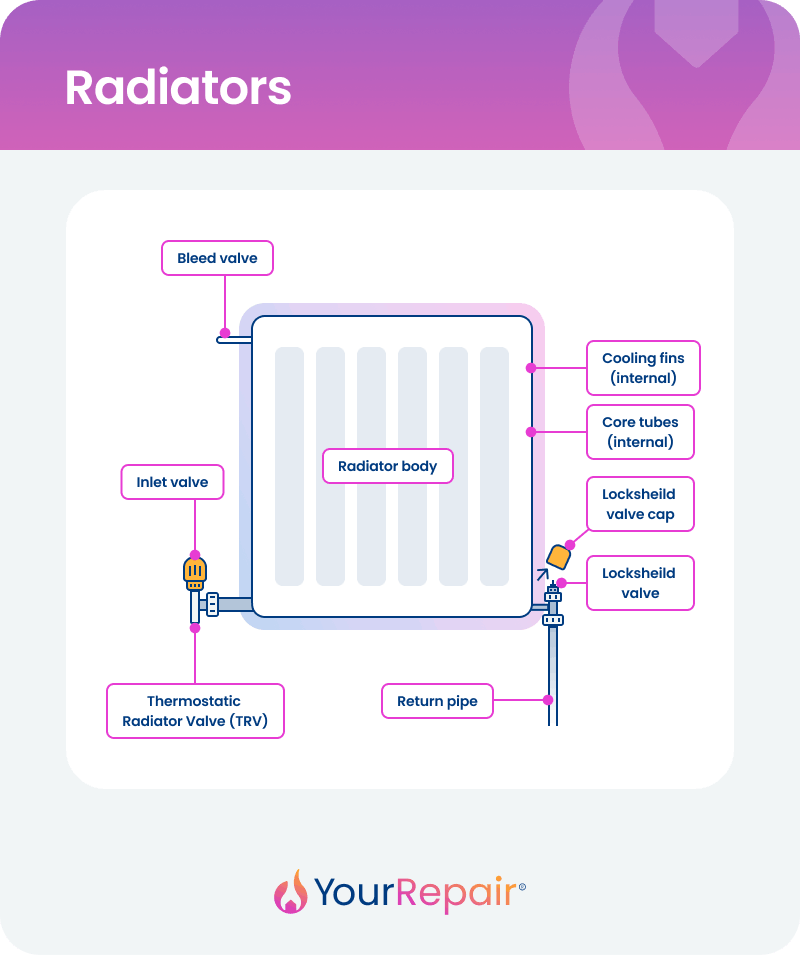
This method works for removing water from one unit in a rental or apartment building.
Shut Off the System and Wait
Turn off the boiler or thermostat. Test the radiator surface before proceeding. Never assume it’s safe based on time alone.
Position Your Bucket
The drain valve sits at the bottom of the radiator as a small brass or plastic screw. Place a bucket directly underneath and wrap the base with a towel.
Open the Valve and Drain
Turn the valve counterclockwise with a spanner. Water flows slowly at first, then steadily. Let it drain completely.
Troubleshooting Tip: No water flowing means the system is likely air-locked. Open the bleed valve at the top with a screwdriver. Hissing indicates air escaping. Once water drips, close the bleed valve and drainage should resume.
Close the Valve and Restart
Turn the drain valve clockwise until tight. Restart the boiler and let the system refill automatically. Check for leaks and bleed the radiator if you hear gurgling.
Drain All Radiators in a Whole-House System
Full drainage is necessary for major repairs, sludge removal, or replacing multiple units.
Scenario A: System With a Drain-Off Valve
Most homes feature a drain-off valve on a downstairs radiator.
- Turn off the boiler and close the water supply (combi boilers require closing the isolation valve).
- Attach a garden hose to the valve using a Jubilee clip.
- Run the hose to a drain or bucket away from vegetation.
- Open all radiator valves to allow air entry.
- Open the drain-off valve to start flow.
Speed Up Drainage: Open bleed valves on upstairs radiators first. Air entering the system helps gravity pull water down faster.
- Wait 15–30 minutes until flow stops.
- Close the drain valve, remove the hose, and tighten all bleed valves.
Scenario B: System Without a Drain-Off Valve
A Speedfit draining tap provides access when no central drain exists.
- Isolate the radiator by closing both the TRV and lockshield valves.
- Bleed all radiators to release pressure.
- Attach the Speedfit tap to the radiator valve after measuring pipe diameter.
- Connect a hose and drain into a bucket or outside.
This method takes longer but works when alternatives aren’t available.
Refill and Add Inhibitor
After drainage, close all valves and add central heating inhibitor to prevent sludge, corrosion, and limescale. Open the water supply and monitor the pressure gauge (target: 1.0–1.5 bar). Bleed all radiators starting from the top floor and inspect for leaks.
Expert Note: Skipping inhibitor shortens system life dramatically. This small investment prevents expensive failures within a few years.
How Long Does the Process Take?
| System | Active Time | Total Time Including Cooling |
|---|---|---|
| Car Radiator | 30–45 min | 1.5–2 hours |
| Apartment Unit | 10–20 min | 1–2 hours |
| Whole House (with valve) | 20–40 min | 3–5 hours |
| Whole House (no valve) | 60+ min | 4–6 hours |
Cooling time is non-negotiable. Rushing it risks serious injury.
How Often Should You Drain a Radiator?

Cars: Every 2–5 Years
Follow your manufacturer’s guidelines. Older vehicles or those in extreme climates benefit from more frequent flushing.
Home Heating: Once Annually
Annual drainage combined with power flushing every 5 years prevents sludge accumulation. Hard water areas or systems prone to airlocks need extra attention.
Warning: Ignoring sludge leads to cold spots, pump strain, and premature boiler failure.
Troubleshoot Common Drain Issues
No Water from the Drain Valve
The system is likely air-locked. Open the bleed valve at the top to let air in and restore flow.
Gurgling After Refill
Trapped air causes this noise. Bleed radiators from the top floor downward.
Uneven Heating
Sludge or air is the usual culprit. Perform a partial drain and flush, or schedule a professional power flush.
Leak at the Drain Valve
A loose valve or worn seal is the cause. Tighten gently. If leaking continues, replace the valve.
Pro Tips for Long-Term Success
Use Distilled Water in Vehicles
Tap water contains minerals that form deposits. Always mix antifreeze with distilled water for automotive systems.
Label Your Radiator Valves
In apartments or complex systems, marking TRV and lockshield valves prevents confusion during future maintenance.
Keep a Drain Kit Ready
Store a bucket, hose, spanner, and inhibitor together for emergency situations.
Know When to Call a Professional
Persistent airlocks, pump failure, major leaks, or no pressure after refill require expert help. DIY attempts can worsen these problems.
Final Checks Before Restarting
Before turning any system back on, verify these conditions:
• All drain and bleed valves are tight
• Coolant or water levels are correct
• No tools or rags remain near the engine or boiler
• Pressure reads within the safe range (1.0–1.5 bar for homes)
• Inhibitor has been added to residential systems
Run the system and inspect for leaks. Touch each radiator to confirm even heat distribution.
Frequently Asked Questions About Draining a Radiator
Can You Drain a Radiator Without Turning Off the Boiler?
No. Always shut off the boiler or engine and wait for complete cooling. Draining a hot, pressurized system causes scalding injuries and component damage.
What Happens If Air Gets Trapped After Refilling?
Trapped air causes gurgling noises, cold spots, and overheating. Bleed each radiator from top to bottom until water flows steadily from the valve.
Is Draining a Radiator the Same as Bleeding It?
No. Bleeding releases trapped air from a single radiator. Draining removes coolant or water entirely for maintenance, repairs, or system replacement.
Can I Use Tap Water Instead of Distilled Water?
Avoid tap water in automotive systems. Minerals cause deposits that reduce cooling efficiency. Distilled water is the safe choice for mixing antifreeze.
How Do I Know If My System Needs Flushing?
Dark or brown water during drainage signals sludge buildup. Cold spots on radiators and frequent airlocks also indicate flushing is overdue.
Should Tenants Drain Radiators in Apartments?
Consult your landlord first. Improper drainage can damage building-wide systems. Many leases require professional handling for heating maintenance.
Key Takeaways for Successfully Draining Any Radiator
Learning how to drain a radiator properly protects your investment and extends system life. Always prioritize safety by waiting for complete cooling and wearing protective gear. Match your tools to the system type, follow the correct sequence for draining and flushing, and never skip the inhibitor in residential systems.
Your next step is choosing the scenario that matches your setup and gathering the necessary tools before starting. With patience and attention to detail, you’ll complete the job safely and restore optimal performance to your radiator system.



