
Cold spots at the bottom of your radiators? Slow heating, noisy boilers, or dirty water when bleeding? These are clear signs of radiator sludge, a corrosive mix of rust and debris that clogs your central heating system. Left unchecked, sludge reduces efficiency, increases energy bills, and can even lead to boiler failure. The good news is that you can often fix it yourself with basic tools and a methodical approach.
This guide walks you through how to clean radiator sludge step by step, from diagnosis to prevention. Whether you are dealing with one stubborn radiator or recurring system-wide issues, you will learn how to flush sludge effectively, restore heat, and protect your system long-term without calling a plumber unless absolutely necessary.
Spot Radiator Sludge Early

Check for Cold Bottoms
If the top of your radiator heats up but the bottom stays cold, sludge is likely settling at the base. Iron oxide and dirt particles sink in the water flow, blocking circulation in lower sections. The thicker the buildup, the larger the cold zone, sometimes covering 20 to 30% of the unit.
Bleed and Inspect Water
Open the bleed valve with a radiator key and let water escape into a cloth or container. Clear water means a clean system. If the liquid is brown, black, or leaves gritty residue, you are expelling sludge. This visual test confirms contamination and signals it is time to act.
Listen for Noisy Boiler
A gurgling or knocking boiler often points to restricted water flow caused by sludge. When debris circulates or blocks narrow pipes, it forces the pump to work harder, creating noise and reducing efficiency. Combine this with cold radiators, and sludge is the likely culprit.
Know What Sludge Is Made Of
Iron Oxide and Dirt Mix
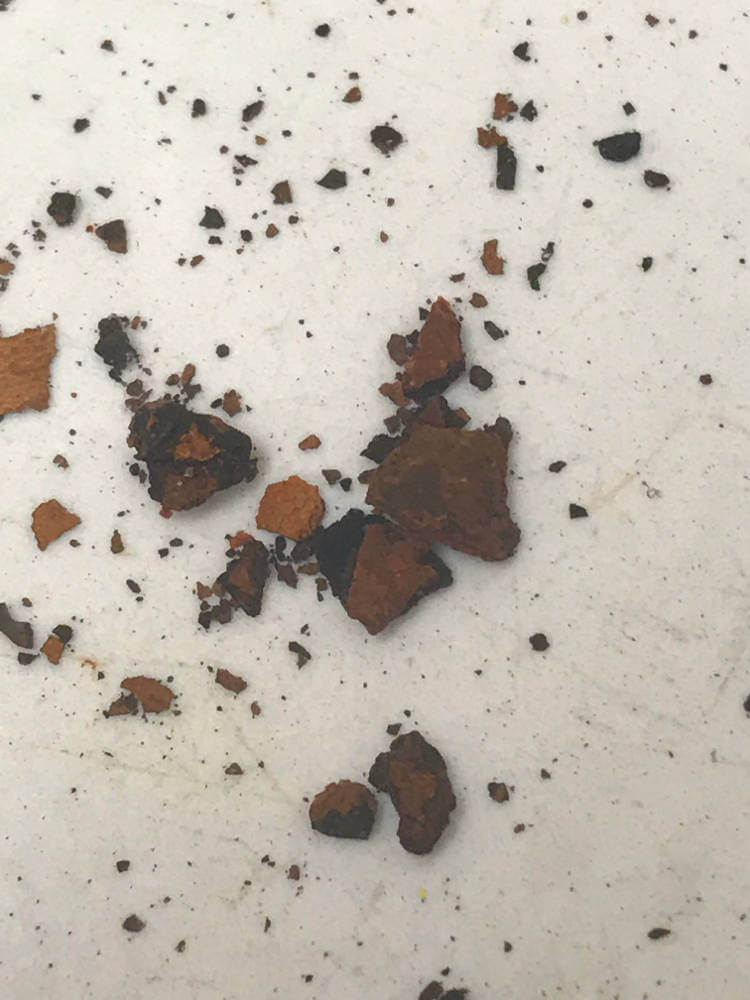
Radiator sludge is not just dirt. It is a sticky blend of rust (iron oxide) and debris from corroded internal parts. Over time, metal surfaces in radiators, pipes, and boilers degrade, releasing particles into the water. Older systems with soldered joints are especially prone to this issue.
How It Forms Over Time
As water circulates, oxygen triggers corrosion. Rust flakes break loose and mix with dirt, forming a slurry. Due to gravity and low flow at radiator bottoms, this mixture settles and thickens. Eventually, it hardens into a blockage that stops water from moving freely.
Why It Hurts System Performance
Sludge restricts water flow, so radiators heat unevenly. The boiler compensates by running longer, increasing wear and energy use. In severe cases, sludge can block pipes or damage the pump and heat exchanger, leading to costly repairs.
Gather the Right Tools
Essential Equipment List
You need just a few tools:
– Two adjustable wrenches (to loosen valves without twisting pipes)
– Radiator bleed key (for releasing air and testing water)
– Bucket (to catch dirty water)
– Garden hose (for high-pressure flushing)
– Old towels or sheets (to protect floors from stains)
Ensure all tools are clean and in good condition. Rust-stained water can damage wood or carpet, so floor protection is non-negotiable.
Safety First: Cool System Only
Never work on a hot radiator. Turn off the heating and wait at least one hour for the system to cool completely. Test the radiator by touch. Only proceed when it feels cool. Opening a hot system risks scalding from pressurized steam or water.
Flush a Radiator Step by Step
Shut Down and Isolate
Turn off the central heating. Locate the thermostatic radiator valve (TRV) on one side and turn it to “0” to cut water supply. This isolates the radiator without shutting down the whole system.
Drain Water Safely
Place a bucket under the TRV. Use one wrench to hold the valve body and another to loosen the nut connecting the radiator. Open the bleed valve at the top with your key. This lets air in and helps water drain out. Let all liquid flow into the bucket.
Empty the Other Side
Once drainage slows, repeat the process on the lockshield valve on the opposite side. Loosen the nut while supporting the valve body. Tilt the radiator slightly toward the open valves to dump residual sludge and water.
Remove and Flush Outside
Lift the radiator off its brackets and carry it outside. Position it so one inlet faces the garden hose and the other points to a drain. Insert the hose into one port and turn on the water. Flush until the outflow runs completely clear. This may take several minutes.
Reverse Flush for Full Clean
Switch the hose to the opposite inlet and flush again. This bidirectional rinse ensures no sludge remains trapped in internal columns or corners. Let the radiator drain fully before bringing it back inside.
Reinstall and Rebalance
Reconnect Without Leaks
Mount the radiator back on its brackets. Reattach both valve connections, tightening the nuts securely but without over-torquing. If possible, match the lockshield valve’s original setting, such as the number of turns open, to maintain system balance.
Bleed Air After Refill
Open the bleed valve at the top. Water will spurt out as air escapes. Once a steady stream flows, close the valve tightly. This step prevents airlocks that cause cold spots or noise.
Restore Heat and Test
Open both valves fully. Turn the heating back on and let the system run. Check for leaks at the connections and confirm the radiator heats evenly from top to bottom.
When to Power Flush the System

Signs Manual Flush Is Not Enough
If radiators stay cold after cleaning, or if multiple units are affected, sludge may be deep in the pipework. Recurring sludge, persistent boiler noise, or dirty bleed water across several radiators means a whole-system clean is needed.
What Power Flushing Does
A professional power flush uses a high-pressure machine to circulate cleaning chemicals and fast-flowing water through all radiators



