
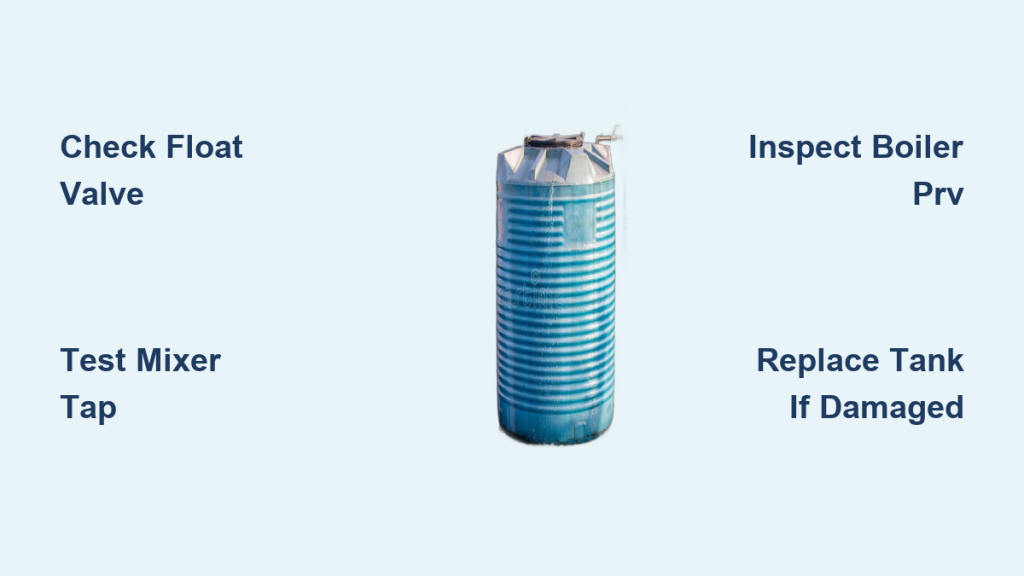
You wake up to a dripping sound from the ceiling or notice a puddle near an external pipe. A water tank overflow leaking is not just annoying. It is a serious warning sign that demands immediate attention.
Left unchecked, this issue wastes hundreds of gallons and damages ceilings. It can rot floorboards or even lead to dangerous mold growth. The good news is that most causes are fixable with simple repairs.
This guide shows you how to quickly identify and stop overflow leaks. You will learn to fix toilets, cold water tanks, and heating systems safely.
Whether you hear a constant drip from the loft or see water trickling down a wall, the root cause is usually specific. It is often a faulty float valve, backflow from a mixer tap, or a boiler problem.
We will walk you through each scenario step by step. You will learn how to stop the leak fast and avoid costly damage to your home.
Identify the Overflow Source Location
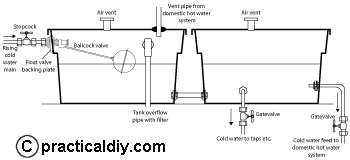
Before grabbing tools, you must pinpoint where the leak originates. The location of the overflow pipe tells you exactly which system is failing.
Check External Pipe Position
The position of the pipe offers the first major clue about the source.
* Pipe near ground floor wall? This likely comes from a toilet cistern.
* Drip from roof eaves or loft vent? This points to a cold water storage tank or central heating expansion tank.
* Leak from boiler unit? This could be pressure relief valve discharge.
Use binoculars or a phone camera to trace the drip without climbing. Most home overflow pipes are 22mm plastic and run vertically from the tank to outside.
Locate the Tank in the Loft
If the leak is from above, head to the loft safely. Look for a large rectangular plastic tank for cold water storage.
You might also see a smaller square tank for feed and expansion. Check for water near the overflow pipe inlet. This indicates overfilling.
Shine a flashlight inside the tank. A white limescale ring on the tank wall marks the normal maximum water level. If water is at or above this line, the system is overfilling.
Confirm It Is Not a Sink Overflow
Sinks and baths have internal overflows that drain into the waste pipe. They do not discharge outside.
If water spills into the basin when the tap runs, it is a blocked drain. External leaks always come from storage tanks or boilers.
Diagnose Faulty Float Valve Mechanism

The most common cause of water tank overflow leaking is a failed float valve. This valve controls water entry and should shut off when the tank is full.
Test the Float Mechanism
Lift the float ball gently by hand. If water stops flowing, the valve works mechanically but may not close automatically.
If water continues, the valve is stuck or the washer is worn. Watch the tank fill to observe the shut-off point.
Water should stop one inch below the overflow pipe. If it keeps rising, the valve is not sealing properly.
Inspect the Float Ball Condition
Remove the float ball and shake it near your ear. If you hear water inside, it is punctured and sinking instead of floating.
Replace it immediately to stop the leak. For older metal floats, check for corrosion or dents that hinder movement.
Plastic floats rarely fail unless they are cracked. A sinking float cannot trigger the shut-off mechanism.
Examine the Valve Seat and Washer
Turn off the water supply before inspecting internal parts. Drain the tank below the valve level to work safely.
Unscrew the valve body and inspect the rubber washer closely. Look for these specific issues:
* Cracked, swollen, or perished: Replace the washer immediately.
* Covered in limescale: Clean it with vinegar to restore function.
Even if the washer looks okay, age weakens its seal. Many plumbers recommend replacing the entire valve since they are inexpensive.
Replace or Adjust the Ball Valve
Fixing a faulty float valve stops most overflow leaks. You can often do this yourself with basic tools.
Adjust Float Height Settings
If the valve works but shuts off too late, adjust the float height. For a metal arm, bend it gently downward with pliers.
For a plastic arm, turn the adjustment screw clockwise to lower the float. This reduces the water volume before shut-off.
Refill the tank and verify water stops below the overflow. Small adjustments make a big difference.
Install a New Ball Valve
Follow these steps to replace a broken valve:
1. Shut off main water supply at the stopcock.
2. Drain the tank by opening a tap downstairs.
3. Unscrew the old valve from the inlet pipe carefully.
4. Take it to a hardware store to match the thread size and arm length.
5. Fit the new valve and hand-tighten, then use a wrench for a quarter-turn more.
6. Turn water back on slowly to avoid shock to the system.
Pro Tip: Wrap thread tape around the inlet connection to prevent leaks.
After installation, test the float again. Water must stop exactly one inch below the overflow pipe.
Detect Mixer Tap Cross-Flow Issues

If the float valve works but the tank still overfills, the culprit may be cross-flow from a mixer tap.
Understand the Cross-Flow Problem
Mixer taps blend hot and cold water. If the internal seal fails, high-pressure mains cold water forces its way into the low-pressure hot water system.
This pushes water back into the cold storage tank. It happens even when the tank float valve is shut.
The tank overflows despite no direct inlet flow from the main supply. This is a tricky issue to diagnose without testing.
Test for Backflow Presence
Perform this simple test to confirm cross-flow:
1. Turn off the cold water supply to the house.
2. Open a hot tap. If cold water still flows, there is cross-flow from a mixer tap.
3. Turn cold water back on. Monitor the cold tank while running a shower.
If the water level rises during use, the mixer is faulty. The high pressure is forcing water backward.
Fix Faulty Mixer Taps
Isolate the tap and disassemble the cartridge to inspect it. Look for cracked seals or mineral buildup inside.
Replace the cartridge or the entire tap if damaged. This repair requires plumbing skill.
Warning: Call a licensed plumber if you are unsure. This is especially true for thermostatic mixer showers.
Inspect Heating System Issues
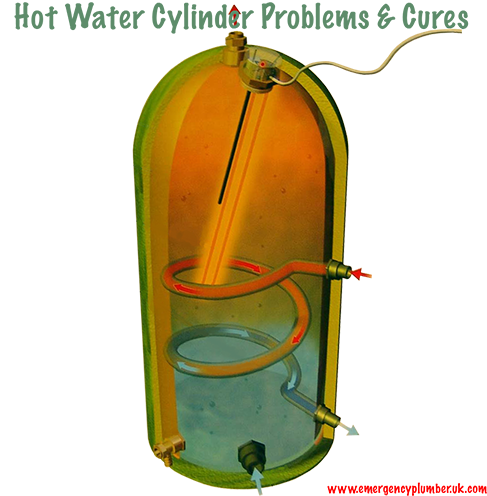
If the overflow comes from the central heating expansion tank, the problem may be in your boiler or cylinder.
Check Thermostat Settings
A thermostat set too high causes water to expand beyond the tank capacity. This leads to occasional dripping during heating cycles.
Small amounts of dripping during heating are normal. However, continuous flow indicates a deeper problem.
If the overflow runs constantly, it is not just expansion. You need to investigate further.
Diagnose Perforated Cylinder Coil
Inside the hot water cylinder, a copper coil carries boiler-heated water. If it develops a hole, heating water leaks into the domestic hot water system.
This extra volume flows back into the feed and expansion tank. It overfills the tank and triggers the overflow.
Signs include:
* Overflow leaks only when heating is on.
* Hot water feels weaker than usual.
* Water in the expansion tank is warm.
Solution: The cylinder must be replaced. This is a job for a qualified plumber. Do not attempt DIY.
Handle Boiler Pressure Leaks

For combi boilers, an overflow pipe leak usually means the pressure relief valve has activated.
Recognize the Danger Signs
A leaking PRV indicates a failed expansion vessel or an over-pressurized system. Pressure above 3 bar is dangerous.
It could also mean the valve is stuck or worn. Do not ignore this warning sign.
A failed expansion vessel can cause boiler damage. In extreme cases, it could lead to an explosion.
Immediate Actions Required
Take these steps immediately if your boiler PRV leaks:
1. Turn off the boiler completely.
2. Do not repressurize the system under any circumstances.
3. Call a Gas Safe registered engineer immediately.
Never attempt to repair or replace a PRV yourself. Gas and high-pressure systems require certified professionals.
Repair or Replace Damaged Tanks
Sometimes the tank itself is the problem rather than the valves. Structural damage causes leaks too.
Seal Minor Cracks Temporarily
For small cracks in plastic tanks, you can apply a temporary fix:
1. Drain and dry the tank completely.
2. Clean the area with rubbing alcohol.
3. Apply waterproof epoxy resin or tank sealant.
4. Let cure for 24 hours before refilling.
This is a temporary fix only. Monitor the area closely for new leaks.
Replace a Rotten or Cracked Tank
Old tanks can split at seams or develop pinholes over time. Replace the tank if the base is bulging or multiple cracks appear.
Tanks over 15 years old are prime candidates for replacement. Modern tanks are lightweight and easy to install.
Cut the old one out and fit the new one. Reconnect the inlet and overflow pipes securely.
Ensure the overflow pipe is one inch above the water shut-off level.
Fix Overflow Pipe Problems
Even with a working tank, a faulty overflow pipe can cause leaks. Check the pipe condition regularly.
Check Pipe Height and Alignment
The overflow pipe should start at least one inch above the normal water level. If it is too low, water spills out prematurely.
Adjust the tank float valve to lower the water level. Alternatively, reposition the overflow pipe to the correct height.
Secure Loose or Damaged Pipes
Overflow pipes must be fixed with brackets every meter. They need a downward slope to ensure drainage.
Terminate the pipe with a drip loop outside to prevent rain entry. Replace cracked or UV-damaged pipes with UV-stable plastic.
Never cap an overflow pipe. It is a safety device. Blocking it risks flooding your home.
Prevent Future Overflow Leaks
A one-time fix is not enough. Prevent recurrence with regular maintenance routines.
Schedule Routine Inspections
Check your system every three to six months. Perform these specific checks:
* Water level in tanks.
* Float movement by lifting it to test response.
* Overflow pipe for blockages like leaves or ice.
* Limescale buildup on valves.
Do this in the early morning when water demand is low. Overfilling is most obvious at this time.
Upgrade to Reliable Components
Install diaphragm-type ball valves. They last longer than traditional float-arm types.
Fit a water level alarm in the loft to alert you to overfilling. Consider removing cold water tanks by switching to a combi boiler.
This eliminates overflow risks entirely. It is a major upgrade but very effective.
Monitor Water Pressure
High mains pressure can prevent float valves from closing. Fit a pressure-reducing valve at the stopcock if needed.
Use a pressure gauge to test your system. These cost under £10 and provide peace of mind.
When to Call a Plumber
Some issues demand professional help. Do not risk personal injury or further damage.
Call Immediately If:
- Boiler PRV is leaking.
- Heating tank overflows continuously.
- Cross-flow persists after tap replacement.
- Tank is structurally damaged and hard to access.
- You are unsure how to isolate water or gas.
A licensed plumber can diagnose complex backflow. They can replace cylinders and ensure gas safety.
Final Leak-Check Protocol
After any repair, verify the fix thoroughly. Follow this protocol to ensure success.
- Turn water supply back on slowly.
- Watch the tank fill. Water should stop one inch below overflow.
- Lift the float. Flow must stop instantly.
- Wait 30 minutes. No drip should appear.
- Check joints and pipes for seepage.
If the overflow remains dry, the repair succeeded. You have successfully fixed the water tank overflow leaking.
Frequently Asked Questions About Water Tank Overflow Leaking
Why is water dripping from my overflow pipe early in the morning?
This often happens when water demand is low. The tank fills up without draw-off, causing the float valve to fail and trigger the overflow.
Can a mixer tap cause my cold water tank to overflow?
Yes. A faulty seal in a mixer tap allows high-pressure mains water to force its way back into the low-pressure tank, causing it to overfill.
How do I know if my heating cylinder coil is perforated?
If the expansion tank overflows only when the heating is on and the water feels warm, the coil is likely leaking heating water into the domestic system.
Is it safe to cap a leaking overflow pipe temporarily?
No. Never cap an overflow pipe. It is a critical safety device. Blocking it can cause the tank to burst or flood your home.
How much does it cost to replace a float valve?
A replacement float valve is very inexpensive, often costing under £10. Professional labor costs will vary if you hire a plumber.
What should I do if my boiler pressure relief valve is leaking?
Turn off the boiler immediately and do not repressurize the system. Call a Gas Safe registered engineer right away.
Key Takeaways for Fixing Water Tank Overflow Leaking
A water tank overflow leaking is a preventable problem. Most fixes take under an hour and cost less than £20 in parts.
Understanding float valves and spotting cross-flow protects your home. Knowing when to call a pro keeps your plumbing running safely.
Start with the float valve since it is the culprit most of the time. Fix it today to stop the drip for good.



