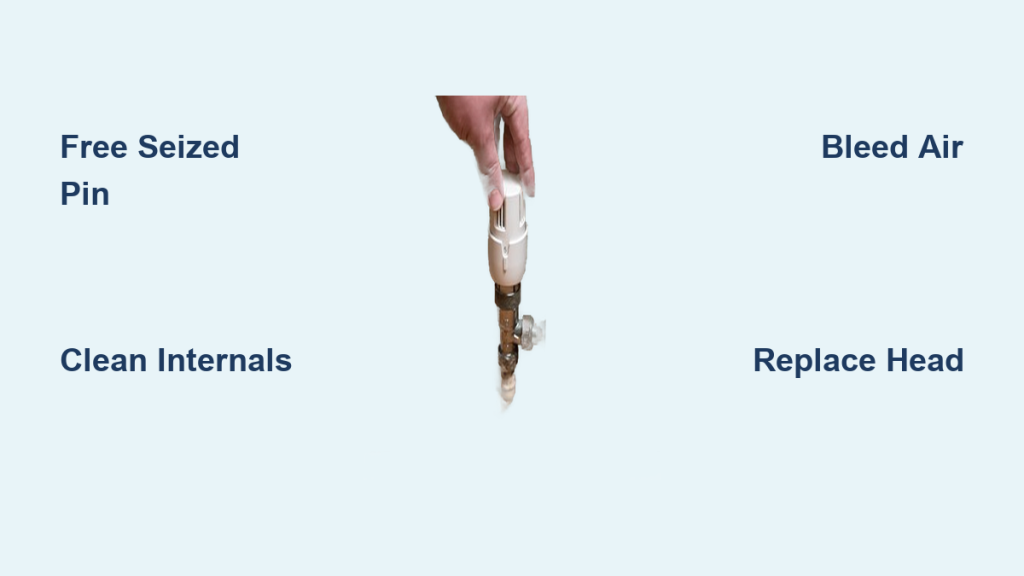
One room freezing while others overheat is a classic sign of a failing thermostatic radiator valve. These small devices control how much hot water enters each radiator, keeping your home comfortable and your energy bills in check. When a TRV malfunctions, especially after summer inactivity, it can leave you with a cold room or an overheated space.
The good news: most thermostatic radiator valve repairs take under 20 minutes and need only basic tools. This guide walks you through every step, from freeing a seized pin to replacing damaged components. You will learn how to restore heat, prevent future failures, and decide when a professional is needed.
Diagnose TRV Failure Symptoms
Before reaching for tools, confirm the problem lies with the TRV and not another part of your heating system. Quick symptom checks save time and prevent unnecessary disassembly.
Check Radiator Heat Response
Turn on your central heating and let it run for 15 to 20 minutes. Then assess each radiator:
- Cold radiator, TRV set high: Likely a stuck-closed valve.
- Hot radiator, TRV set low or off: Suggests a stuck-open valve.
- Only top half heats: Could indicate an air lock.
- Hissing or clicking noises: May point to incorrect flow direction or internal blockage.
If only one radiator is affected, the issue is likely isolated to its TRV. If multiple radiators fail, check boiler pressure or system-wide issues like pump failure.
Test Pin Movement Manually
Remove the thermostatic head by loosening the nut underneath, usually by hand or with a light turn of a spanner. Once removed, expose the metal pin inside the valve body.
Gently press down on the pin with your finger or pliers. It should:
- Move smoothly up and down.
- Spring back when pressed.
- Show no resistance or grinding.
No movement means the pin is seized, which is common after summer inactivity. If the pin moves freely but the radiator stays cold, air or a closed lockshield valve may be blocking flow. If the pin moves but the radiator stays hot, debris may prevent closure or the thermostatic head is faulty.
Free a Seized Valve Pin

A stuck pin is the most common TRV failure. After months of inactivity, the pin can bond to the seat, blocking hot water flow. Freeing it requires gentle mechanical action and lubrication.
Loosen the Lockshield Valve
Locate the opposite end of the radiator, the side without the TRV. That is the lockshield valve, which controls water return.
Use adjustable pliers to turn it one full turn anticlockwise. This ensures unrestricted flow during repair. Do not remove it, just open it slightly.
Remove and Exercise the TRV Head
With the heating off, unscrew the thermostatic head from the valve body. Set it aside carefully.
Expose the central pin. Using pliers or grips, gently grasp the top of the pin.
Push it down firmly and release. Repeat 5 to 10 times.
The goal is to break any corrosion seal or sediment bond. Do not force it. If it will not budge, apply lubricant.
Apply Lubricant and Recheck
Spray a small amount of WD40 directly onto the pin mechanism. Work it up and down again to draw the lubricant into the stem.
Wait 2 to 3 minutes, then repeat the motion. The pin should now move smoothly.
Wipe excess oil to prevent dust buildup.
Reattach the TRV head and tighten the nut. Turn the dial to maximum and restart the heating. Monitor for heat within 10 to 15 minutes.
✅ Pro Tip: If the radiator heats but will not turn off, the issue is not the pin. It is likely debris or a failed head. Move to cleaning or replacement.
Clean Internal Valve Components

When pin manipulation fails, internal debris like sludge, rust, or limescale may be blocking the valve. Deep cleaning restores flow but requires partial disassembly.
Shut Down and Isolate the Radiator
Turn off the central heating and wait for the radiator to cool completely.
Close both valves:
- TRV side: Turn the dial to “0” or close manually.
- Lockshield side: Turn clockwise until tight.
Place a bowl and towels beneath the TRV to catch drips.
Disassemble the Valve Body
Use a wrench to unscrew the entire TRV body from the radiator tail, the threaded pipe stub.
Once removed, unscrew the top cap from the valve body. Carefully extract the internal plunger and seat.
Inspect for:
- Corrosion on the pin or bore
- Sludge buildup around the seal
- Cracked or warped washers
Descale and Rinse Thoroughly
Soak metal parts in a 50/50 mix of white vinegar and warm water for 30 to 60 minutes. This dissolves limescale and mineral deposits.
Scrub gently with a soft brush. Avoid steel wool, which can scratch sealing surfaces.
Rinse all components with clean water. Dry with a lint-free cloth.
Reassemble the valve, ensuring all threads are clean and tight.
Reattach to the radiator. Open both valves slowly and check for leaks.
Restart heating and test performance.
⚠️ Warning: If the valve body is cracked or the pin is bent, replacement is safer than repair.
Bleed Air from the System
Even with a working TRV, trapped air can block water flow, leaving the radiator cold at the top. Bleeding removes air and restores circulation.
Locate and Open the Bleed Valve
Find the bleed valve, a small square nipple, on one of the radiator’s top corners.
Insert a radiator bleed key and turn it counterclockwise about 1/4 turn.
You will hear a hiss as air escapes.
Keep the key in place until water starts to drip out.
Close the valve tightly by turning clockwise.
Recheck System Pressure
Bleeding lowers boiler pressure. Check the pressure gauge on your boiler.
If below 1.0 bar, repressurize using the filling loop, usually under the boiler.
Open both ends of the loop until pressure reaches 1.5 bar. Then close both valves.
Restart heating and verify full radiator warmth.
🔍 Visual Cue: A cold top and warm bottom equals a classic air lock sign.
Replace the Thermostatic Head
If the pin moves freely but the radiator ignores temperature changes, the thermostatic head is likely faulty.
Remove the Old Head
Unscrew the head from the valve body by hand or with a spanner. No system drain is needed.
Set aside the old unit.
Install a Compatible Replacement
Match the new head to your valve model. Most brands including Honeywell, Danfoss, and Drayton offer cross-compatible heads.
Screw the new head onto the valve body by hand. Tighten gently with a spanner if needed. Over-tightening damages seals.
Ensure the dial turns smoothly and clicks between settings.
Set to maximum and wait 15 minutes for heat response.
Test by lowering the setting once the room warms. The radiator should cool down within 20 to 30 minutes.
✅ Smart Option: Consider upgrading to a smart TRV head for app control and scheduling.
Replace the Entire TRV Unit

When the valve body is corroded, the pin is broken, or cleaning fails, full replacement is necessary.
Drain the Heating System Section
Turn off the boiler and let it cool.
Close the main water feed.
Open a downstairs radiator bleed valve to allow air in.
Close both valves on the faulty radiator.
Attach a hose to the drain valve if present, or use buckets.
Open both radiator valves briefly to drain water.
Once empty, proceed with removal.
Install the New TRV
Unscrew the old valve body from the radiator tail and pipe.
Wrap the threads of the new valve with PTFE tape.
Screw it into place. Start with the radiator side, then the pipe side. Hand-tighten, then give a 1/4 turn with a wrench.
Ensure the flow arrow, if present, points toward the radiator.
Reconnect both valves, open them slowly, and check for leaks.
Refill the system, bleed all radiators, and repressurize.
Test operation.
⚠️ Gas Safe Note: In the UK, gas boiler work requires a registered engineer. Replacing a TRV is generally safe DIY unless it involves gas components.
Prevent Future TRV Failures
Avoid annual cold snaps by adopting simple seasonal habits that keep TRVs responsive and debris-free.
Prepare for Summer Downtime
Before turning off heating in spring:
- Turn all TRVs to maximum.
- This keeps pins extended, preventing them from sticking in the closed position.
Leave them open until the next heating season.
Service Before Winter Start
Before autumn heating restart:
- Remove each TRV head.
- Push the pin up and down 5 to 10 times to free any static bond.
- Apply a drop of WD40 if movement feels stiff.
- Clean dust from the head’s vent holes with a soft brush.
This ensures smooth operation from day one.
Optimize TRV Placement and Use

Even a perfectly working TRV can give poor results if poorly placed or misused.
Avoid Temperature Interference
Never install TRVs:
- Behind long curtains
- Inside cabinets
- Near direct sunlight
- Close to TVs, lamps, or other heat sources
These locations trick the sensor into reading false temperatures, causing early shutoff or constant heating.
Reserve One Radiator for Boiler Control
Do not install a TRV on the radiator in the same room as the main thermostat.
That radiator must respond directly to the thermostat to prevent boiler short-cycling or overheating.
This radiator acts as the system’s reference point.
Balance Flow Direction
Older TRVs have a flow arrow on the body. Install so the arrow points into the radiator.
Modern bi-directional valves like the Danfoss RA2 do not require this, but older models do.
Incorrect installation causes noise and poor control.
Troubleshoot Common TRV Issues
Use this quick-reference guide to match symptoms with solutions.
No Heat Despite High Setting
Possible causes:
– Stuck pin
– Closed lockshield valve
– Air lock
– Sludge blockage
Fix:
1. Free the pin using the steps in the earlier section.
2. Check the lockshield is open.
3. Bleed the radiator.
4. If persistent, flush the system.
Radiator Will Not Turn Off
Possible causes:
– Debris preventing seal
– Worn washer
– Failed thermostatic head
Fix:
1. Clean valve internals.
2. Replace washer or entire head.
3. Upgrade to a liquid-filled head for better accuracy.
Hissing or Clicking Noise
Cause: Often incorrect flow direction or high water velocity past a partial blockage.
Fix:
– Verify flow arrow direction.
– Balance system by adjusting lockshields.
– Replace with bi-directional TRV.
Inconsistent Room Temperature
Cause: Dust-clogged sensor vents or poor placement.
Fix:
– Clean vent holes with compressed air or brush.
– Relocate TRV or move obstructions.
Frequently Asked Questions About Repairing Thermostatic Radiator Valves
How long does a thermostatic radiator valve typically last?
A well-maintained TRV can last 10 to 15 years depending on water quality and usage. Annual exercise of the pin and seasonal cleaning significantly extend its lifespan. Poor water quality with high sludge or limescale content shortens service life considerably.
Can I repair a thermostatic radiator valve without draining the system?
Yes, in many cases. Freeing a stuck pin, lubricating the mechanism, and replacing just the thermostatic head all work without draining. Only full valve body replacement requires draining the affected radiator section.
Why does my radiator stay hot even when the TRV is off?
This usually means the valve is stuck open due to debris preventing closure, a worn washer, or a failed thermostatic head. Cleaning the internals or replacing the head typically resolves the issue.
Is WD40 safe to use on a thermostatic radiator valve pin?
Yes, when applied sparingly to the metal pin mechanism only. WD40 helps break corrosion bonds and free seized pins. Avoid getting it on rubber seals or washers, as it can degrade them over time.
Do I need a professional to repair a thermostatic radiator valve?
Most basic repairs like freeing a stuck pin, bleeding air, or swapping the thermostatic head are safe DIY tasks. However, if the valve body is cracked, the pin is bent, or you need to drain the system, professional help is wise. In the UK, any work involving gas boiler components requires a Gas Safe registered engineer.
Why does my TRV make clicking or hissing noises?
Clicking or hissing often indicates incorrect flow direction on older valves or high water velocity through a partially blocked valve. Verify the flow arrow points into the radiator, balance the system using lockshield valves, or upgrade to a bi-directional TRV to eliminate noise.
Key Takeaways for Repairing Thermostatic Radiator Valves
Diagnosing the pin condition first is the fastest path to a successful repair. If the pin is seized, gentle mechanical exercise combined with WD40 solves most cases in minutes. If the pin moves freely, the problem likely lies with air, debris, or the thermostatic head itself.
Seasonal maintenance prevents 90 percent of TRV failures. Setting all valves to maximum before summer keeps pins extended and mobile. Exercising them before winter breaks any static bond that formed during downtime.
When in doubt, replace just the head. It is affordable, requires no draining, and often restores full function. For corroded bodies or bent pins, full valve replacement is the safer long-term fix. With proper placement away from heat sources and curtains, plus annual care, your TRVs will deliver reliable, room-by-room comfort for over a decade.