
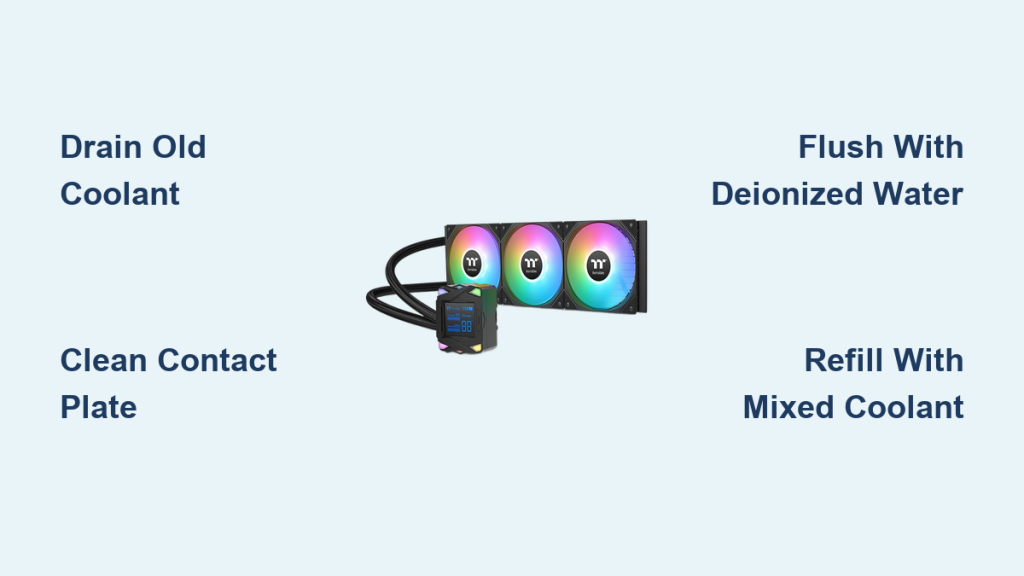
If your all-in-one (AIO) liquid cooler is making gurgling noises, running hotter than usual, or showing signs of pump strain, it might be time to change AIO coolant. Over time, coolant can evaporate or degrade, forming air bubbles that reduce cooling efficiency and increase pump noise. Contaminants from manufacturing or internal corrosion can also build up, especially on the waterblock contact plate and radiator fins. The good news? With a few basic tools and some care, you can refresh your AIO cooler from the inside out, refilling the coolant, cleaning key components, and restoring peak performance.
In this guide, you will learn exactly how to change AIO coolant safely, clean the contact plate, and maintain your radiator for long-term reliability.
Remove the AIO Cooler from Your PC
Before starting any maintenance, power down your PC and unplug it completely. Carefully remove the AIO cooler from your CPU by detaching the radiator fans and unscrewing the mounting brackets from the case. Set the cooler on a clean, level surface with the pump head facing up to prevent spills or air from entering prematurely.
Lay down a towel to catch accidental drips and keep the unit stable during disassembly. Keep the entire unit level at all times to avoid damaging internal tubing or seals.
Detach the Pump Housing
Most AIO coolers allow access to the coolant loop by removing the pump housing from the cold plate. Use the appropriate screwdriver, usually Phillips or Torx, to remove the screws securing the pump to the base. Gently lift the pump away without tilting it excessively, as residual coolant may leak into sensitive areas.
Inspect Internal Components
Once the pump is removed, visually inspect the internal channels and impeller. Look for discoloration, sludge, or visible corrosion. A clear loop indicates healthy fluid, while dark or cloudy liquid suggests contamination and confirms the need for a full flush.
Clean the Contact Plate

Thermal transfer suffers when the contact plate is oxidized or coated with old thermal paste. Cleaning it properly ensures optimal heat conduction between your CPU and cooler.
Remove Old Thermal Paste
Use a lint-free cloth dampened with isopropyl alcohol, 90% or higher, to wipe away dried thermal paste. Avoid abrasive materials that could scratch the metal surface. Repeat until no residue remains. Never use paper towels, as they can leave fibers behind.
Polish the Metal Surface
Oxidation creates microscopic gaps that reduce cooling efficiency. Apply a small amount of Autosol metal polish to a clean microfiber cloth and rub the contact plate in circular motions for 2 to 3 minutes. Then switch to a fresh cloth to buff it to a mirror finish.
Only polish copper or nickel-plated plates. Do not polish aluminum surfaces, as they scratch easily.
Check Coolant Level and Drain Old Fluid
With the pump removed, examine the coolant reservoir inside the pump housing. The fluid should reach the top of the internal chamber with no visible air pockets.
Signs of Low Coolant
Watch for these indicators that your coolant level is low. Air bubbles visible in tubing, gurgling or buzzing pump noise, and higher CPU temperatures under load all signal evaporation or micro-leaks. Refilling is essential to restore performance and prevent pump failure.
Drain the Old Coolant Completely
To avoid mixing incompatible fluids, fully drain the old coolant before refilling. Place the pump end slightly lower than the radiator and tilt the entire unit gently while positioning the radiator above a plastic container. Allow gravity to pull the fluid through the loop.
For heavily contaminated loops, flush the system with distilled water. Repeatedly fill and drain until the runoff water runs clear. Never use tap water for flushing, as it contains minerals that promote corrosion. Full drainage takes 5 to 10 minutes depending on loop complexity.
Mix New Coolant Properly
Using pre-mixed coolant avoids errors, but concentrated formulas like EK Cryofuel offer better customization and longevity. Always mix concentrate with deionized water, not distilled or tap water, as deionized water lacks ions that cause galvanic corrosion in metal components.
Follow the Correct Mix Ratio
Check the manufacturer label for the recommended ratio. Most concentrates require a 1:9 or 1:10 ratio, meaning concentrate to water. Use a graduated measuring cup for precision. For example, for 100ml total volume, add 10ml concentrate plus 90ml deionized water.
Refill the AIO Loop
Refilling requires patience to minimize trapped air, which reduces cooling efficiency and increases pump noise.
Use a Fill Bottle
A narrow-tipped fill bottle gives you control over flow rate. Slowly inject the mixed coolant into the pump chamber while keeping the radiator elevated. Hold the pump housing higher than the radiator during filling to encourage air to rise and exit the loop naturally.
Eliminate Air Bubbles
Gently shake and tilt the radiator in different directions after filling. Tap the tubing lightly to dislodge stubborn bubbles. Let the unit sit vertically for 10 minutes to allow remaining air to settle. Bubbles rising to the top mean the system is self-venting.
Reassemble the Cooler Safely
Reinstalling the pump incorrectly can damage seals or cause leaks. Inspect all rubber gaskets for cracks or deformation and replace them if worn. Apply a thin layer of silicone grease to improve seal integrity and prevent dry friction.
Reattach the Pump Housing
Align the pump precisely over the contact plate and tighten screws gradually in a diagonal pattern. This ensures even pressure and prevents warping. Most screws require only light hand pressure, so avoid over-tightening.
Clean the Radiator Fins
Dust buildup on radiator fins restricts airflow and reduces heat dissipation. Use an air duster to blast dust from multiple directions, focusing on densely packed fin areas where debris accumulates.
Deep Clean Stubborn Grime
For caked-on dirt, soak the radiator in lukewarm water for 60 minutes. Rinse thoroughly under a strong shower stream, then shake off excess water and let it dry completely in a well-ventilated area. Never power on the cooler until the radiator is 100% dry, as moisture can damage fans or cause shorts.
Reinstall and Test Performance
Mount the AIO cooler back onto your CPU with fresh thermal paste. Reconnect power and fan headers, then boot the system. Run the PC for 15 minutes without closing the case to monitor for leaks around the pump or tubing connections.
Benchmark Cooling Performance
Use stress-testing software like Prime95 or AIDA64 to monitor CPU temperatures. Compare results to pre-maintenance levels. Success signs include lower idle and load temperatures, quieter pump operation, and stable system performance.
Prevent Future Coolant Issues
While AIO coolers are sealed units, proper maintenance extends their lifespan significantly. Most manufacturers recommend coolant replacement every 2 to 3 years, even in closed-loop systems. Set a calendar reminder to inspect your cooler annually.
Choose High-Quality Coolants
Opt for biocide-infused, anti-corrosive coolants like EK Cryofuel, Mayhems NC Plus, or Alphacool Aqua. These inhibit microbial growth and protect metal components. Despite their visual appeal, avoid UV-enhanced fluids, as they often leave residue and degrade faster. Stick to clear or performance-dyed formulas for reliability.
Key Takeaways for Changing AIO Coolant
Changing AIO coolant is not required often, but doing it right prevents premature failure. Always keep the unit level during disassembly, and never mix coolant brands or types. Store leftover mixed coolant in a sealed container for future top-offs. Consider upgrading to a custom loop if you plan frequent maintenance.
By following this guide on how to change AIO coolant, you have not only restored cooling efficiency but also extended the life of your expensive hardware. With clean fluid, a polished contact plate, and dust-free fins, your system will run cooler, quieter, and more reliably for years to come.
Frequently Asked Questions About Changing AIO Coolant
How often should I change the coolant in my AIO cooler?
Most manufacturers recommend changing AIO coolant every 2 to 3 years, even in closed-loop systems. Annual inspection is advised to catch issues early.
Can I use tap water to flush my AIO cooler?
No, never use tap water for flushing. Tap water contains minerals that promote corrosion in metal components. Use only distilled or deionized water.
Why is my AIO pump making gurgling noises?
Gurgling noises typically indicate air bubbles in the loop or low coolant levels. This often happens when coolant has evaporated over time, creating air pockets that cause pump strain.
Do I need to replace the thermal paste when changing AIO coolant?
Yes, you should remove and replace the thermal paste during the coolant change process. Old thermal paste becomes less efficient and can hinder thermal transfer between the CPU and cooler.
Can I mix different brands of coolant in my AIO?
No, never mix coolant brands or types. Different formulations can react with each other, causing sludge, corrosion, or pump damage. Always drain old coolant completely before adding new fluid.
What happens if air bubbles remain in the loop after refilling?
Air bubbles reduce cooling efficiency and can cause pump noise or premature wear. To eliminate them, tilt and shake the radiator after filling, then let the unit sit vertically for 10 minutes to allow air to rise and escape.



