
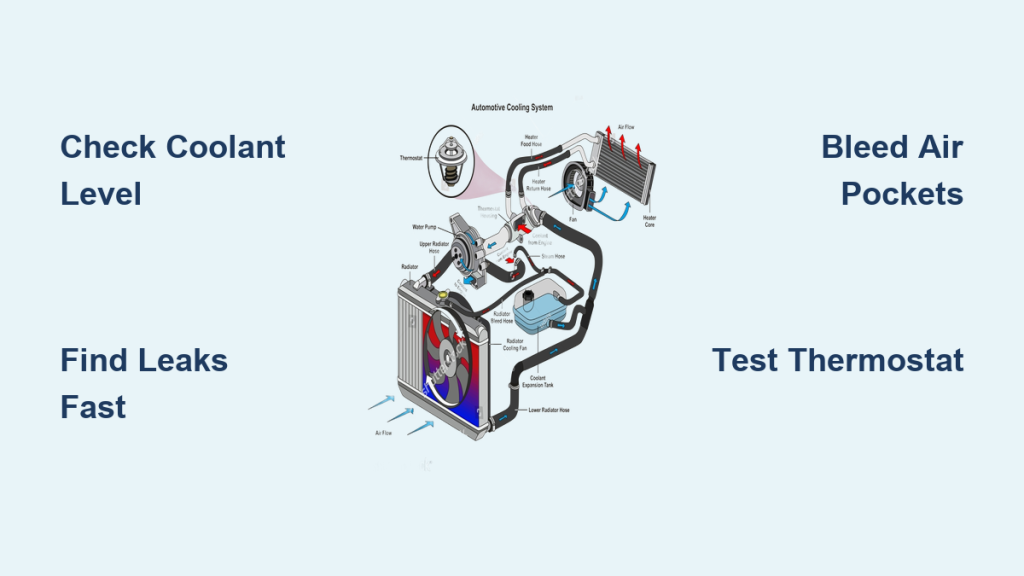
You turn the key, and within minutes the temperature gauge climbs. Steam rises from under the hood. The dashboard flashes a red warning light. Your coolant is not working, and your engine is at risk. Ignoring this can lead to catastrophic damage in under 10 minutes. Whether you are facing a slow leak, a failed thermostat, or air in the system, diagnosing and fixing the issue fast is critical. This guide breaks down every possible cause of coolant failure, how to test each component, and what to do next step by step.
Check Coolant Level First
Low coolant is the most common reason the system fails. Without enough fluid, heat builds up rapidly. The engine cooling system relies on adequate fluid levels to absorb and transfer heat away from critical components. When coolant not working becomes a problem, the first place to look is the expansion tank.
Look for Dashboard Warnings
Your car alerts you before serious damage occurs. Watch for these warning signs.
The red thermometer or coolant symbol on the dashboard indicates an overheating condition. The temperature gauge entering the red zone means the engine is running too hot. Reduced or no heat from cabin vents signals that the cooling system cannot regulate temperature properly. These signs mean the engine is overheating. Pull over immediately if you see them.
Inspect Expansion Tank
Open the hood only after the engine cools. Locate the translucent coolant reservoir.
Coolant should sit between MIN and MAX lines. If below minimum, top up with 50/50 mix of proper coolant and distilled water. Never open the radiator cap on a hot engine because pressure can cause scalding. If coolant is low without visible leaks, suspect an internal issue like a blown head gasket.
Find and Fix Coolant Leaks
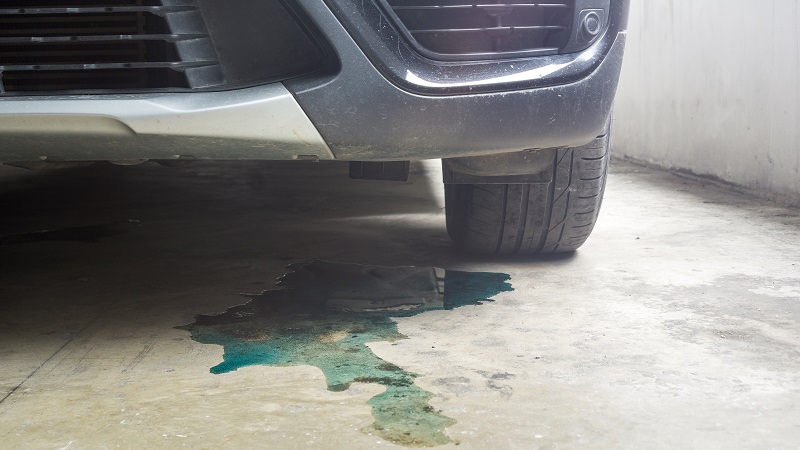
Leaks cause 70% of low coolant cases. They can be external or internal. When coolant not working becomes apparent, leaks are often the culprit.
Scan for External Leaks
Look under the car after parking overnight for puddles of green, orange, pink, or yellow fluid. Stains on hoses, radiator, or water pump indicate where leaks originate. A sweet, syrupy smell near the engine is a telltale sign of coolant escape.
Common leak points include the radiator where cracks and corroded fins develop, hoses with cracks and swollen sections, the water pump dripping from the weep hole, and the thermostat housing gasket. Use a flashlight to inspect hard-to-see areas. Shine it at low angles to catch small drips.
Test for Internal Leaks
No puddles but coolant keeps disappearing. Check for white, milky oil which indicates coolant mixing with oil from head gasket failure. White exhaust smoke that smells sweet signals coolant entering combustion chambers. Bubbles in the coolant reservoir when the engine runs suggest air or exhaust gases are present.
Perform a combustion gas test using a block tester kit with chemical fluid. If fluid changes color, exhaust gases are in the cooling system, confirming head gasket failure.
Bleed Air from the System
Air pockets block coolant flow and cause overheating even with full fluid levels. When coolant not working properly, airlock is often the issue.
Recognize Airlock Symptoms
Temperature gauge fluctuates wildly indicates air disrupting the system. The engine overheats quickly, then cools down as air moves through. Heater blows cold despite hot engine because air prevents proper circulation. Air often enters after coolant refills or repairs.
Bleed the Cooling System
Follow your vehicle bleeding procedure.
Park on a slight incline with front higher. Remove the radiator cap or open the bleed valve if equipped. Fill coolant to top. Run engine with heater on high. Squeeze upper radiator hose to release air bubbles. Top off as level drops. Replace cap only when no more bubbles appear. Some models require a scan tool to activate the water pump during bleeding.
Test the Thermostat
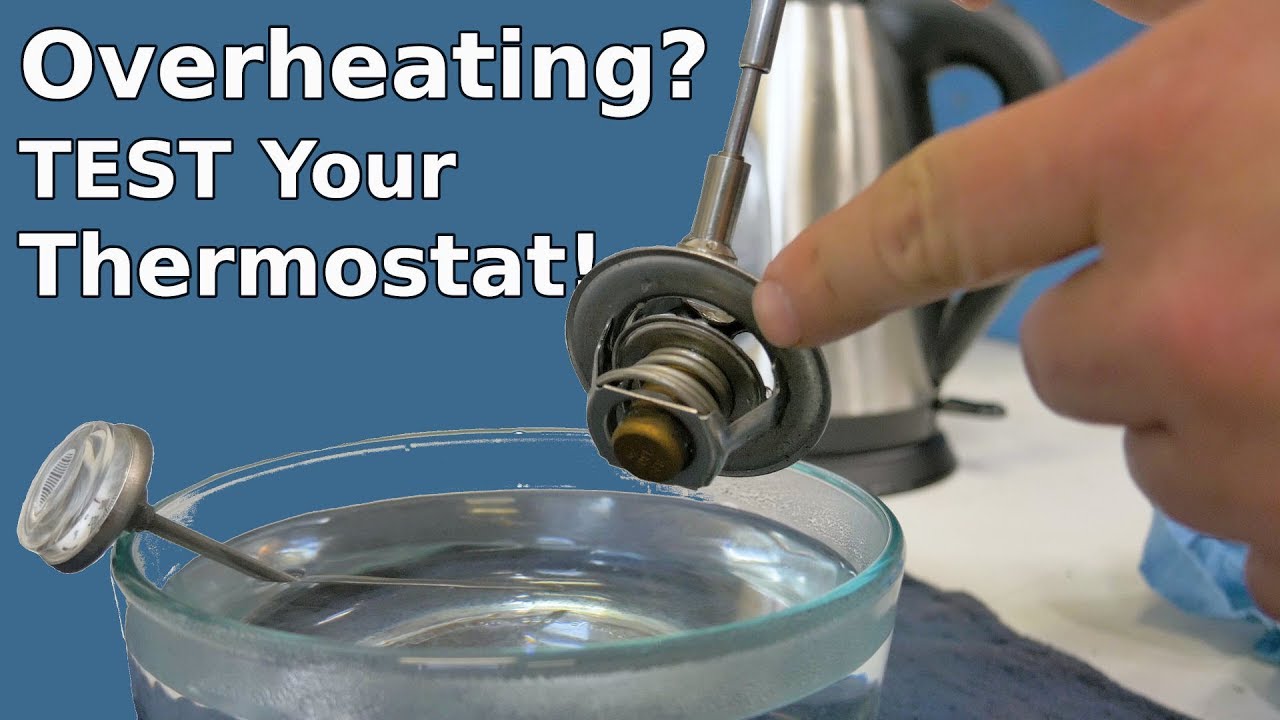
A stuck thermostat is a leading cause of sudden overheating. If coolant not working, the thermostat is a common failure point.
Diagnose Stuck-Closed Failure
If the upper radiator hose stays cold while the engine overheats, the thermostat is not opening. Coolant cannot reach the radiator, and heat builds rapidly. This often happens shortly after startup.
Remove and Test in Hot Water
Drain coolant below thermostat level. Remove thermostat housing. Take thermostat to a pot of boiling water at 100°C or 212°F. It should begin opening at 82°C to 93°C or 180°F to 200°F depending on model. Fully open within 10 to 15°C above rated temperature. If it does not move, replace it. Always install a new gasket or O-ring.
Inspect the Radiator
A clogged or blocked radiator stops heat from escaping. When coolant not working, the radiator may be the problem.
Clean External Debris
Insects, leaves, and dirt block airflow. Shut off the engine. Use compressed air or garden hose to clean fins from the front. Avoid bending fins. Use a fin comb if damaged. Do this every six months, especially after highway driving.
Check for Internal Clogs
Use an infrared thermometer to measure temperature at radiator inlet which should be hottest. Measure outlet which should be cooler. Normal drop is 10°C to 15°C or 18°F to 27°F. Less than 5°C difference means coolant is not transferring heat, likely due to internal sludge.
Flush the radiator if clogged by draining old coolant, connecting flush gun or garden hose to heater core line, running water through until clear, and refilling with correct 50/50 coolant mix.
Diagnose Water Pump Failure
The water pump circulates coolant. If it fails, flow stops.
Spot Early Warning Signs
Listen for high-pitched whining or grinding from front of engine. Coolant dripping from weep hole indicates seal failure. Check for wobbling pulley or shaft play. Corroded or eroded impeller is visible during replacement. Pump failure often follows coolant neglect or mixing incompatible types.
Replace with Timing Belt
Most manufacturers recommend replacing the water pump during timing belt service. This prevents future failure, saves labor costs, and ensures long-term reliability. Use OEM or high-quality aftermarket pumps because cheap units fail faster.
Test and Replace Old Coolant
Coolant degrades over time. Old fluid loses protection and corrodes parts.
Check Coolant Condition
Inspect color and clarity. Clear, bright color means good condition. Cloudy, rusty, or oily indicates contaminated coolant. Sludge in reservoir means overdue for flush.
Use test strips to check pH level which should be 8.5 to 10.5. Check freeze point which should protect down to -34°C or -30°F. Check additive strength for corrosion inhibitors. Replace if over three to five years old, mixed with wrong coolant type, or shows signs of contamination.
Flush and Refill Correctly
Drain coolant from radiator and engine block. Flush with cooling system cleaner. Rinse thoroughly with water. Close drains and refill with manufacturer-recommended coolant. Use 50% coolant and 50% distilled water unless specified otherwise. Never use tap water because minerals cause scale buildup.
Pressure Test the System
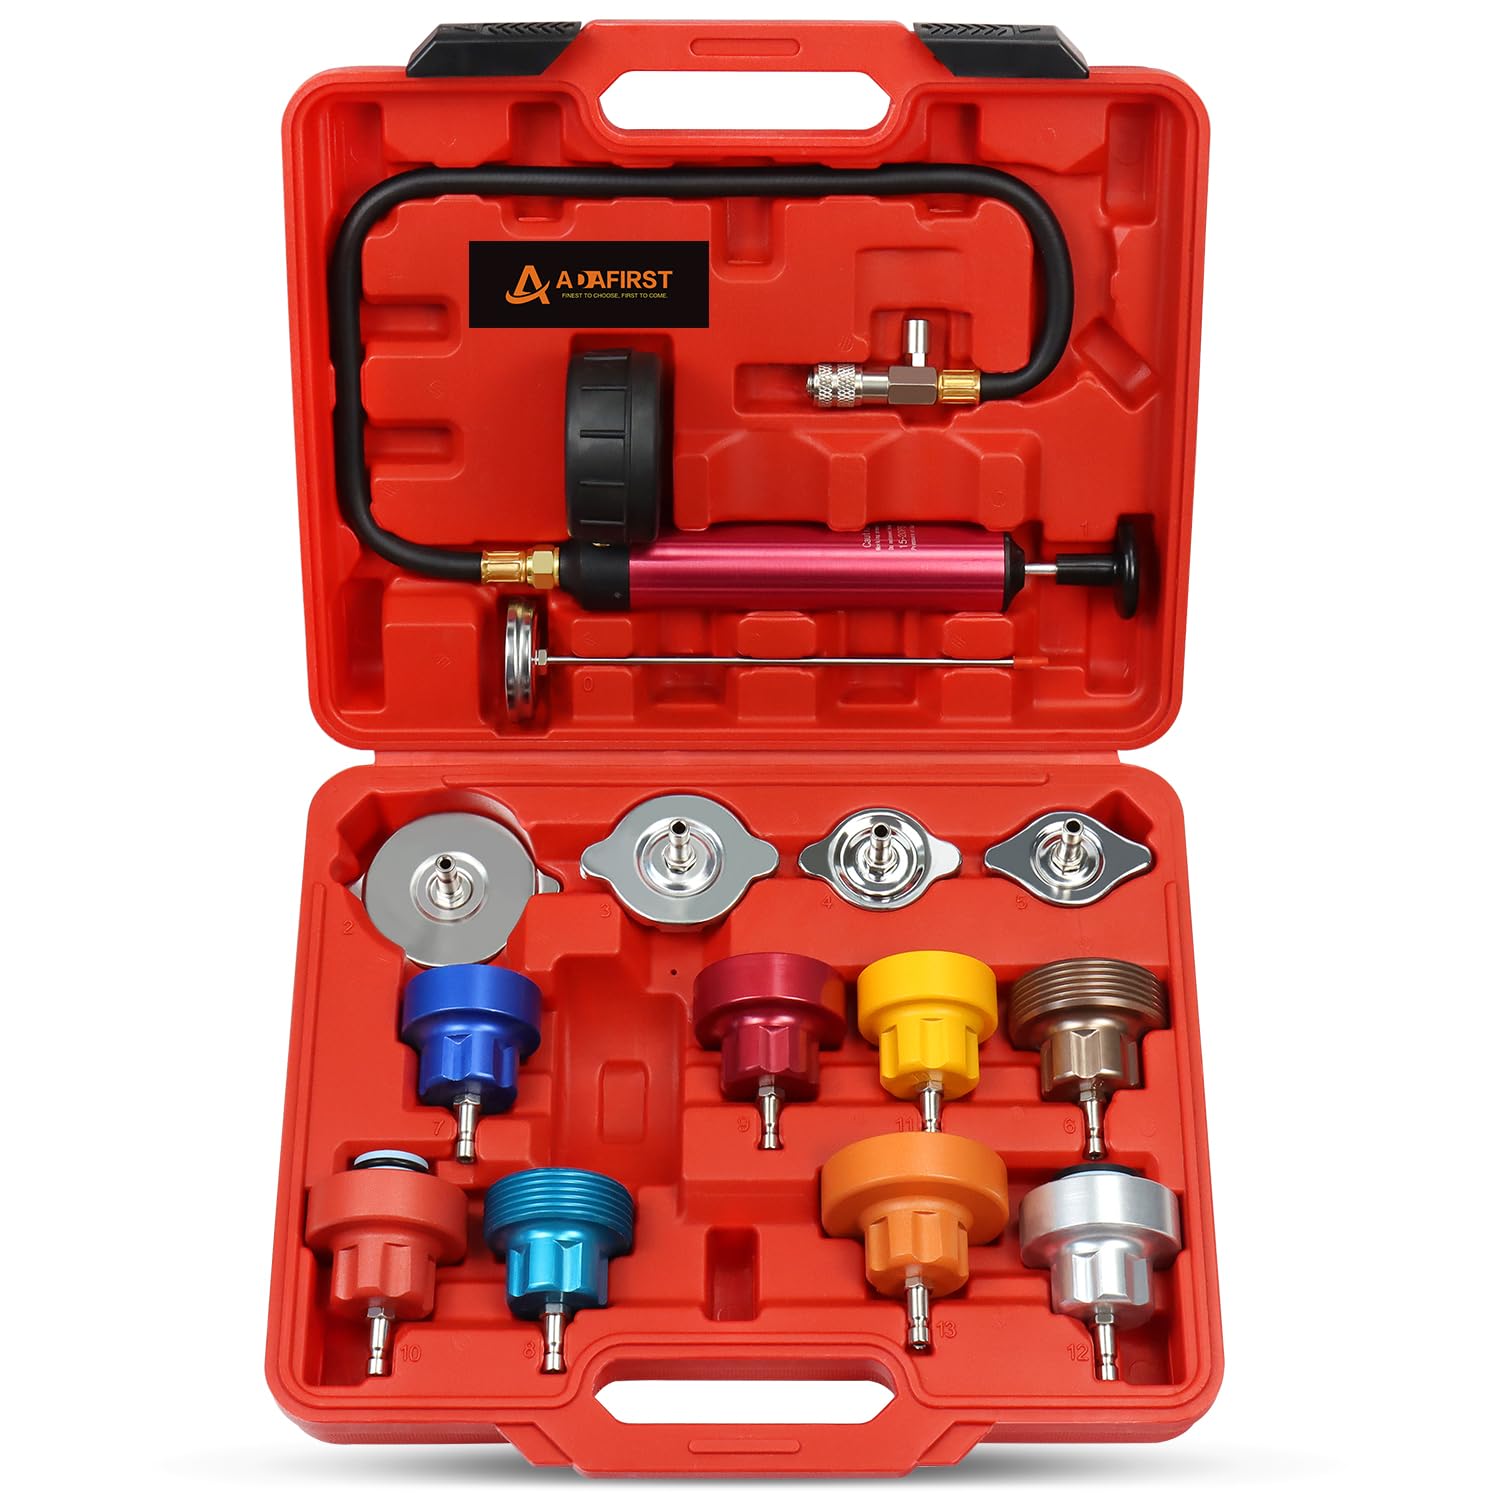
Find hidden leaks with a pressure tester.
Perform a Leak-Down Test
Attach tester to radiator neck or expansion tank. Pump to 13 to 18 psi, checking manual for exact spec. Monitor gauge for 10 to 15 minutes.
Steady pressure means no leaks. Slow drop indicates small external or internal leak. Rapid drop means major leak or head gasket failure. Inspect all connections under pressure. Look for bubbles at hose clamps or radiator seams.
Use Infrared Thermometer for Diagnosis
An IR gun helps pinpoint cooling issues without disassembly.
Scan Key Components
Radiator inlet versus outlet should show 10°C plus difference. Thermostat housing should heat up after engine warms. Heater core hoses should both be hot when heater is on. Cylinder head hot spots indicate localized overheating. If radiator inlet and outlet are the same temperature, flow is blocked.
Prevent Long-Term Engine Damage
Driving with failed coolant leads to irreversible harm.
Know the Risks of Overheating
Within five to ten minutes, aluminum parts warp including cylinder head and pistons. Head gasket blows from pressure. Oil breaks down, losing lubrication. Beyond 15 minutes, cracked block or head occurs. The engine seizes. Total replacement becomes needed. Even one severe overheat can shorten engine life significantly.
Never Drive With Overheat Warning
If the temp gauge hits red, pull over immediately. Turn off A/C and turn heater to max. Shut off engine if no improvement in two minutes. Wait 30 to 60 minutes before checking coolant. Do not continue driving. Tow to a shop if necessary.
Follow Preventive Maintenance
Avoid coolant failure with routine care.
Inspect Weekly
Check coolant level in reservoir. Look for new stains under the car. Examine hoses for cracks or soft spots. Clear debris from radiator.
Replace Coolant on Schedule
Replace every 30,000 to 60,000 miles or per manufacturer. Use correct type, OAT, HOAT, or IAT. Avoid mixing chemistries because they can gel and clog the system.
Use Professional Testing
For fleets or high-mileage vehicles, perform annual strip tests for pH and freeze point. Perform biennial lab analysis using FleetGuard CC2717 kit which measures molybdate, nitrate, silicates, detects corrosion metals like iron, copper, and lead, and identifies contamination early. Order kits from FleetGuard.com or contact a rep for bulk programs.
Emergency Fixes That Work
Stuck on the road. These steps buy time.
Add Water as Temporary Fix
If coolant is low and none available, wait for engine to cool. Add distilled water to reservoir. Drive only to nearest repair shop. Never pour cold water into a hot radiator because thermal shock can crack the block.
Boost Airflow in Traffic
If overheating in stop-and-go traffic, turn off A/C. Turn heater to max to draw heat from engine. Shift to neutral at stops and rev engine slightly to spin fan. If electric fan is not running, check fuse and relay.
Upgrade Cooling System Components
Prevent future issues with quality parts.
Use OEM-Grade Coolant
Top brands include Prestone with -37°C to +129°C protection, Zerex formulated for aluminum engines, and Peak extended life formula. Ensure compatibility with your vehicle seals and materials.
Replace Weak Points
Proactively swap radiator cap every three years to maintain pressure. Swap hoses every five years because cracks weaken over time. Swap thermostat with coolant flush. A $10 cap prevents a $1,500 engine repair.
Frequently Asked Questions About Coolant Not Working
Why does my car overheat even when coolant level is full?
Air pockets in the cooling system can block coolant flow even when levels appear normal. This airlock prevents proper circulation and causes overheating. Bleed the system following the procedure outlined above to release trapped air.
How long can I drive with low coolant?
Driving with low coolant is extremely risky. Within five to 10 minutes of coolant loss, the engine can reach critical temperatures. Less than five minutes of driving without coolant can cause permanent damage. Pull over immediately if you notice low coolant.
Can I use water instead of coolant in an emergency?
Distilled water works as a temporary fix in emergencies. However, water alone lacks anti-corrosion additives and has a lower boiling point. Use it only to reach the nearest repair shop, then flush and refill with proper coolant immediately.
What causes coolant to disappear without visible leaks?
Internal leaks cause coolant loss without external signs. Head gasket failure allows coolant to enter combustion chambers or oil passages. A cracked engine block or heater core can also leak coolant internally. Perform a combustion gas test to diagnose head gasket issues.
How often should I replace my coolant?
Replace coolant every 30,000 to 60,000 miles or according to your manufacturer schedule. Old coolant loses protective additives, becomes acidic, and can cause corrosion and clogs. Regular replacement prevents costly cooling system damage.
Why does my heater blow cold air when the engine is hot?
A stuck-closed thermostat prevents hot coolant from reaching the heater core. Air in the system can also block heater hoses. Low coolant levels reduce flow to the heater. Test the thermostat and bleed the system to restore heater function.
Key Takeaways for Fixing Coolant Not Working
Coolant not working is a silent killer but is entirely preventable. Most failures start small: a slow leak, a degraded fluid, or a stuck thermostat. By checking levels weekly, testing components like the thermostat and water pump, and maintaining your system on schedule, you avoid expensive breakdowns. If you see warning signs like the temperature gauge climbing or steam rising, act fast. Flush old coolant every 30,000 to 60,000 miles, replace faulty parts immediately, and never ignore the temperature gauge. A healthy cooling system means a longer-lasting engine, better fuel economy, and worry-free driving. Keep this guide handy because it could save your engine.



