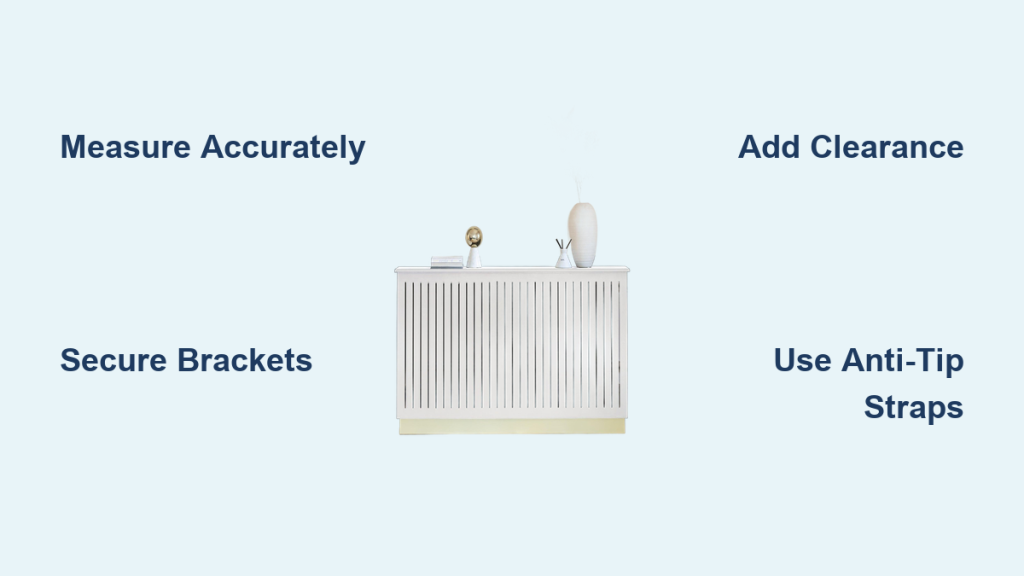
A radiator cover can completely change the look of a room while shielding children and pets from hot surfaces. However, an improperly secured cover quickly turns into a safety risk, especially in busy households. Learning how to secure a radiator cover the right way protects your family and keeps the unit functioning properly. This guide covers measuring, mounting, and maintaining your cover so it stays firmly in place for years.
Whether you’re installing a brand-new model or re-securing an older one, you’ll find practical steps for both wall-mounted and free-standing designs. You’ll also learn how to avoid common installation mistakes and when to call in a professional.
Measure for Proper Fit Before Securing
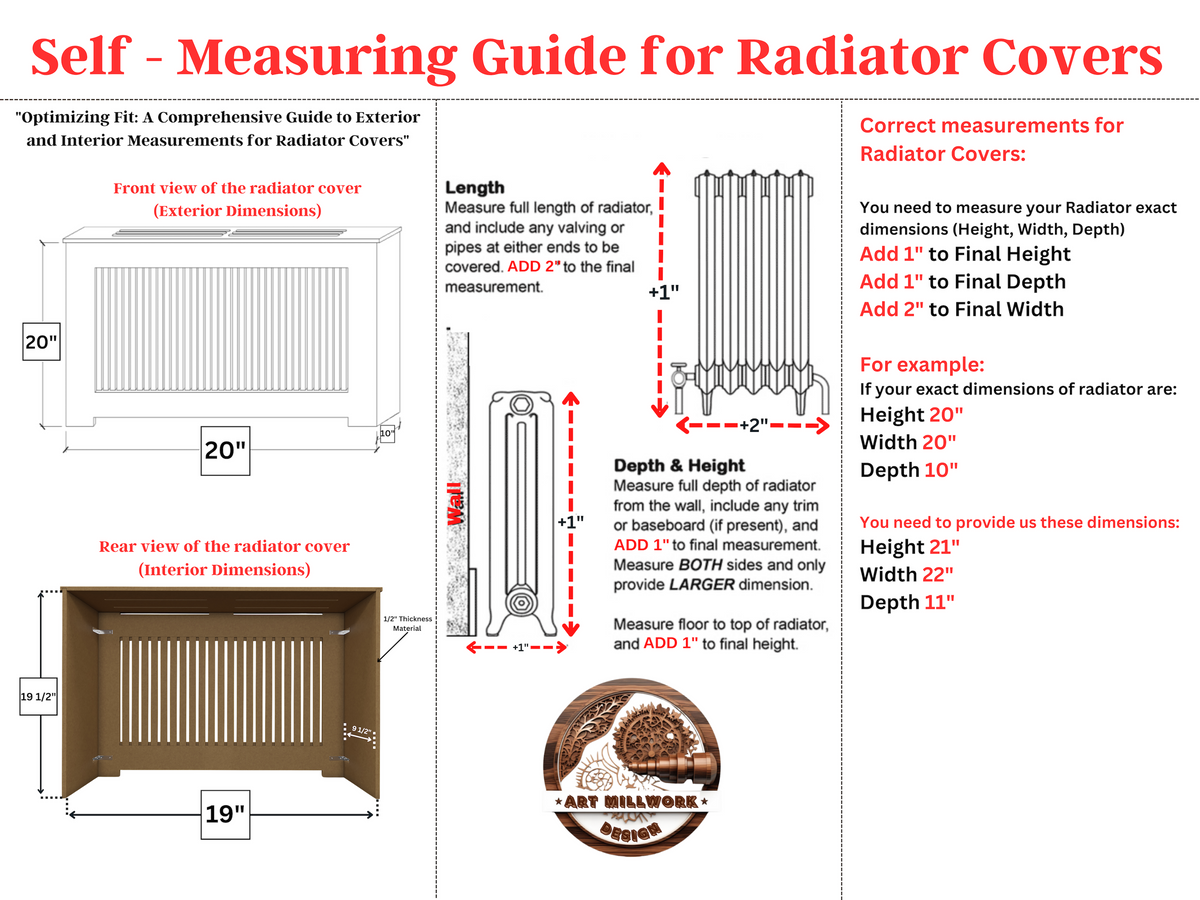
An ill-fitting cover won’t sit flush against the wall or brackets, which leads to wobbling and instability. Taking accurate measurements upfront saves time and frustration later.
Check Radiator Dimensions Carefully
Use a tape measure to record the height from the floor, the width including any valves, and the depth of the radiator. Don’t overlook protruding parts like pipes or thermostatic valves that may need to fit inside the cover.
Add Clearance Space for Airflow
Add 2.5cm to the height and depth and 5cm to the width of your measurements. This extra space allows hot air to circulate freely around the radiator. Without proper ventilation, heat builds up inside the cover and creates a potential fire hazard.
Match Size to Manufacturer Charts
Refer to a size chart like the one below to pick the right model:
| Size | Width (cm) | Height (cm) | Depth (cm) |
|---|---|---|---|
| Small | 78 | 81.5 | 19 |
| Medium | 112 | 81.5 | 19 |
| Large | 152 | 81.5 | 19 |
| Extra Large | 172 | 81.5 | 19 |
| Adjustable | 141 to 205 | 82.7 | 20.5 |
An adjustable model offers flexibility if your radiator falls outside standard dimensions.
Assemble the Cover Correctly
Most covers arrive flat-packed and require self-assembly. A poorly built frame won’t sit securely on brackets or against the wall, so getting this step right matters.
Follow the Included Instructions
Lay out all parts first and confirm nothing is missing. Jack Stonehouse covers come with a self-assembly kit designed for beginners, so the process is straightforward when you follow each step.
Tighten Every Fixing Fully
Ensure screws, dowels, and clips are all tightened completely. Loose corner joints bear the most stress and are the first to fail. A frame that flexes in your hands won’t hold up once mounted.
Test Stability Before Mounting
Gently shake the assembled cover. If it wobbles, recheck the connections and tighten any loose joints. A solid frame is essential before you attempt to secure it to the wall.
Choose Between Wall-Mounted and Free-Standing
Knowing which type you have determines how you secure it. Both options work well, but each has specific considerations.
Wall-Mounted Covers Offer Maximum Safety
If your cover includes brackets and screws, it’s designed to be wall-fixed. This is the safest option in homes with children or pets. Wall mounting prevents tipping and keeps the unit stable during accidental bumps.
These covers typically feature rear brackets that attach to the wall, with the cover sliding or resting into place.
Free-Standing Units Provide Flexibility
Some models are built to stand freely over the radiator. These rely on proper sizing and weight distribution for stability. They’re ideal if you rent or plan to relocate the cover later.
However, a free-standing cover can still tip if leaned on, so additional safety measures are wise.
Pro Tip: In households with toddlers, always opt for a wall-fixed model or modify a free-standing unit with anti-tip straps.
Install Wall Brackets Securely
For wall-mounted covers, correct bracket placement ensures long-term safety and ease of use.
Position the Cover and Mark Drill Points
Place the assembled cover over the radiator. Use a pencil to mark where the brackets align with the wall through the mounting holes. Confirm the cover is level using a spirit level before marking.
Warning: Never drill into a radiator pipe or valve area. Confirm drill points are clear of plumbing before proceeding.
Drill Holes and Insert Wall Plugs
Using a drill, create holes at the marked spots. Insert the wall plugs provided, which are usually plastic anchors for masonry walls. For drywall, consider toggle bolts for added strength.
Attach Brackets with Screws
Secure the brackets using the supplied screws. Ensure the curved shoulder of the bracket faces upward, which allows the cover to slide or rest securely into place. Stop tightening once snug to avoid stripping the screw hole.
Test Bracket Strength
Apply gentle upward and downward pressure to each bracket. If any wobble, redrill or reinforce with larger plugs. Weak brackets compromise the entire installation.
Mount the Radiator Cover in Place
With brackets secured, you’re ready to fix the cover to the wall.
Lift and Align with Brackets
Carefully lift the cover and lower it onto the brackets, ensuring the base slots into the grooves. The fit should be snug but not forced. For heavier models, ask someone to help to avoid straining or dropping the unit.
Confirm Level and Clearance
Check that the cover sits evenly on all sides. Verify there’s still 2.5 to 5cm of clearance around the radiator for airflow. A blocked cover traps heat, reducing radiator efficiency and posing a fire risk.
Perform a Final Stability Check
Gently push the top of the cover. If it moves more than 1 to 2cm, it’s unstable. Recheck bracket tightness and alignment. For extra security, consider adding L-brackets at the top rear to anchor the unit further.
Secure Free-Standing Covers Safely

Even if your cover isn’t designed for wall fixing, you can still make it safer.
Use Anti-Tip Straps
Attach furniture anti-tip straps from the top of the cover to the wall. These are nearly invisible and prevent forward tipping. The same straps used for dressers and bookshelves work well here.
Add Non-Slip Pads
Place non-slip rubber pads under the feet of the cover. This prevents sliding when bumped and improves grip on wooden or tiled floors.
Avoid High-Traffic Zones
Position free-standing covers away from door swings, hallways, or play areas. Even a slight nudge can destabilize them over time.
Perform Regular Maintenance Checks
Securing a radiator cover isn’t a one-time task. Routine checks ensure it stays safe and functional.
Conduct a Monthly Stability Test
Push the top edge gently each month. Any movement means re-tightening screws or checking wall anchors. Dust buildup can also shift balance, so clean inside and out regularly.
Inspect for Warping or Damage
Heat exposure may cause wood or MDF covers to warp over time. If the unit no longer sits flush or gaps appear, replace it. A warped cover won’t secure properly.
Keep Vents Clear at All Times
Never drape clothes or towels over the cover. This blocks airflow, increases internal temperature, and risks damaging both the radiator and the cover.
Know When to Call a Professional

Most radiator covers are DIY-friendly, but some situations call for expert help.
Drilling into Difficult Walls
If you’re installing on tile, stone, or solid concrete, use a masonry bit and consider hiring a tradesperson to avoid cracking surfaces.
Mounting on Unsupported Drywall
Standard wall plugs may not hold in hollow drywall. A professional can install toggle bolts or stud anchors for reliable support.
Fitting Built-In or Custom Units
Integrated cabinetry-style covers may need carpentry skills. If your unit combines shelving or storage, professional fitting ensures structural integrity.
Frequently Asked Questions About Securing Radiator Covers
Do radiator covers need to be fixed to the wall?
Fixing a cover to the wall isn’t compulsory, but it’s the safest option. Many covers are designed to be free-standing, which works well if you rent or plan to move the unit later.
What clearance does a radiator cover need?
Add 2.5cm to the height and depth and 5cm to the width of your radiator measurements. This space allows hot air to circulate and prevents overheating.
How do I secure a free-standing radiator cover?
Use furniture anti-tip straps attached to the wall, place non-slip pads under the feet, and position the cover away from high-traffic areas. These steps greatly reduce tipping risks.
Can I install a radiator cover myself?
Yes. Most covers come with a self-assembly kit and easy-to-follow instructions. People of all DIY levels can complete the job with basic tools like a drill, screwdriver, and spirit level.
How do I remove a wall-mounted radiator cover?
Carefully remove the screws from the brackets and gently dislodge the cover. Support the weight as you loosen the final screws to avoid dropping the unit.
What tools do I need to secure a radiator cover?
You’ll need a tape measure, drill, spirit level, pencil, and the wall plugs and screws provided with the cover. A masonry bit is helpful for tough wall surfaces.
Key Takeaways for Securing Your Radiator Cover
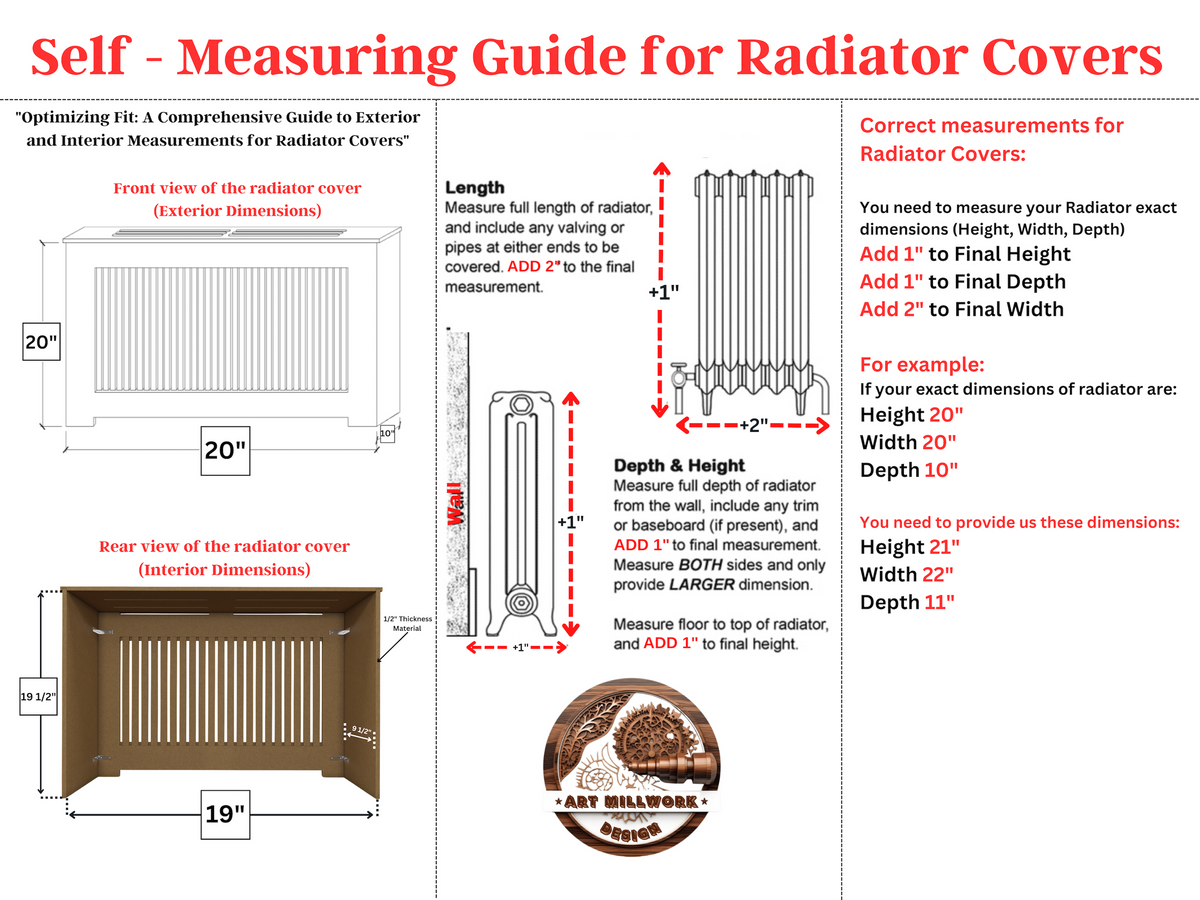
Knowing how to secure a radiator cover properly protects your family and maintains heating efficiency. Start by measuring your radiator accurately and choosing the right size with proper clearance. Assemble the frame carefully and decide whether wall-mounted or free-standing suits your home best.
For wall-mounted models, install brackets securely and confirm the cover sits level with adequate airflow space. For free-standing units, add anti-tip straps and non-slip pads for extra safety. Perform monthly checks to catch loose fixings or warping early.
Your next step: gather your tools, take fresh measurements, and follow this guide to secure your radiator cover with confidence today.