If your heater isn’t working and you suspect a coolant leak, you are not alone. Low coolant is one of the most common reasons for no cabin heat, and it is often a sign of a deeper problem. When coolant escapes, the system cannot circulate enough hot fluid through the heater core, leaving you with cold air even when the engine is warm. Worse, ignoring the issue risks engine overheating, air pockets, or serious internal damage like a blown head gasket.
A coolant leak might leave puddles under your car, but not always. Some leaks evaporate instantly on hot engine parts, leaving only a sweet, pungent odor. Others drip inside the dash or mix with oil or exhaust gases, silent but destructive. This guide walks you through how to identify leaks, test your heater system, and restore full heat safely and effectively.
Spot the Symptoms Early
Cold Air Despite Warm Engine
If the engine reaches normal temperature but the heater blows lukewarm or cold air, coolant is likely low or not circulating. This often happens when coolant has leaked out, air is trapped in the heater core, or the thermostat is stuck open.
At idle, heat may fade completely. When you rev the engine, you might feel a brief burst of warmth. This points to insufficient flow or air blockage.
Sweet Smell Under Hood or Inside Cabin
A distinctive sweet, syrupy smell means antifreeze is burning on hot engine parts. Even without visible puddles, this odor confirms a hidden external leak, often from small coolant lines near the exhaust manifold or a leaking heater core.
Inside the car, the same smell combined with damp carpet or foggy windows signals a failing heater core.
Frequent Coolant Top-Offs
Need to add coolant every few days or after short drives? That is not normal. Coolant does not burn off. If the level drops, it is escaping somewhere. Track how often you refill.
Every 50 to 100 miles suggests a likely internal or evaporative leak. No puddle but low levels means check for steam or smell. Milky oil or white exhaust smoke indicates an internal engine issue possible.
Find the Leak: External vs Internal

Check for Visible Leaks
Start with a cold engine. Look under the hood and under the car for green, orange, or pink puddles. Coolant colors vary by type. Also look for crusted residue on hoses, radiator, or reservoir and damp spots near hose clamps, water pump, or thermostat housing.
Inspect these common failure points.
The radiator can have cracks, corrosion, or damaged fins. Hoses can be soft, swollen, or cracked. The coolant reservoir may have hairline cracks that leak when hot. The radiator cap may have a worn seal or warped neck. The water pump may show wetness near the front of the engine from a weep hole leak.
Use a flashlight and mirror to see behind components. Even a tiny drip adds up over time.
Test for Heater Core Leaks
The heater core sits behind the dashboard. A leak here shows up as wet passenger floorboard, musty odor or fogged windows, sweet smell inside the cabin, or puddle under the car near the firewall from the A/C drain tube.
To confirm the issue, run the heater on max for 10 minutes. Turn off and check the floor. Smell the air vents after shutdown. If damp or smelly, the heater core is likely leaking.
Rule Out Internal Engine Leaks
When coolant disappears with no visible leak, suspect internal failure.
Blown head gasket signs include white smoke from exhaust especially at startup, bubbling in radiator or reservoir while engine runs, milky residue under oil cap or on dipstick, and overheating followed by cold starts.
Use a combustion leak tester to detect exhaust gases in the coolant. A color change in the test fluid confirms a head gasket breach.
Cracked block or head shows the same symptoms as head gasket but more severe. This requires professional diagnosis via pressure test or dye inspection.
Failing intake manifold gasket is common on V6 engines with coolant passages. This can cause misfires, white exhaust smoke, and coolant loss without external signs.
Diagnose the Heating System
Verify Engine Operating Temperature
A cold-running engine cannot heat the cabin. Start cold and watch the temperature gauge. It should reach 195 to 220°F within 5 to 10 minutes. If it stays low, the thermostat may be stuck open.
Replace thermostats every 60,000 to 100,000 miles as preventive maintenance. It is cheap and easy, located at the end of the upper radiator hose.
Perform the Heater Hose Test
With the engine fully warmed up, turn heater to max heat and highest fan speed. Feel both heater hoses where they enter the firewall.
Both hoses hot means good flow through heater core. One hot and one cold indicates a clog or air lock. Both warm but not hot means low coolant or thermostat issue.
This simple test tells you if the problem is flow, level, or blockage.
Pressure Test the Cooling System
Use a cooling system pressure tester to find hidden leaks. Cool the engine only. Never pressurize a hot system.
Attach tester to radiator or reservoir neck. Pump to cap rating, usually 13 to 18 psi. Hold pressure for 10 to 15 minutes.
If pressure drops, look for new leaks on hoses, water pump, or radiator. Check radiator cap seal and replace if suspect. Inspect heater core lines and intake manifold.
Some leaks only appear when hot. Re-test after warming up the engine.
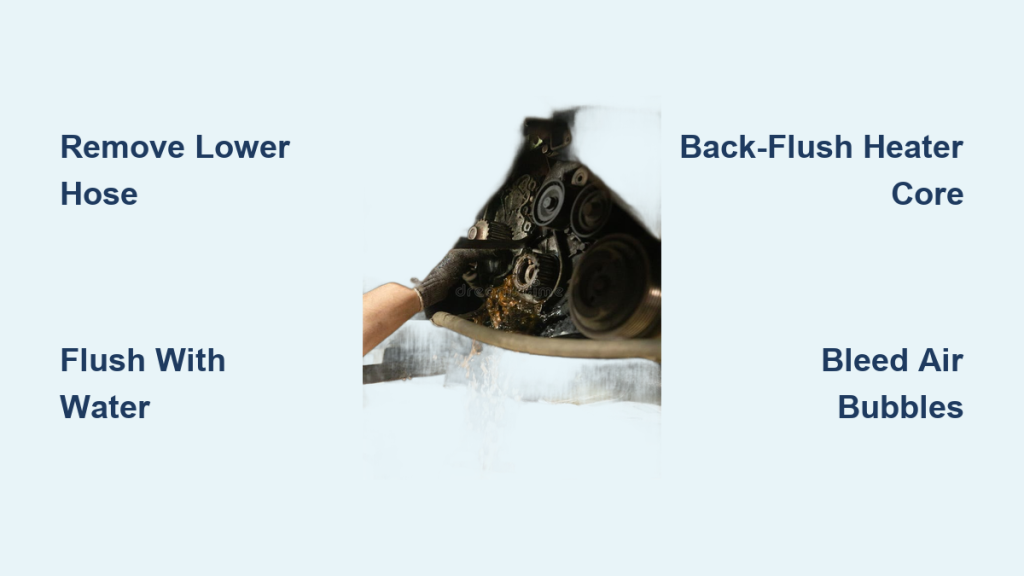
Bleed Air from the System
Air pockets block coolant flow, especially to the heater core. Symptoms include gurgling from dashboard, intermittent heat, and coolant level rising and falling in reservoir.
Proper bleeding procedure requires cooling the engine and removing the radiator cap. Start the engine and set heater to max heat with high fan. Let engine warm up fully until thermostat opens. Slowly add coolant as level drops. Rev engine slightly to dislodge air. Continue until flow is steady and bubble-free. Install cap only when hot and full.
Some vehicles need the front end jacked up or have bleeder screws. Check your model specifications.
Repair Common Failures

Replace Leaky Hoses and Clamps
Cracked or soft hoses are ticking time bombs. Replace any that feel spongy, brittle, or swollen. Use OEM-spec or reinforced silicone hoses. Install proper worm-drive or constant-tension clamps. Never use zip ties.
Check connections at the radiator, heater core, water pump, and reservoir. Tighten clamps firmly but do not crush rubber.
Fix Radiator and Cap Issues
The radiator cap maintains system pressure. A weak seal causes coolant to boil off. Replace cap every 3 to 5 years as routine maintenance. Inspect radiator neck for warping or corrosion. If cap will not hold pressure, replace both cap and neck seal.
For radiator leaks, small pinholes may be sealed with stop-leak additives as a temporary fix. Cracks or major corrosion require radiator replacement.
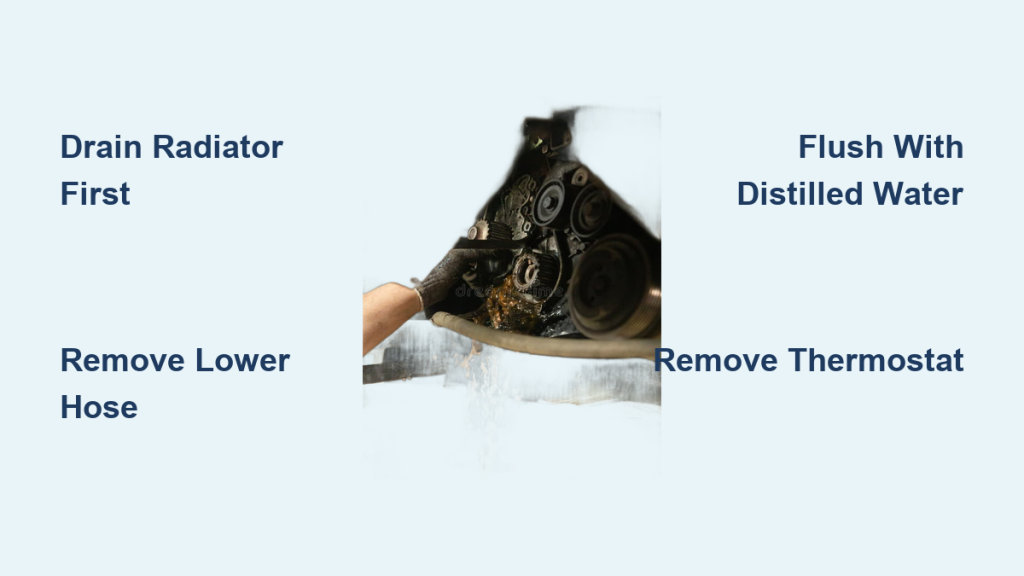
Flush or Replace Clogged Heater Core
If one hose is hot and the other cold, the core is likely clogged.
Flushing steps include disconnecting heater hoses at the firewall and flushing with garden hose water in both directions. Use radiator flush chemical if sludge is present. Reconnect and refill system.
If flushing fails or leak is confirmed, replace the heater core. This is labor-intensive because it requires dash removal, but it is necessary. Consider upgrading to metal core if original is plastic.
Replace Faulty Thermostat
Engine runs cool and heater is weak? The likely cause is thermostat stuck open.
Replacement steps include draining coolant below thermostat housing. Remove housing and old thermostat. Install new one with spring facing engine. Replace housing gasket or use sealant. Refill and bleed system.
Cost is under $30. Time is 30 minutes. The impact on heater performance is huge.
Address Blown Head Gasket
No external leak but coolant vanishes and white smoke appears? You may need head gasket replacement.
Warning signs include bubbling in radiator, overheating, low compression, and coolant in oil.
This is major engine work, best left to professionals. Consider a compression test, cylinder leak-down test, or block test for exhaust gases in coolant. Repairs can cost $1,000 to $2,500 depending on engine type.
Prevent Future Problems
Use the Right Coolant
Never mix coolant types. Use only manufacturer-specified coolant.
OAT orange coolant is for GM and VW. HOAT yellow/gold is for Ford and Chrysler. IAT green is for older vehicles. Si-OAT pink/purple is for Asian models.
Mix 50/50 with distilled water. Tap water causes corrosion.
Change Coolant on Schedule
Old coolant loses inhibitors and turns acidic. Standard coolant should be replaced every 30,000 to 50,000 miles. Extended-life OAT/HOAT can last up to 100,000 miles. Check owner is manual for specific intervals.
Flushing removes sludge and prevents clogs.
Inspect System Regularly
Monthly checks prevent surprises. Check coolant level in both radiator and reservoir. Squeeze hoses for soft spots. Inspect cap seal for cracks or warping. Sweet odor is an early warning.
Fix small leaks immediately. A drip today can mean engine damage tomorrow.
Frequently Asked Questions About Coolant Leaks and Heater Problems
Why does my heater blow cold air when the engine is warm?
Cold air from vents when the engine is warm usually means low coolant level or poor circulation. A coolant leak reduces the amount of hot fluid reaching the heater core. Air trapped in the system can also block flow. Check coolant levels and perform the heater hose test to diagnose.
Can I drive with a coolant leak and no heat?
Driving with low coolant is risky. Your engine can overheat within minutes, potentially causing warped cylinder heads or a blown head gasket. If the heater is not working, address the issue before driving long distances. Short trips to a repair shop may be acceptable if coolant is topped off.
How do I know if the heater core is leaking internally?
Internal heater core leaks show distinct signs. Look for damp passenger floorboard, sweet smell inside the cabin, foggy windows, or musty odor. The A/C drain tube may also drip coolant onto the ground near the firewall. These symptoms confirm a failing heater core.
What is the fastest way to find a hidden coolant leak?
Use a cooling system pressure tester. Attach it to the radiator or reservoir and pressurize to the cap rating. Watch for pressure drop over 10 to 15 minutes. For evaporative leaks that leave no puddle, add fluorescent dye to coolant and use a UV light to trace the source.
Will adding coolant fix my heater?
Adding coolant may restore heat if the issue is simply low fluid level. However, you must also bleed air from the system after refilling. If the leak continues or the heater core is clogged, simply adding coolant will not solve the problem permanently.
Key Takeaways for Fixing Coolant Leaks and Heater Issues
A heater that will not blow hot air is rarely just a comfort issue. It is a warning sign of coolant leaks, air pockets, clogs, or engine damage. Start with the heater hose test to check flow, verify coolant levels in both the radiator and reservoir, and bleed the system properly after any refill.
If the leak is not obvious, pressure test the cooling system or consult a professional. Do not drive long distances with low coolant. Overheating can warp cylinder heads in minutes and lead to costly repairs.
Stay safe, stay warm, and keep your cooling system in top shape by inspecting regularly, using the correct coolant, and addressing small leaks immediately before they become major problems.